Be patient..... we are fetching your source code.
Objective
The main objective of this post is to illustrate to how to use “UITableView control” and how to populate data with it in iOS application.
Introduction
UITableView is one of the important components of UIKit framework, basically it used for displaying large or small set of data.
The UITableView class is responsible for presenting and displaying data as a list of rows in table view. The data is being displayed is basically managed by the table view's data source object. The data source can be any object.
Step 1 Create xCode project
Create xCode project named it as uitableview_demo and saved it. This project will contain one View Controller, which is our main view controller.
Step 2 UITableView Delegate Method
UITableView is responsible to detect touch. When UITableView detects any touches from user, it will notify its delegate, which will respond to touch event.
Step 3 Design UI
To use UITableView, first drag and drop table view in your main view controller. UITableView is available in two default styles:
- Plain
- Grouped
To change the default style of the table view, which is plain, select the table view in the storyboard, open the attribute inspector tab and change the attribute style to Grouped. This demo is with plain table view.
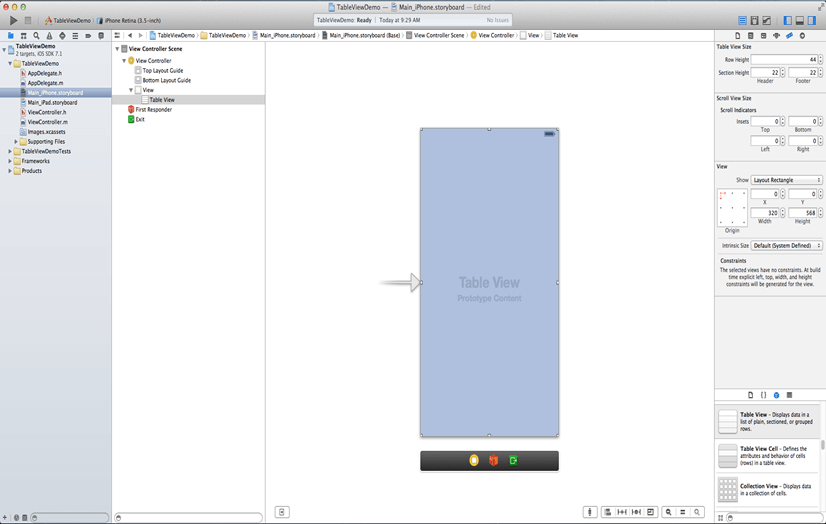
Step 4 Attach UITableView Datasource & Delegate
Now Connect your UITableView to Data Source and Delegate. Next select UITableView from your main view controller in the storyboard, open the Connection Inspector, and drag from the data source outlet (circle on its right) to the main view controller which is described in following screen. Same steps would be repeated for table view delegate. Our main view controller is now set as the data source and delegate of our UITableView.
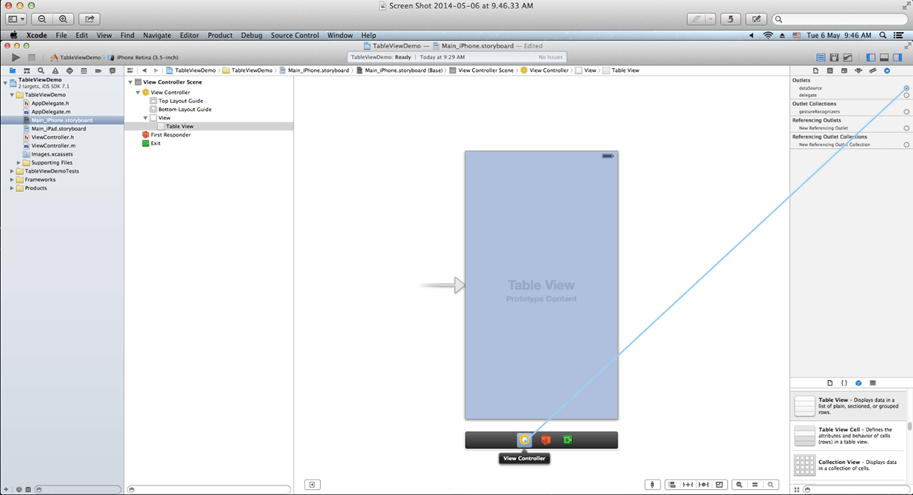
Step 5 Implement Datasource & Delegate
The data source and delegate objects of the UITableView need to conform the UITableViewDataSource and UITableViewDelegate protocol, for that write following line of code in your main viewcontroller.h file.
#import <UIKit/UIKit.h>

@interface ViewController : UIViewController<UITableViewDataSource,UITableViewDelegate>
Step 6 Array Initialisation
Now it’s time for creating data source for table view Declare one array in your main viewController.h file; use and define in viewDidLoad method of your view controller as following:
- (void)viewDidLoad
{
    [super viewDidLoad];
    colors=[[NSArray alloc]initWithObjects:@"RED",@"YELLOW",@"GREEN",@"BLUE",@"BLACK",@"PURPLE",@"WHITE",nil];
// Do any additional setup after loading the view, typically from a nib.
}
Step 7 UITableView Delegate Method
Implement following UITableView delegate methods in your main viewcontroller.m file.
-(NSInteger)numberOfSectionsInTableView:(UITableView *)tableView
{
    return 1;
}

-(NSInteger)tableView:(UITableView *)tableView numberOfRowsInSection:(NSInteger)section
{
    return [colors count];
}
Now first drag and drop Table View cell in UITableView and set its reuse identifier “Cell” as displayed in following figure.
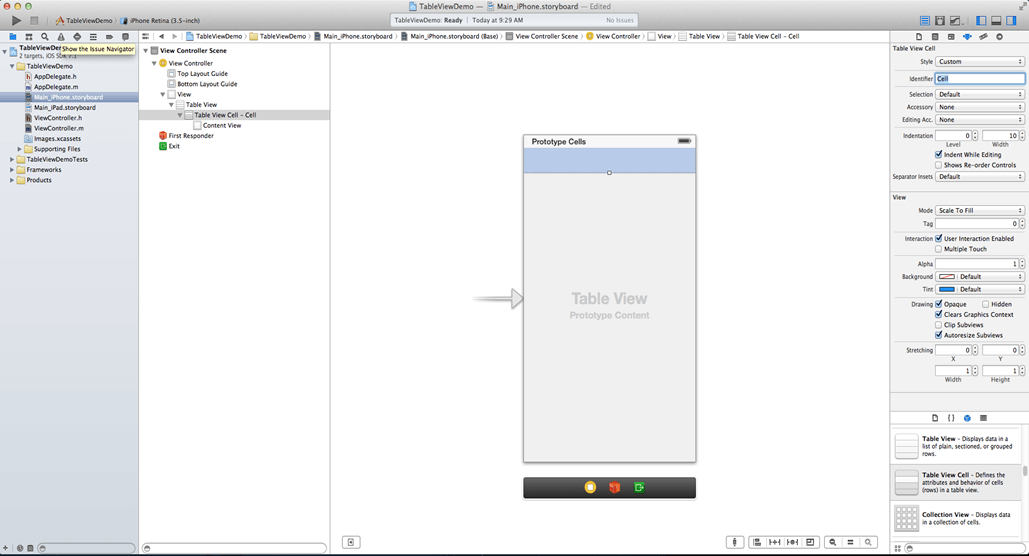
Table view cells can be denoted for reuse by specifying a reuse identifier during initialization. UITableView put it into a reuse queue for later use. When the UITableView’s DataSourceobject asks the table view for a new cell and specifies a reuse identifier, then table view check reuse queue and check if a table view cell with the specified reuse identifier is available or not. If no cell for tableview is available then it will initialize new one and then pass it to data source object which is describe in following line of code.
- (UITableViewCell *)tableView:(UITableView *)tableView cellForRowAtIndexPath:(NSIndexPath *)indexPath {
    static NSString *CellIdentifier = @"Cell";

    [tableView registerClass:[UITableViewCell class] forCellReuseIdentifier:CellIdentifier];

    UITableViewCell *cell = [tableView dequeueReusableCellWithIdentifier:CellIdentifier forIndexPath:indexPath];
    [cell setBackgroundColor:[UIColor clearColor]];
    // Fetch Color
    NSString *color = [colors objectAtIndex:[indexPath row]];

    [cell.textLabel setText:color];

    return cell;
}
Step 8 UITableView Call Selection Method
Now our goal is when user pick any color from table view, appropriate color will be set as background color of table view. Following delegate method will work for same.
- (void)tableView:(UITableView *)tableView didSelectRowAtIndexPath:(NSIndexPath *)indexPath
{
    if(indexPath.row==0)
    {
        [tableView setBackgroundColor:[UIColor redColor]];
    }
    else if (indexPath.row==1)
    {
        [tableView setBackgroundColor:[UIColor yellowColor]];
    }
    else if (indexPath.row==2)
    {
        [tableView setBackgroundColor:[UIColor greenColor]];
    }
    else if (indexPath.row==3)
    {
        [tableView setBackgroundColor:[UIColor blueColor]];
    }
    else if (indexPath.row==4)
    {
        [tableView setBackgroundColor:[UIColor blackColor]];
    }
    else if (indexPath.row==5)
    {
        [tableView setBackgroundColor:[UIColor purpleColor]];
    }
    else if (indexPath.row==6)
    {
        [tableView setBackgroundColor:[UIColor whiteColor]];
    }
}
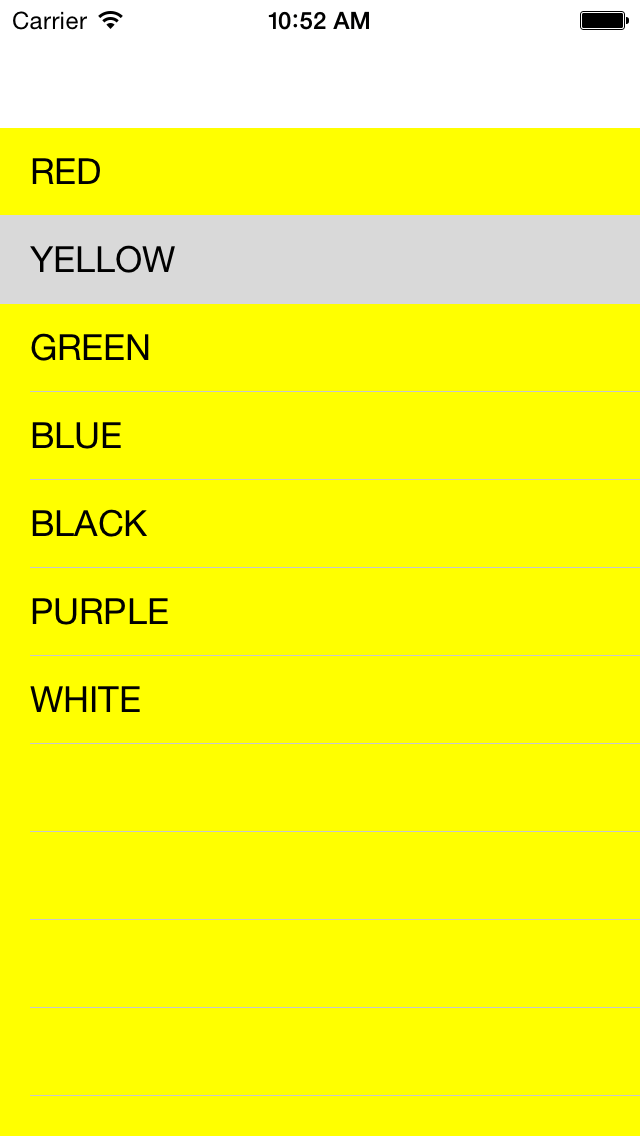
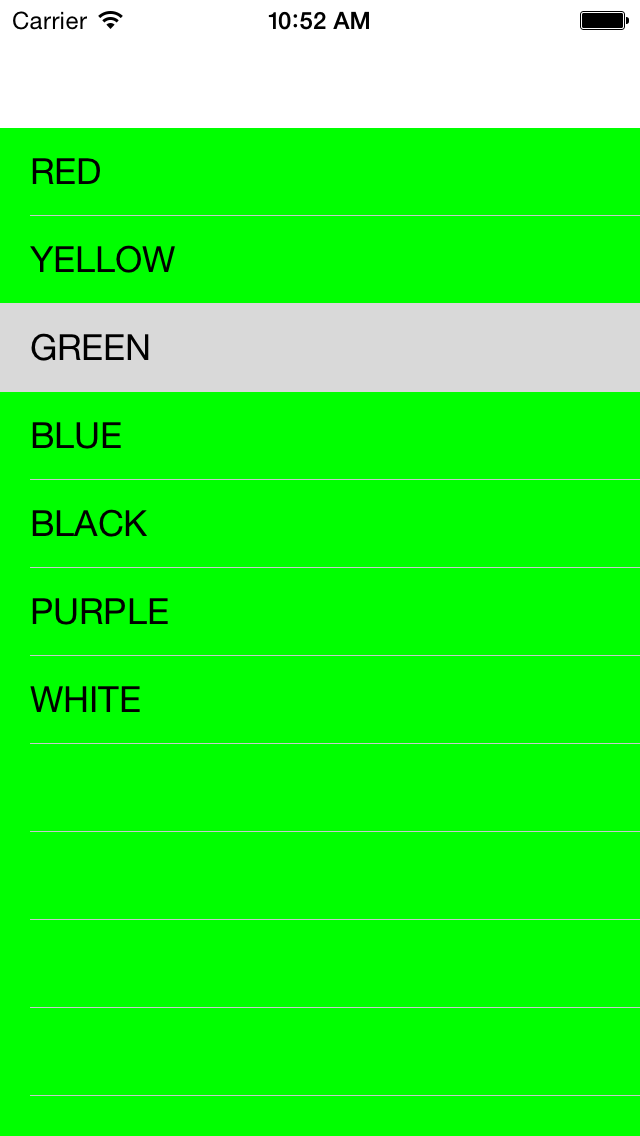
Screenshots:
Note: Here you can download sample code and learn how to build UITableView for your applications.
I hope you found this blog helpful while Create UITableView Control in iOS. Let me know if you have any questions or concerns regarding iOS App Development, please put a comment here and we will get back to you ASAP.
Got an Idea of iPhone App Development? What are you still waiting for? Contact us now and see the Idea live soon. Our company has been named as one of the best iPhone App Development Company in India.

I am iOS developer, as a developer my basic goal is continue to learn and improve my development skills , to make application more user friendly.
JSON Parsing Example in Swift Tutorial
