Be patient..... we are fetching your source code.
Objective
The main objective of this blog post is to set HorizontalListView widget in your android application.
HorizontalListView is an Android ListView widget which scrolls horizontally. Android Eclipse tool only provides Vertical ListView widget. Here I have derived customized HorizontalListview widget by extending AdapterView.
Usage:- To use the HorizontalListView Widget in an XML layout:
- Import The Library File into your project
- Make sure you are running ADT version 17 or greater
- Add this XML namespace to your layout
xmlns:widget="http://schemas.android.com/apk/res-auto" - Create the HorizontalListView in xml as given below:
<com.android.horizontallistview.horizontallistview
android:id="@+id/yourid"
android:layout_width="match_parent"
android:layout_height="100dp"
android:layout_gravity="center_vertical">
Example:-
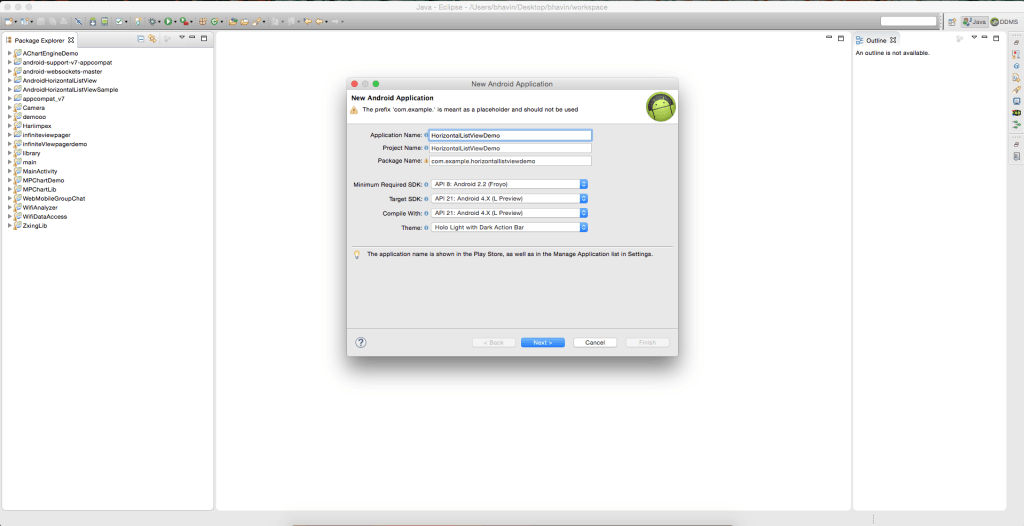
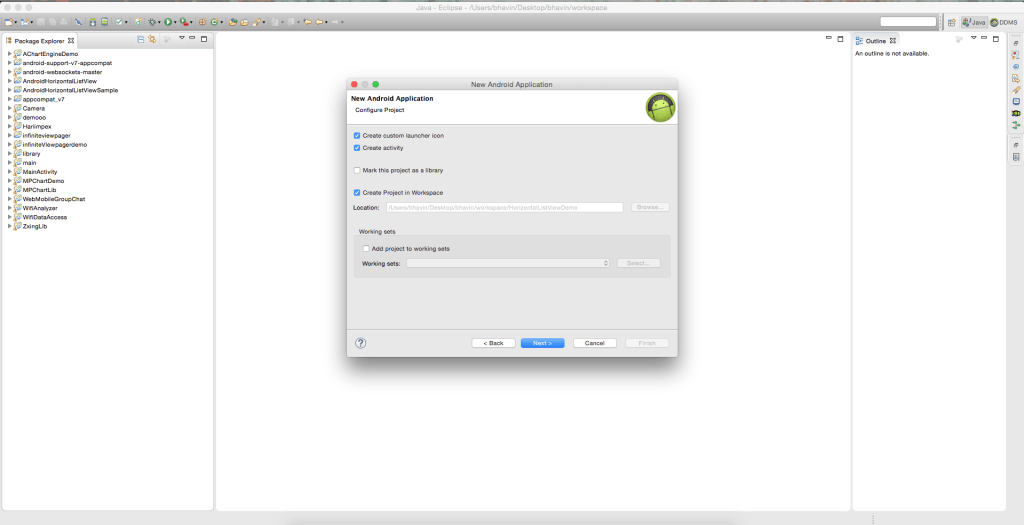
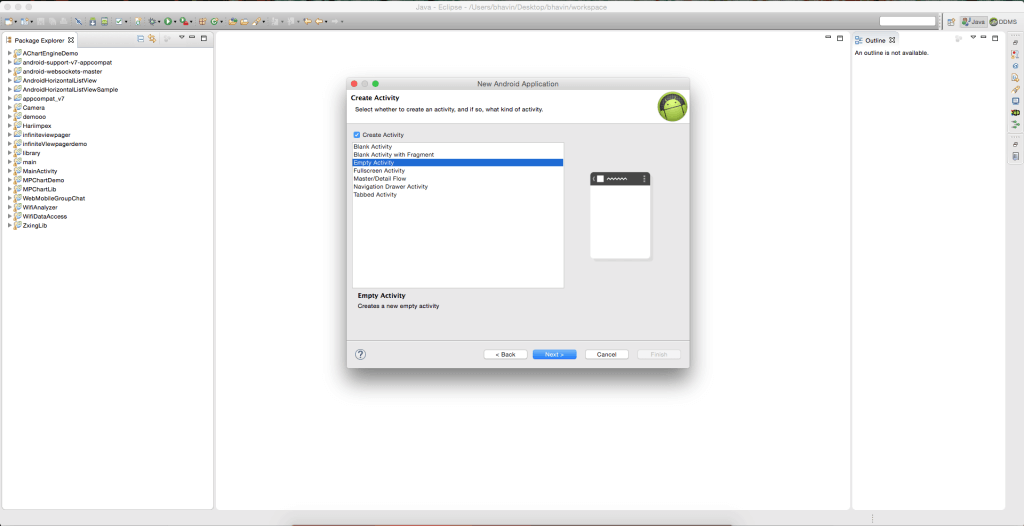
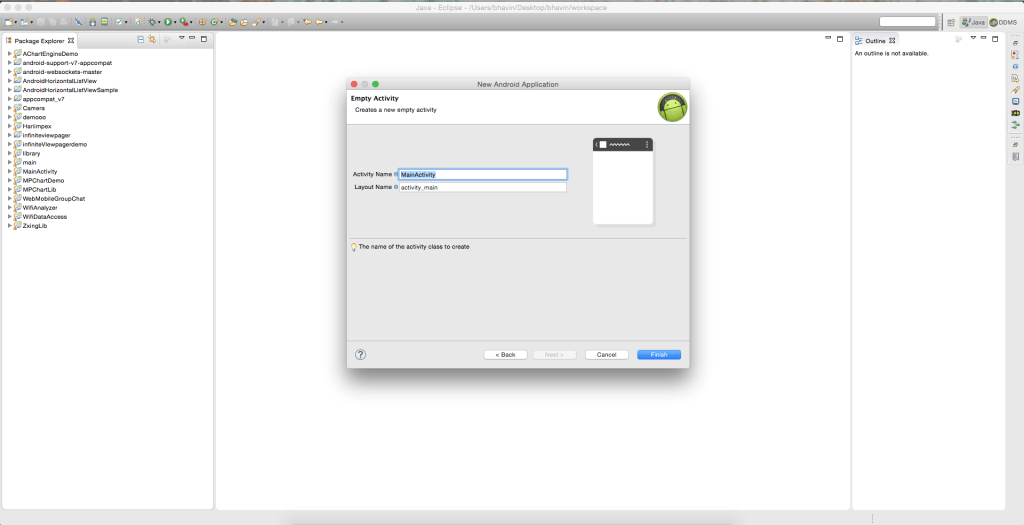
Step 1 Open Eclipse and Create a New Application
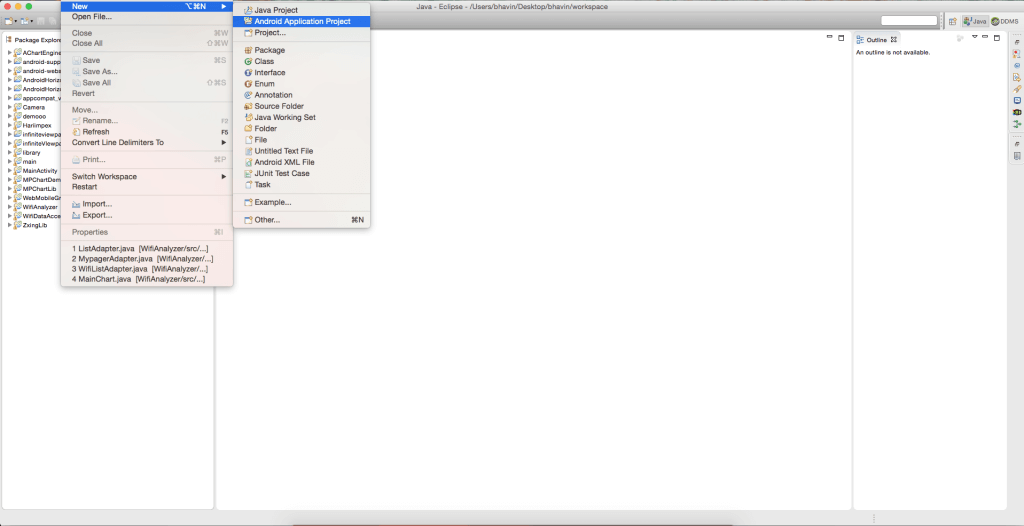
- Give Application name as HorizontalListViewDemo.
Step 2 Import HorizontalListViewLibrary
which was downloaded earlier.
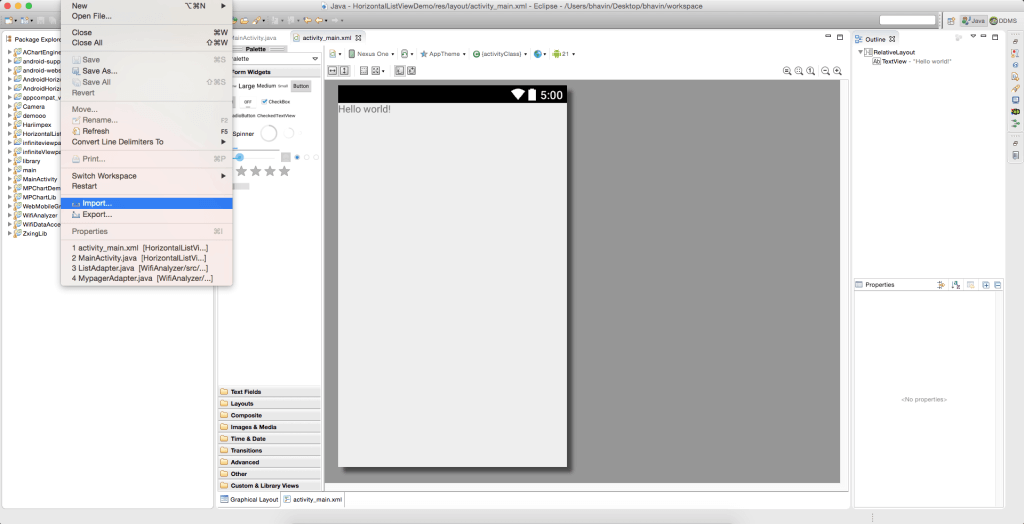
- Select Existing Android code into Workspace and click next.
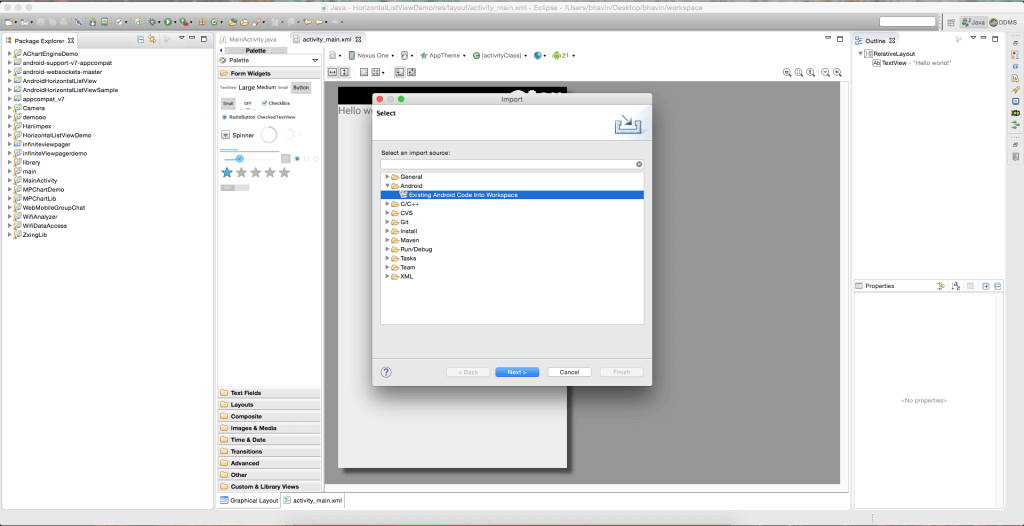
- Browse and select HorizontalListViewLibrary Project which was downloaded earlier.
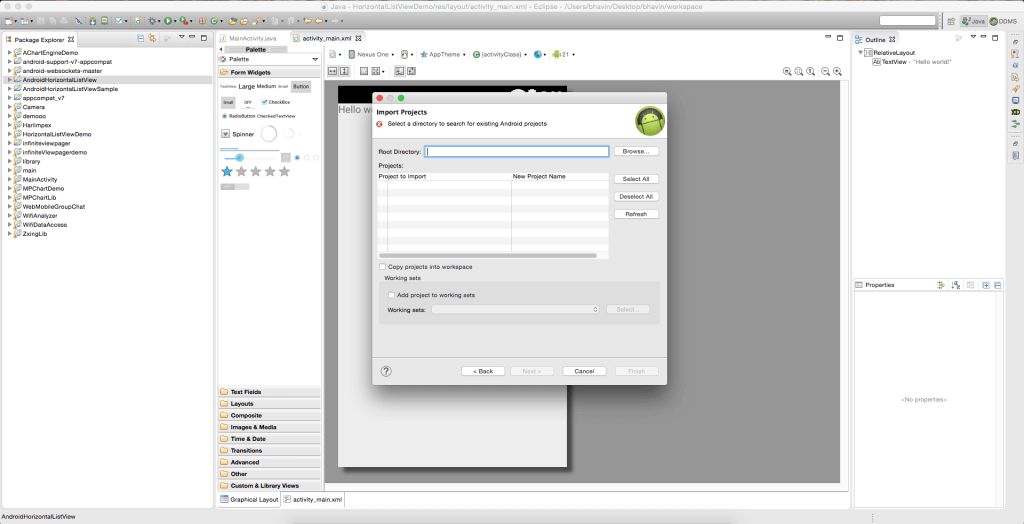
- Don’t forget to tick on copy project into workspace.
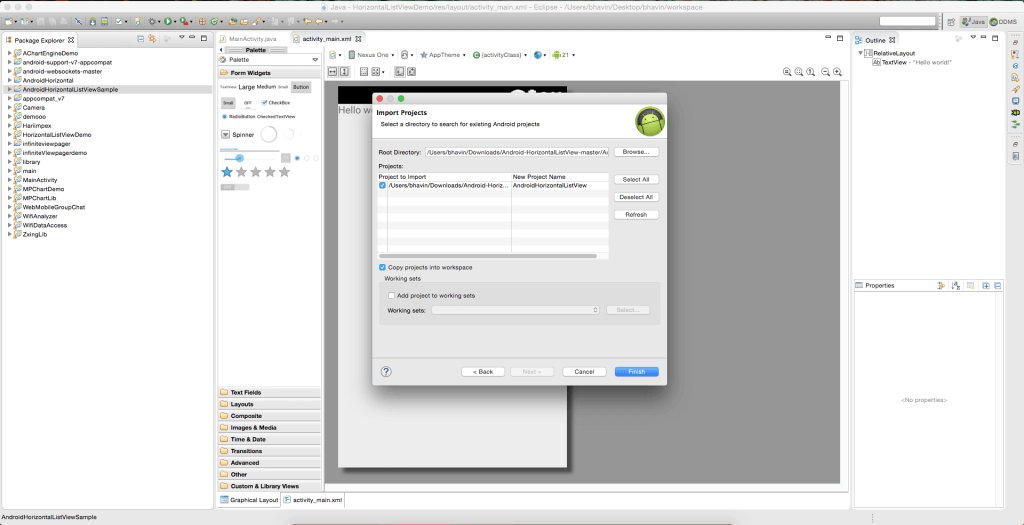
- Click on Finish and you will be able to see on your Eclipse package explorer as HorizontalListViewLibrary.
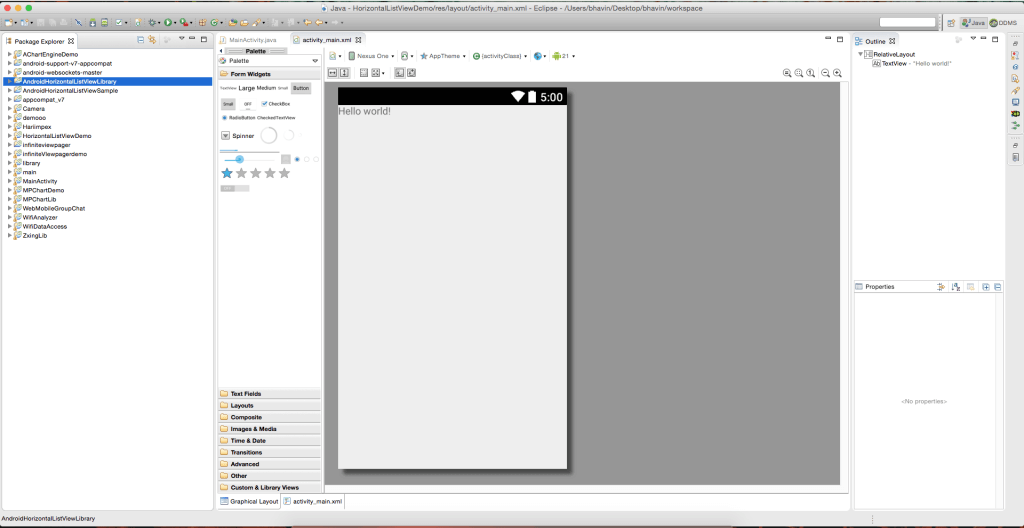
Step 3 Add HorizontalListViewLibrary in Project.
- Right click on your project and select properties.
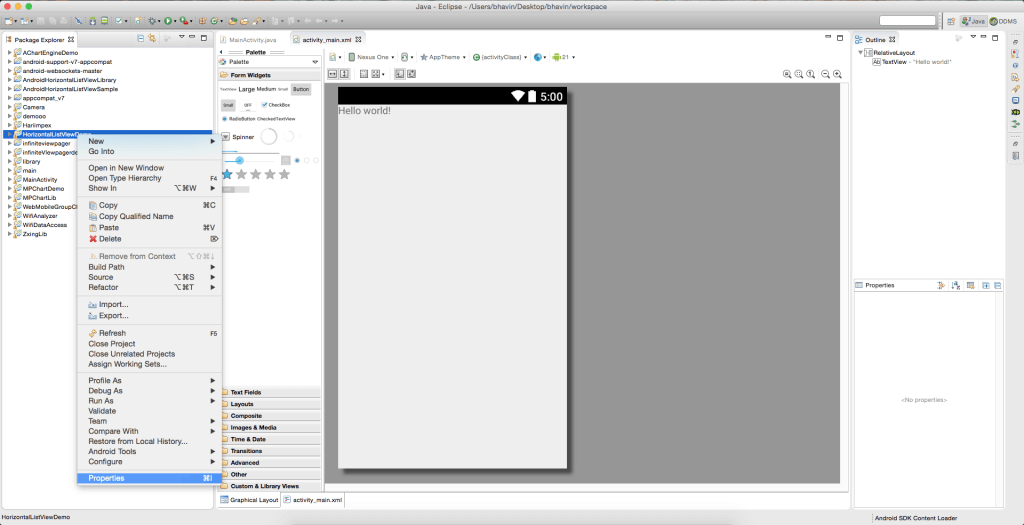
- You will see a dialog box. From that select android from the left side list and click on add button.
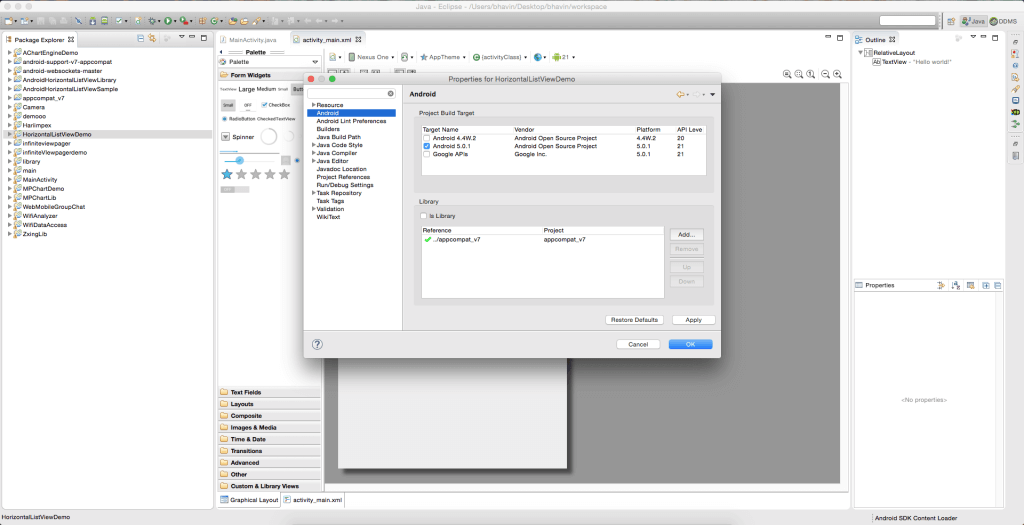
- Then you will again see a dialog box which contains list of Libraries. In that dialog box, select HorizontalListViewLibrary.
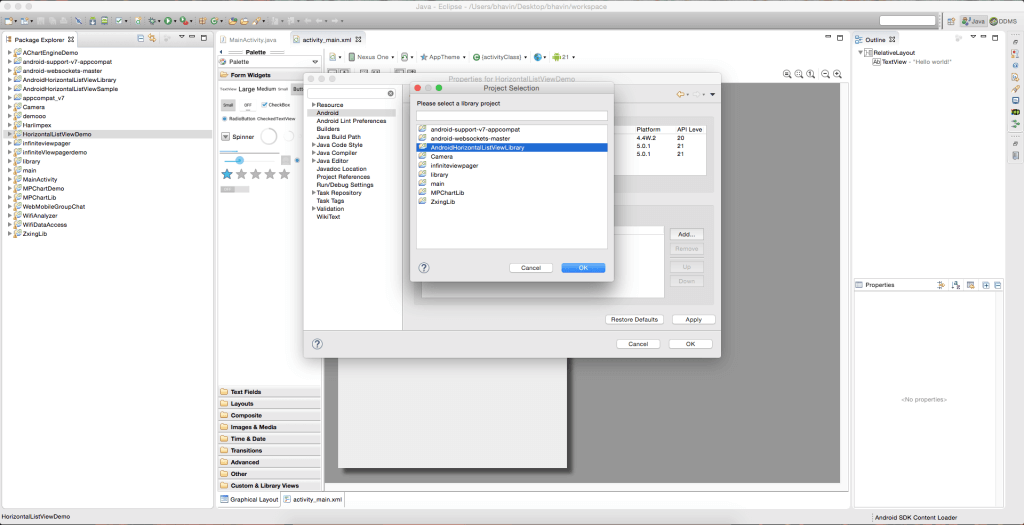
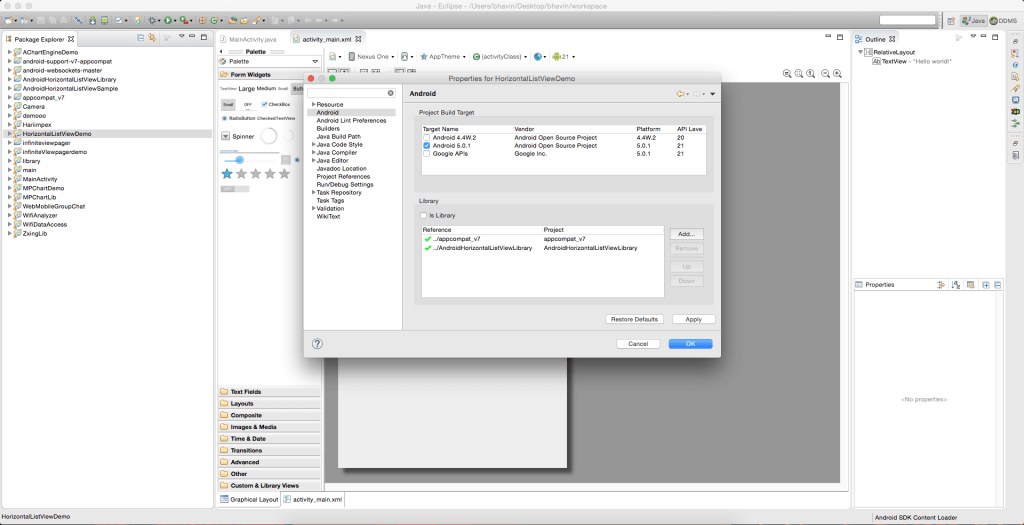
- After selecting the library that appears in your project library list, click on apply and ok button.
Step 4 Add HorizontalListView widget in your Layout.
- Add following widget code in activity_main.xml file
<LinearLayoutxmlns:android="http://schemas.android.com/apk/res/android"
xmlns:tools="http://schemas.android.com/tools"
android:id="@+id/LinearLayout1"
android:layout_width="match_parent"
android:layout_height="match_parent"
android:orientation="vertical"
tools:context="${relativePackage}.${activityClass}">

<TextView
android:id="@+id/textView1"
android:layout_width="wrap_content"
android:layout_height="wrap_content"
android:layout_gravity="center"
android:text="Simple List"
android:textAppearance="?android:attr/textAppearanceMedium"/>

<com.android.horizontallistview.HorizontalListView
android:id="@+id/hlvSimpleList"
android:layout_width="match_parent"
android:layout_height="100dp"
android:layout_gravity="center_vertical"/>

<TextView
android:id="@+id/textView2"
android:layout_width="wrap_content"
android:layout_height="wrap_content"
android:layout_gravity="center"
android:text="CustomList"
android:textAppearance="?android:attr/textAppearanceMedium"/>

<com.android.horizontallistview.HorizontalListView
android:id="@+id/hlvCustomList"
android:layout_width="match_parent"
android:layout_height="100dp"
android:layout_gravity="center_vertical"/>

</LinearLayout>
Step 5 Add a new Layout file(Xml File) into project.
- Create a new xml file named dataset.xml
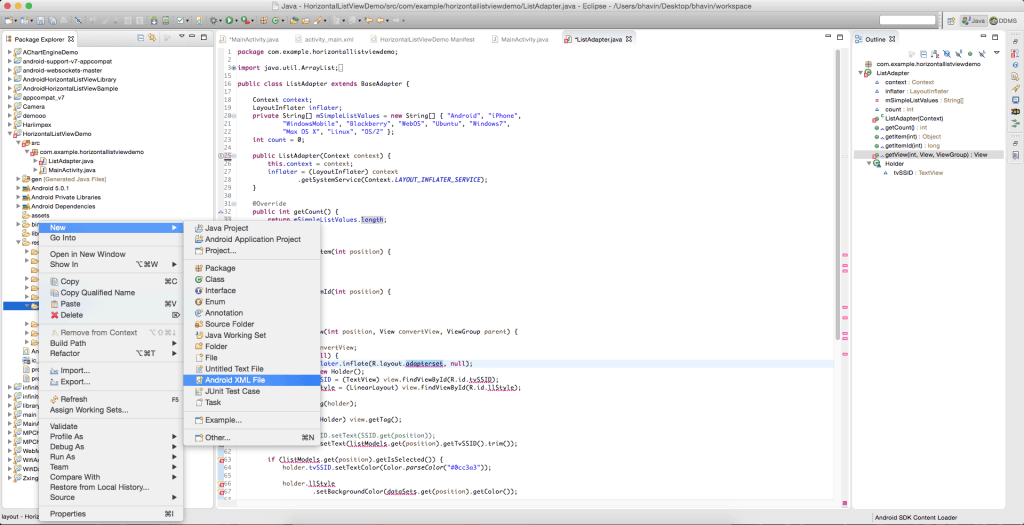
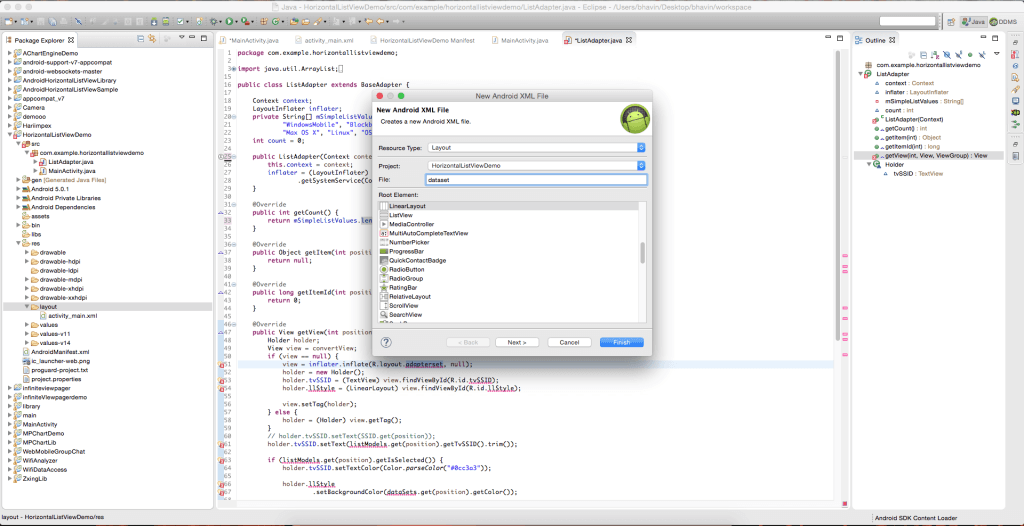
- Change the following in dataset.xml
<?xmlversion="1.0"encoding="utf-8"?>
<LinearLayoutxmlns:android="http://schemas.android.com/apk/res/android"
android:layout_width="match_parent"
android:layout_height="match_parent"
android:orientation="vertical">

<TextView
android:id="@+id/textView1"
android:layout_width="match_parent"
android:layout_height="wrap_content"
android:background="@drawable/rounded_corner"
android:gravity="center"
android:text="Medium Text"
android:textAppearance="?android:attr/textAppearanceMedium"/>

</LinearLayout>
Step 6 Add new class to set list in HorizontalListView
- Create a new class named Adapter.java
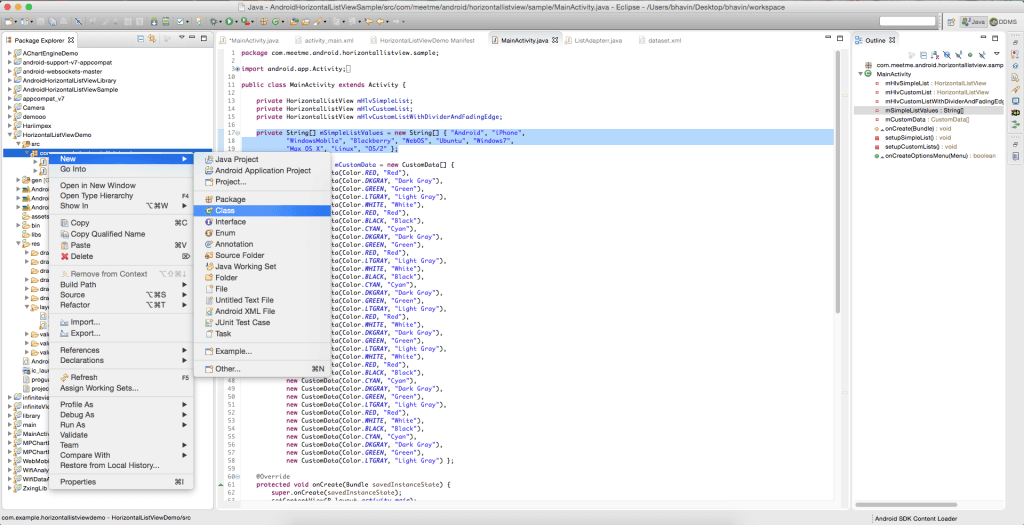
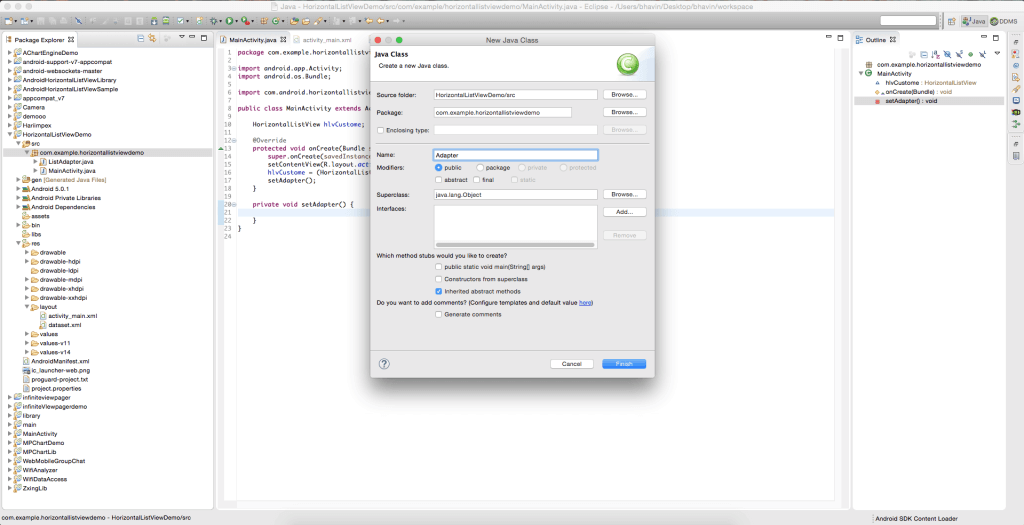
- Make changes in Adapter.java File
importandroid.content.Context;
importandroid.view.LayoutInflater;
importandroid.view.View;
importandroid.view.ViewGroup;
importandroid.view.ViewGroup.LayoutParams;
importandroid.widget.BaseAdapter;
importandroid.widget.TextView;
public class Adapter extends BaseAdapter {
    Context context;
    LayoutInflaterinflater;
    private String[] mSimpleListValues = new String[] { "Android", "iPhone",
            "WindowsMobile", "Blackberry", "WebOS", "Ubuntu", "Windows7",
            "Max OS X", "Linux", "OS/2" }
    int count = 0;
    public Adapter(Context context) {
        this.context = context;
        inflater = (LayoutInflater) context
                .getSystemService(Context.LAYOUT_INFLATER_SERVICE);
    }
    @Override
    public int getCount() {
        returnmSimpleListValues.length;
    }
    @Override
    public Object getItem(int position) {
        return null;
    }
    @Override
    public long getItemId(int position) {
        return 0;
    }
    @Override
    public View getView(int position, View convertView, ViewGroup parent) {
        Holder holder;
        View view = convertView;
        if (view == null) {
            view = inflater.inflate(R.layout.dataset, null);
            holder = new Holder();
            holder.tvSSID = (TextView) view.findViewById(R.id.textView1);
            view.setTag(holder);
        } else {
            holder = (Holder) view.getTag();
        }
        holder.tvSSID.setText(mSimpleListValues[position]);
        view.setLayoutParams(new LayoutParams(135, 60));
        return view;
    }
    class Holder {
        TextViewtvSSID;
    }
}
For more information about BaseAdapter please follow the link:
https://developer.android.com/reference/android/widget/BaseAdapter.html
Step 7 SetAdapter in ListView
- Write the following code in MainActivity.java File
packagecom.example.horizontallistviewdemo;

importandroid.app.Activity;
importandroid.os.Bundle;
importandroid.widget.ArrayAdapter;

import com.android.horizontallistview.HorizontalListView;

publicclassMainActivityextends Activity {

HorizontalListViewhlvSimple, hlvCustom;

private String[] mSimpleListValues = new String[] { "Android", "iPhone",
            "WindowsMobile", "Blackberry", "WebOS", "Ubuntu", "Windows7",
            "Max OS X", "Linux", "OS/2" };

@Override
protectedvoidonCreate(Bundle savedInstanceState) {
        super.onCreate(savedInstanceState);
        setContentView(R.layout.activity_main);
        hlvSimple = (HorizontalListView) findViewById(R.id.hlvSimpleList);
        hlvCustom = (HorizontalListView) findViewById(R.id.hlvCustomList);
        setAdapter();
    }

privatevoidsetAdapter() {
        ArrayAdapter<String>adapter = newArrayAdapter<String>(this,
                android.R.layout.simple_list_item_2, android.R.id.text1,
                mSimpleListValues);

        hlvSimple.setAdapter(adapter);
        hlvCustom.setAdapter(new Adapter(getApplicationContext()));
    }
}
Step 8 Run Your Application.
- Run this application by choosing a running android device. Install the application in it and verify the results.
- To run the application from Eclipse, open your project’s activity files and click on Run icon from the toolbar.
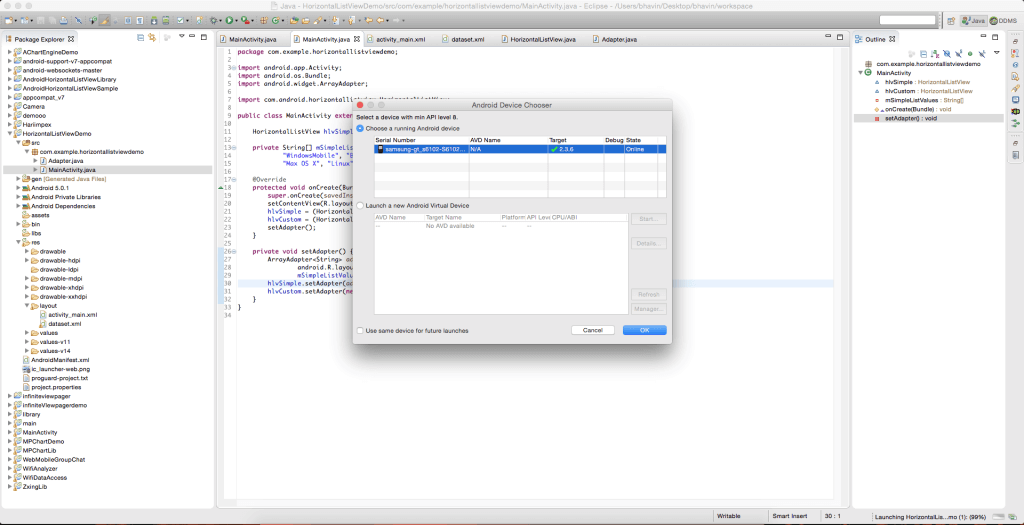
- After successful installing and running of the application, you would see the result as shown below.

I hope you find this blog very helpful while working with Custom HorizontalListView in Android App. Let me know in comment if you have any question regarding Android App. I will reply you ASAP.
Got an Idea of Android App Development? What are you still waiting for? Contact us now and see the Idea live soon. Our company has been named as one of the best Android App Development Company in India.

I am passionate Android Application Developer. Love to develop Application with Unique thing. And also like to share tips & tricks about latest Application trends.
Gesture Recognizer using Swift
