Be patient..... we are fetching your source code.
Objective
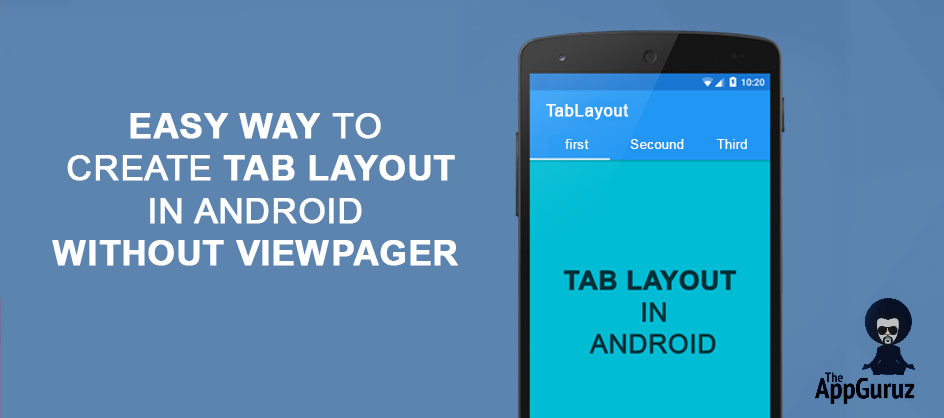
This blog post gives you brief idea about how to implement tab layout without ViewPager class.
Difference between my previous blog and this blog is, In that blog I can change tab by swiping left and right where in this blog you have to click on the tab to change the tab.
I will teach you how to use Tab Layout without ViewPager in your Android app.
Output:
Let’s understand what is Tab Layout?
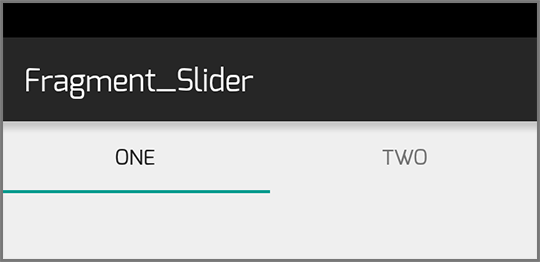
Tab Layout provides a horizontal layout to display tabs.
For more detail about Android TabLayout Click here.
How to create Tab Layout in your Android app?
Follow these simple steps to create a horizontal tab layout in your Android app. In my example I would be displaying two tabs named One and Two.
Step 1 Create New Android Project.
If you are new to Android Studio and don't know how to create a new project then you should checkout our other blog:
Step 2 Add Android Support Design Dependency.
To use TabLayout feature, you have to add dependency of android.support:design library. There are two ways to add dependency in your android studio project:
2.1 Add Dependency From Module Settings.
To add dependency:
- Right click on the app and click on Open Module Settings.
- Now go to the dependencies tab and click on add (+) button and search for a support:design.
- Select android.support:design library and click ok.
2.2 Add Dependency From Gradle File.
Go to build.gradle file.
compile 'com.android.support:design:23.1.1'
Copy the above line and paste it into the depencies
Note
Here, I am using:
- android.support:design:23.1.1 (currently latest version of android.support:design)
Your dependencies should look like following:
dependencies{
        compile fileTree(include: ['*.jar'], dir: 'libs')
        testCompile 'junit:junit:4.12'
        compile 'com.android.support:appcompat-v7:23.1.1'
        compile 'com.android.support:design:23.1.1'
    }
You can learn more about adding dependency to your Android Studio project from our other blog post:
Step 3 Add Images in Drawable folder
In my example I would be displaying:
- Different images in tab One &
- Displaying some text in tab Two.
To Display Images I have to add few images in Drawable folder and take reference of those images in strings.xml file.
Path for string.xml: app >> res >> values >> strings.xml
3.1 Update string.xml File.
strings.xml
<resources>
    <string name="app_name">Fragment_Slider</string>

    <string name="hello_world">Hello world!</string>
    <string name="action_settings">Settings</string>

    <string-array name="all_images">
        <item>@drawable/image1_a</item>
        <item>@drawable/image1_b</item>
        <item>@drawable/image1_c</item>
        <item>@drawable/image1_d</item>
        <item>@drawable/image1_e</item>
        <item>@drawable/image1_f</item>
        <item>@drawable/image1_g</item>
        <item>@drawable/image1_h</item>
        <item>@drawable/image1_i</item>
        <item>@drawable/image1_j</item>
        <item>@drawable/image1_k</item>
        <item>@drawable/image1_l</item>
        <item>@drawable/image1_m</item>
        <item>@drawable/image1_n</item>
        <item>@drawable/image1_o</item>
        <item>@drawable/image1_p</item>

    </string-array>

    <string-array name="all_contacts">
        <item>Mehul Rughani</item>
        <item>Tejas Jasani</item>
        <item>Ravi Gadesha</item>
        <item>Ravi Soneji</item>
        <item>Bharat Mamtora</item>
        <item>Vivek Tank</item>
        <item>Parth Trivedi</item>
        <item>Hardik Trivedi</item>
        <item>Mehul Rughani</item>
        <item>Tejas Jasani</item>
        <item>Ravi Soneji</item>
        <item>Mehul Rughani</item>
        <item>Bharat Mamtora</item>
        <item>Vivek Tank</item>
        <item>Parth Trivedi</item>
        <item>Hardik Trivedi</item>
        <item>Mehul Rughani</item>
    </string-array>

</resources>
In strings.xml file I have declared two string arrays, each representing items I would be using in my example.
- all_images: Containing references of all static images.
- all_contacts: Containing references of all the contacts.
Now I am going to create color.xml file for storing required color references.
3.2 Create color.xml File.
- To create color.xml file, right click on app >> res >> values folder and select New >> Value resource file and name it color
color.xml:
<?xml version="1.0" encoding="utf-8"?>
<resources>
    <color name="color_black">#000000</color>
    <color name="color_white">#ffffff</color>
    <color name="color_light_green">#0ABABA</color>
</resources>
Now, lets create fragments to show images and contacts.
First I am going to create fragment which will display few images.
Step 4 Create Fragment One - To show images.
I would be displaying images in this fragment, for that I need to create layout which contains the images. So let’s get started with creating layout.
4.1 Create fragment_one.xml layout File.
- To create layout file, right click on app >> res >> layout and select New >> Layout resource file.
- Give appropriate name to that layout file. Here I am using fragment_one.xml.
- In my example, fragment_one.xml is used to display some static images in GridView.
fragment_one.xml:
<?xml version="1.0" encoding="utf-8"?>
<LinearLayout xmlns:android="http://schemas.android.com/apk/res/android"
    android:layout_width="match_parent"
    android:layout_height="match_parent">

    <GridView xmlns:android="http://schemas.android.com/apk/res/android"
        android:id="@+id/gridViewFragmentOne"
        android:layout_width="match_parent"
        android:layout_height="match_parent"
        android:gravity="center"
        android:horizontalSpacing="1dip"
        android:numColumns="2"
        android:stretchMode="columnWidth"
        android:verticalSpacing="1dip" />

</LinearLayout>
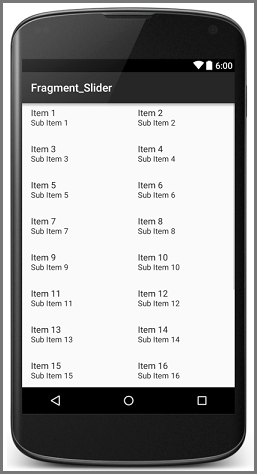
In this layout file, I have taken a GridView to display images (You can change the properties of a GridView as per your application requirements).
I am done with putting GridView in my first fragment. Now i will add images in my GridView, which needs to inflate from another layout file.
So I am going to create image_inflater.xml file.
4.2 Create image_inflater.xml layout File.
image_inflater.xml:
<?xml version="1.0" encoding="utf-8"?>
<LinearLayout xmlns:android="http://schemas.android.com/apk/res/android"
    android:layout_width="match_parent"
    android:layout_height="match_parent"
    android:gravity="center">


    <ImageView
        android:id="@+id/ivImageInflator"
        android:layout_width="70dp"
        android:layout_height="70dp"
        android:layout_marginBottom="10dp"
        android:layout_marginTop="10dp"
        android:src="@drawable/image1_a" />

</LinearLayout>
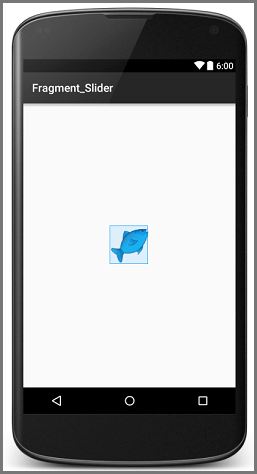
I would be inflating this imageView (multiple copies) to the GridView that I have declared in fragment_one.xml (You can change the properties of imageview as per your requirements).
I am done with my layout file for first fragment, so now let’s move towards the coding part of the first fragment.
4.3 Create FragmentOne.java File. FragmentOne.java
public class FragmentOne extends Fragment {

    private GridView gridView;
    ArrayList<Drawable> allDrawableImages = new ArrayList<>();
    private TypedArray allImages;


    @Override
    public View onCreateView(LayoutInflater inflater, ViewGroup container,
                             Bundle savedInstanceState) {
        // Inflate the layout for this fragment
        View rootView = inflater.inflate(R.layout.fragment_one, null);
        getAllWidgets(rootView);
        setAdapter();
        return rootView;
    }

    private void getAllWidgets(View view) {
        gridView = (GridView) view.findViewById(R.id.gridViewFragmentOne);
        allImages = getResources().obtainTypedArray(R.array.all_images);
    }

    private void setAdapter()
    {
        for (int i = 0; i < allImages.length(); i++) {
            allDrawableImages.add(allImages.getDrawable(i));
        }

        GridViewAdapter gridViewAdapter = new GridViewAdapter(MainActivity.getInstance(), allDrawableImages);
        gridView.setAdapter(gridViewAdapter);
    }
}
As the name suggests, this is a fragment file, so it extends Fragment class.
In this file I have taken a reference of gridview (that I have declared in fragment_one.xml) and reference of all images from string.xml file.
Now let’s understand setAdapter() method in detail:
In this method, I am adding all the images (fetcehd from strings.xml in getAllWidgets() method) to allDrawableImages Arraylist.
After that I have created an object of GridViewAdapter and called the constructor of GridViewAdapter with two arguments.
- Argument 1: Context
- Argument 2: Drawable ArrayList (For images).
Then I have set GridViewAdapter object to the GridView (for displaying all the images in GridView).
We cannot add items in gridview directly, we need to do it through adapter. So I have created gridViewAdapter for that.
4.4 Create GridViewAdapter.java File.
Create GridViewAdapter.java file for adding items.
GridViewAdapter.java:
public class GridViewAdapter extends BaseAdapter {

    public ArrayList<Drawable> allItemsResourceID;
    private LayoutInflater inflater;
    Context context;

    public GridViewAdapter(Context context, ArrayList<Drawable> images) {
        inflater = LayoutInflater.from(context);
        this.context = context;
//
        allItemsResourceID = images;
        Log.d("Adapter", "Create Image Adapter " + allItemsResourceID.size());
    }
    GridViewAdapter(Context context) {
        inflater = LayoutInflater.from(context);
    }

    @Override
    public int getCount() {
        return allItemsResourceID.size();
    }

    @Override
    public Object getItem(int position) {
        return allItemsResourceID.get(position);
    }

    @Override
    public long getItemId(int position) {
        return position;
    }

    @Override
    public View getView(final int position, View convertView, ViewGroup parent) {
        final ViewHolder holder;
        View view = convertView;
        if (view == null) {
            view = inflater.inflate(R.layout.image_inflater, parent, false);
            holder = new ViewHolder();
            assert view != null;
            holder.imageView = (ImageView) view.findViewById(R.id.ivImageInflator);
            view.setTag(holder);
        } else {
            holder = (ViewHolder) view.getTag();
        }

        if (!allItemsResourceID.get(position).equals("")) {
            holder.imageView.setImageDrawable(allItemsResourceID.get(position));
        }

        return view;
    }

}

class ViewHolder {
    ImageView imageView;
}
This adapter file will take images one by one and
- Store it in imageview of image_inflater.xml and
- Add it into the grid view.
So I am ready with my first fragment, now let's move towards the second fragment.
Second fragment will be used to display contacts which I have already declared in strings.xml file.
If you would like to learn more about adapters, you can go here:
Step 5 Create Fragment Two to display contacts.
To display contacts, I need to first create layout which can contain the contacts I want to show.
So let's get started with creating layout.
5.1 Create fragment_two.xml layout File.
Create fragment_two.xml file in res >> layout folder. In my example I am using this fragment to display contacts.
fragment_two.xml:
<?xml version="1.0" encoding="utf-8"?>
<LinearLayout xmlns:android="http://schemas.android.com/apk/res/android"
    android:layout_width="match_parent"
    android:layout_height="match_parent">

    <ListView xmlns:android="http://schemas.android.com/apk/res/android"
        android:id="@+id/listFragmentTwo"
        android:layout_width="match_parent"
        android:layout_height="match_parent"/>

</LinearLayout>
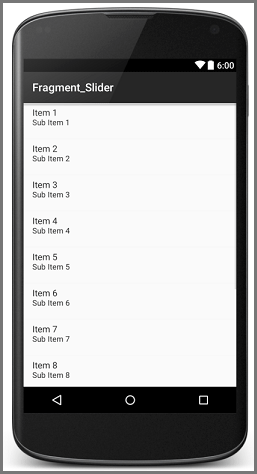
In this layout file I have taken a listview to display static contacts (you can change properties of listview as per your application requirements)
I am done with putting listview in my second fragment. But to put data in my listview, I’ll need to inflate the contacts from another layout file.
For that I am going to create a contact_inflater.xml file.
5.2 Create contact_inflater.xml layout File.
To inflate text I am creating contact_inflator.xml file with two TextViews. One textview will contain the name and the other is for number.
contact_inflater.xml:
<?xml version="1.0" encoding="utf-8"?>
<LinearLayout xmlns:android="http://schemas.android.com/apk/res/android"
    android:layout_width="match_parent"
    android:layout_height="match_parent"
    android:orientation="vertical">

    <LinearLayout
        android:layout_width="match_parent"
        android:layout_height="wrap_content"
        android:layout_margin="10dp"
        >

        <TextView
            android:id="@+id/tvContactListNumber"
            android:layout_width="wrap_content"
            android:layout_height="wrap_content"
            android:layout_margin="10dp"
            android:textColor="@color/color_black"
            android:text="1."/>

        <TextView
            android:id="@+id/tvContactListName"
            android:layout_width="match_parent"
            android:layout_height="wrap_content"
            android:layout_marginRight="20dp"
            android:layout_marginLeft="20dp"
            android:layout_gravity="center"
            android:textColor="@color/color_black"
            android:textSize="20sp"
            android:text="MEHUL RUGHANI"/>

    </LinearLayout>

</LinearLayout>
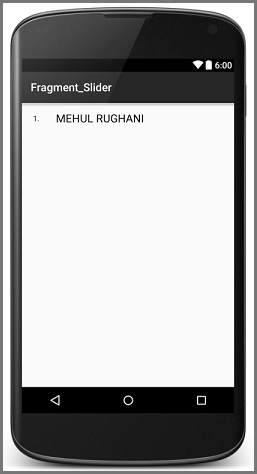
I am done with my layout file for second fragment, so now let’s get started with the coding of second fragment.
5.3 Create FragmentTwo.java File.
FragmentTwo.java:
public class FragmentTwo extends Fragment
{
    private ListView listView;
    TypedArray allContacts;
    ArrayList<String> allContactNames = new ArrayList<>();

    @Override
    public View onCreateView(LayoutInflater inflater, ViewGroup container,
                             Bundle savedInstanceState) {
        // Inflate the layout for this fragment
        View rootView = inflater.inflate(R.layout.fragment_two, null);
        getAllWidgets(rootView);
        setAdapter();
        return rootView;
    }

    private void getAllWidgets(View view) {
        listView = (ListView) view.findViewById(R.id.listFragmentTwo);

        allContacts = getResources().obtainTypedArray(R.array.all_contacts);

    }

    private void setAdapter()
    {
        for (int i = 0; i < allContacts.length(); i++) {
            allContactNames.add(allContacts.getString(i));
        }

        ListViewAdapter listViewAdapter= new ListViewAdapter(MainActivity.getInstance(), allContactNames);
        listView.setAdapter(listViewAdapter);
    }
}
Like FragmentOne.java, this class also extends Fragment class. In this file, I have taken a reference of ListView from fragment_two.xml & all contacts from strings.xml file
Let’s understand setAdapter() method:
In this method, first I am adding all the contacts (fetched from strings.xml file) to allContactNames ArrayList.
Then I have created an object of ListViewAdapter and called constructor of ListViewAdapter with two arguments.
- Argument 1: Context
- Argument 2: String ArrayList (For Contacts).
Then I have set the ListViewAdapter object to the ListView.
Since we cannot add items in ListView directly (same as GridView) I am going to create an adapter for it.
5.4 Create ListViewAdapter.java File.
ListViewAdapter.java:
public class ListViewAdapter extends BaseAdapter {

    private ArrayList<String> allContacts;
    private Context context;
    private LayoutInflater inflater;

    public ListViewAdapter(Context context, ArrayList<String> allContacts) {
        inflater = LayoutInflater.from(context);
        this.context = context;
        this.allContacts = allContacts;
    }

    @Override
    public int getCount() {
        return allContacts.size();
    }

    @Override
    public Object getItem(int position) {
        return allContacts.get(position);
    }

    @Override
    public long getItemId(int position) {
        return position;
    }

    @Override
    public View getView(int position, View convertView, ViewGroup parent) {
        final ContactHolder holder;
        View view = convertView;
        if (view == null) {
            view = inflater.inflate(R.layout.contact_inflater, parent, false);
            holder = new ContactHolder();
            assert view != null;
            holder.tvContactName = (TextView) view.findViewById(R.id.tvContactListName);
            holder.tvNumber = (TextView) view.findViewById(R.id.tvContactListNumber);
            view.setTag(holder);
        } else {
            holder = (ContactHolder) view.getTag();
        }

        holder.tvContactName.setText(allContacts.get(position));
        holder.tvNumber.setText((position+1)+"");

        return view;
    }
}

class ContactHolder {
    TextView tvContactName;
    TextView tvNumber;
}
This adapter file will take contacts one by one and performs following operation:
- It will store name in TextView of contact_inflater.xml file
- It will add the contact into listview.
Finally, I am done with both of my fragments. So, now I will add both the fragments in TabLayout.
So come back to the Main Activity of the project.
In this tutorial, you cannot change tabs by swiping left or right if you want this feature then you can checkout our previous blog.
Step 6 Update Your Main Activity.
6.1 activity_main.xml File.
<LinearLayout xmlns:android="http://schemas.android.com/apk/res/android"
   xmlns:app="http://schemas.android.com/apk/res-auto"
   xmlns:tools="http://schemas.android.com/tools"
   android:layout_width="match_parent"
   android:layout_height="match_parent"
   android:orientation="vertical"
   tools:context=".MainActivity">


   <android.support.design.widget.TabLayout
       android:id="@+id/tabs"
       android:layout_width="match_parent"
       android:layout_height="wrap_content"
       app:tabGravity="fill"
       app:tabMode="fixed"
       />

   <FrameLayout
       android:id="@+id/frame_container"
       android:layout_width="match_parent"
       android:layout_height="match_parent" />

</LinearLayout>
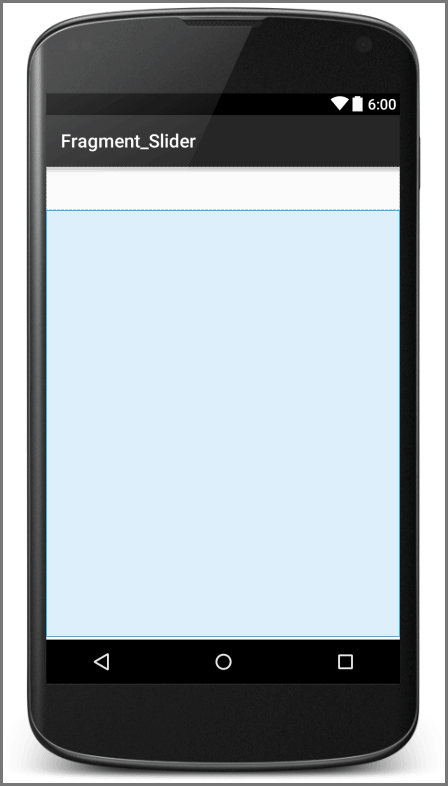
In this file I have taken TabLayout.
Note
Sometimes you might not get an option to add TabLayout, in that case you have to add dependecy for android.support:design Library. (Go to Step - 2)
FrameLayout: It is used to display data for currently selected tab.
I am done with my main layout file now let’s check the code for the same.
6.2 MainActivity.java File.
MainActivity.java
public class MainActivity extends AppCompatActivity {

   public static MainActivity instance;

   private FragmentOne fragmentOne;
   private FragmentTwo fragmentTwo;
   private TabLayout allTabs;

   @Override
   protected void onCreate(Bundle savedInstanceState) {
       super.onCreate(savedInstanceState);
       setContentView(R.layout.activity_main);
       instance=this;

       getAllWidgets();
       bindWidgetsWithAnEvent();
       setupTabLayout();
   }

   public static MainActivity getInstance() {
       return instance;
   }

   private void getAllWidgets() {
       allTabs = (TabLayout) findViewById(R.id.tabs);
   }

   private void setupTabLayout() {
       fragmentOne = new FragmentOne();
       fragmentTwo = new FragmentTwo();

       allTabs.addTab(allTabs.newTab().setText("ONE"),true);
       allTabs.addTab(allTabs.newTab().setText("TWO"));
   }

   private void bindWidgetsWithAnEvent()
   {
       allTabs.setOnTabSelectedListener(new TabLayout.OnTabSelectedListener() {
           @Override
           public void onTabSelected(TabLayout.Tab tab) {
             setCurrentTabFragment(tab.getPosition());
           }

           @Override
           public void onTabUnselected(TabLayout.Tab tab) {
           }

           @Override
           public void onTabReselected(TabLayout.Tab tab) {
           }
       });
   }

   private void setCurrentTabFragment(int tabPosition)
   {
       switch (tabPosition)
       {
           case 0 :
               replaceFragment(fragmentOne);
               break;
           case 1 :
               replaceFragment(fragmentTwo);
               break;
       }
   }

   public void replaceFragment(Fragment fragment) {
       FragmentManager fm = getSupportFragmentManager();
       FragmentTransaction ft = fm.beginTransaction();
       ft.replace(R.id.frame_container, fragment);
       ft.setTransition(FragmentTransaction.TRANSIT_FRAGMENT_OPEN);
       ft.commit();
   }
}
Here I have taken a references of:
- FragmentOne
- FragmentTwo
- Tablayout
Now let’s understand methods in detail.
setupTabLayout():
private void setupTabLayout() {
       fragmentOne = new FragmentOne();
       fragmentTwo = new FragmentTwo();

       allTabs.addTab(allTabs.newTab().setText("ONE"),true);
       allTabs.addTab(allTabs.newTab().setText("TWO"));
   }
I have created an object of each fragment (which would be shown in TabLayout) to PagerAdapter
allTabs.addTab(allTabs.newTab().setText("ONE"),true);
allTabs.addTab(allTabs.newTab().setText("TWO"));
I am going to add both the tabs in TabLayout widget using addTab() method. Here I am passing true in first tab. It will open my first tab by default.
bindWidgetsWithAnEvent():
private void bindWidgetsWithAnEvent()
   {
       allTabs.setOnTabSelectedListener(new TabLayout.OnTabSelectedListener() {
           @Override
           public void onTabSelected(TabLayout.Tab tab) {
               setCurrentTabFragment(tab.getPosition());
           }

           @Override
           public void onTabUnselected(TabLayout.Tab tab) {
           }

           @Override
           public void onTabReselected(TabLayout.Tab tab) {
           }
       });
   }
Now I am going to override some TabLayout methods. When user selects any tab then onTabSelected() method will be called and you will get selected tab in this method. I am changing fragment with the help of tab position
Note
I will get position of tab from tab.getPosition(), it will return currently selected tab position,starting with 0.
setCurrentTabFragment(int tabPosition):
private void setCurrentTabFragment(int tabPosition)
   {
       switch (tabPosition)
       {
           case 0 :
               replaceFragment(fragmentOne);
               break;
           case 1 :
               replaceFragment(fragmentTwo);
               break;
       }
   }
I am calling this method when user selects any tab. I am passing position of the tab to this method and from tab position I am replacing the fragment in the FrameLayout.
replaceFragment(Fragment fragment):
public void replaceFragment(Fragment fragment) {
       FragmentManager fm = getSupportFragmentManager();
       FragmentTransaction ft = fm.beginTransaction();
       ft.replace(R.id.frame_container, fragment);
       ft.setTransition(FragmentTransaction.TRANSIT_FRAGMENT_OPEN);
       ft.commit();
   }
This method will set the current fragment data in FrameLayout (that we have taken in activity_main.xml)
FragmentManager fm = getSupportFragmentManager();
FragmentTransaction ft = fm.beginTransaction();
To replace the fragment, i need to begin Transaction. So I would be calling beginTransation() method of FragmentManger.
ft.replace(R.id.frame_container, fragment);
Now I am going to replace current Fragment with the old one.
In FragmentTransaction.replace() method we need to pass two arguments.
| Argument - 1 | ID of the FrameLayout (that I have taken in activity_main.xml) |
| Argument - 2 | Fragment that we want to replace |
At the end, I need to commit that transaction using FragmentTransaction.commit() method.
I hope you find this blog post very helpful while creating Tab Layout In Android Without ViewPager. Let me know in comment if you have any questions regarding Tab Layout. I will reply you ASAP.
Learning Android sounds fun, right? Why not check out our other Android Tutorials?
Got an Idea of Android App Development? What are you still waiting for? Contact us now and see the Idea live soon. Our company has been named as one of the best Android Application Development Company in India.

I am professional Android App & Game developer. I love to develop unique and creative Games & Apps. I am very passionate about my work.
