Be patient..... we are fetching your source code.
Objective
My objective in this post would be to explain how you can add Google Maps SDK to implement features like show specific location, show route from one place to another, show user’s current location, show user’s updated location, etc.
This tutorial gives you brief idea about how to implement Google Maps SDK for iOS in your iOS Applications.
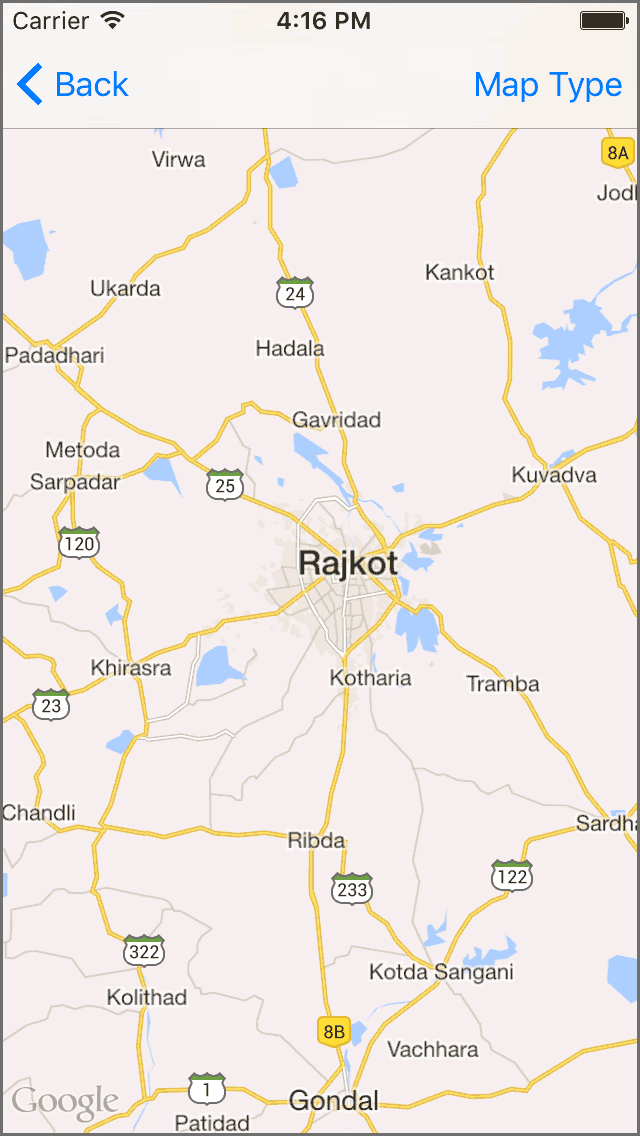
You Will Get Final Output:
Step 1 Introduction
Google Maps SDK for iOS allows us to add maps to our iOS applications. Google Maps SDK automatically handles the Google Maps, and also response to the user’s activities such as
- Tap
- movement
- zoom, etc.
Google Maps SDK also allows us to get user’s current location. We can get the location on the map by latitude and longitude of the place.
Now I will teach you how to integrate Google Maps SDK in iOS application using Swift. First of all, you need API Key for Google Maps. For that you need a Google Account.
Step 2 Get API Key
To use the Google Maps SDK, we need an API key.
API key is a key through which we can make calls to Google API from an iOS Application.
Follow these steps to get API Key for your app:
- Sign into Developers Console using your Google Account.
- Create Project if you haven’t created it yet, else go to Step 3.
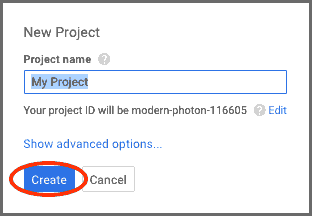
- Add name of the project.
- Click on Create button.
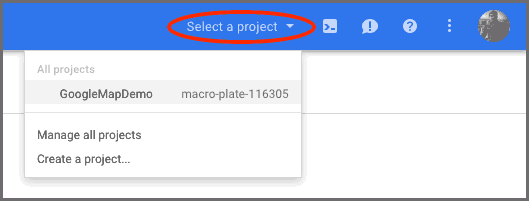
- Select the project by clicking on Select a project button available on Top-Right Corner.
- Click on Enable and Manage APIs.
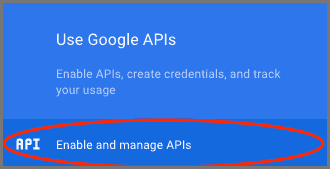
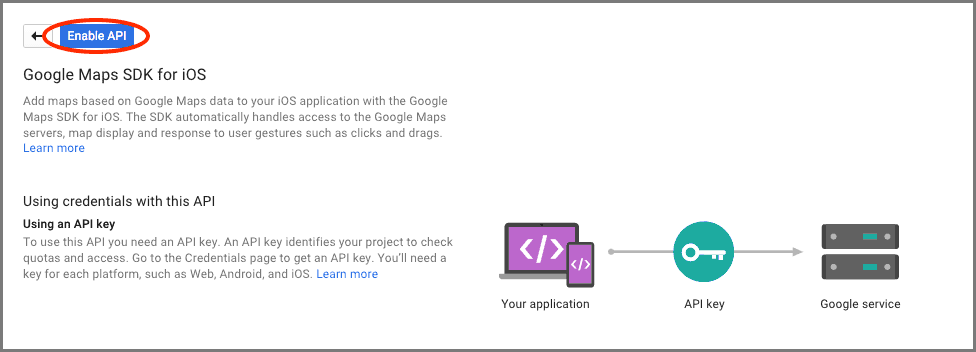
- It will list all the Google APIs. Select Google Maps SDK for iOS listed in Google Maps API.

- It will prompt to Enable the API. Click on Enable API.
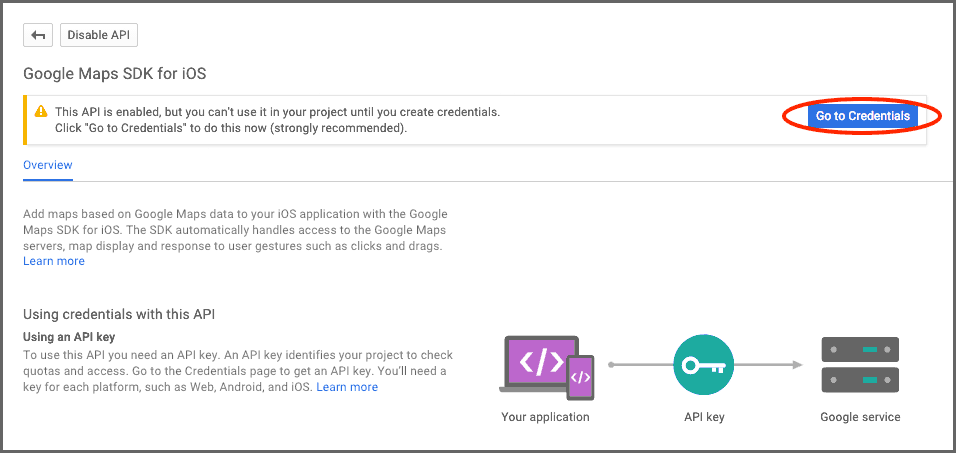
- Your Google Maps SDK now enabled. But you can’t use it before creating credentials. Click on Go to Credentials to create credentials.
- Click on New Credentials.
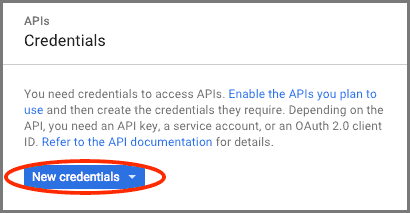
A drop-down box appears by clicking on New Credentials. Click on API Key.
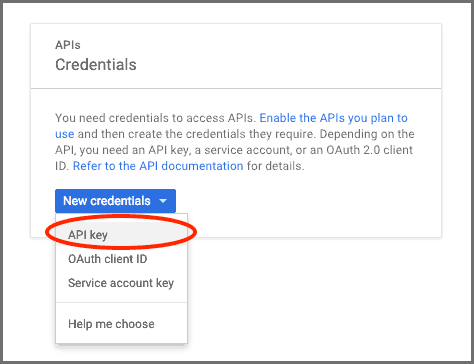
- Click on iOS Key.

- It will ask the name of the iOS API Key and Bundle Identifier of the iOS Application.
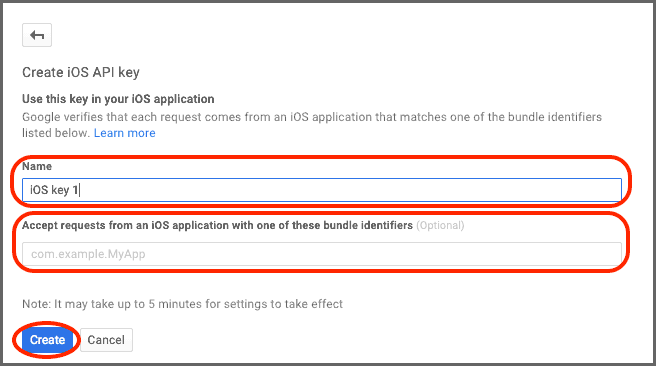
- Add name of the iOS API Key
- Add Bundle Identifiers of the iOS Applications. You can add multiple Bundle Identifiers in this section. It will accept request from iOS Applications with any of the Bundle Identifiers listed here.
- When you are ready with all configurations, click on Create button.
- It will create API Key and display on the screen.
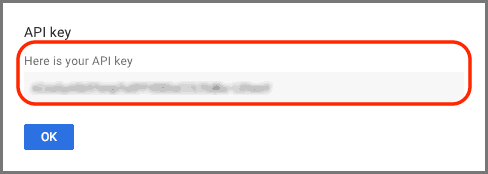
Copy this API Key and store it. You will need this API Key to use Google Maps SDK in your iOS Application.
I have done with all setup for API Key.
Step 3 Project Configuration
- Now create a new Xcode project. If you don't have any idea about how to create project please refer following link. http://www.theappguruz.com/blog/basic-of-creating-xcode-project-in-ios
- To integrate Google Maps SDK for iOS, you need to get GoogleMap framework. You can get Google Maps SDK by this link. https://developers.google.com/maps/documentation/business/mobile/ios/
- You can find GoogleMaps.framework in a downloaded folder. Drag GoogleMaps.framework to the project in Xcode.
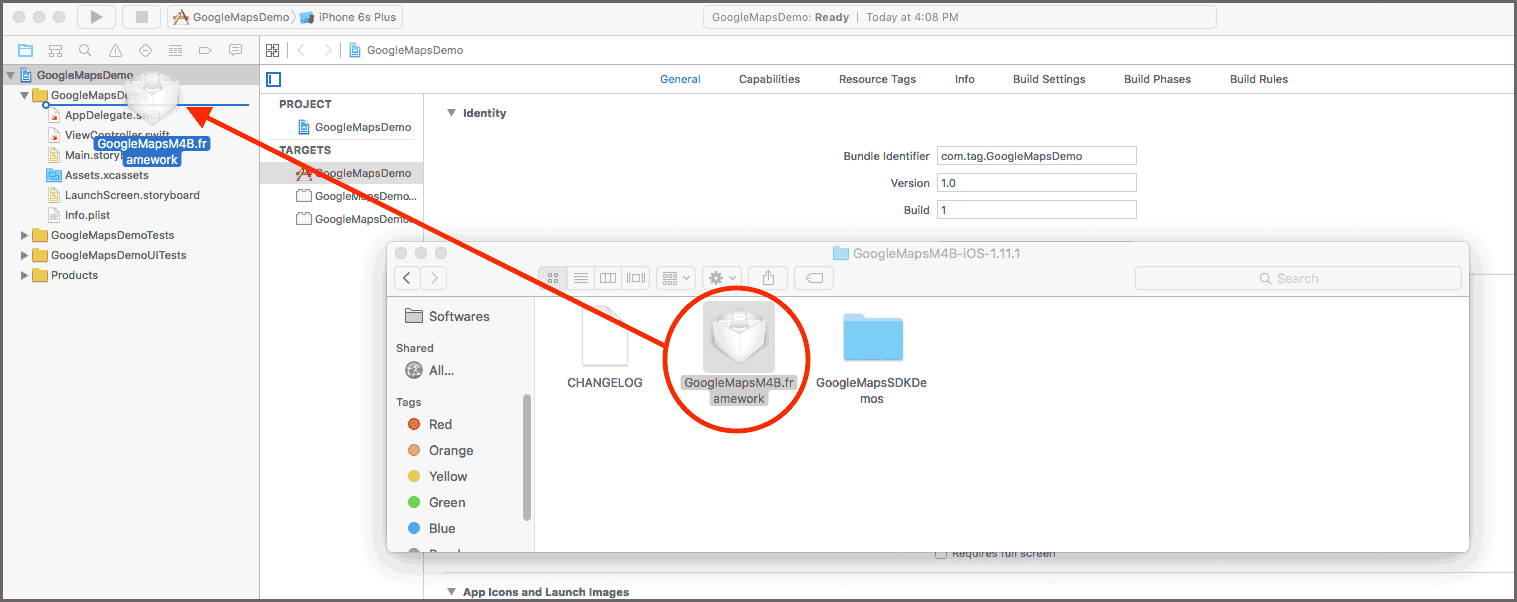
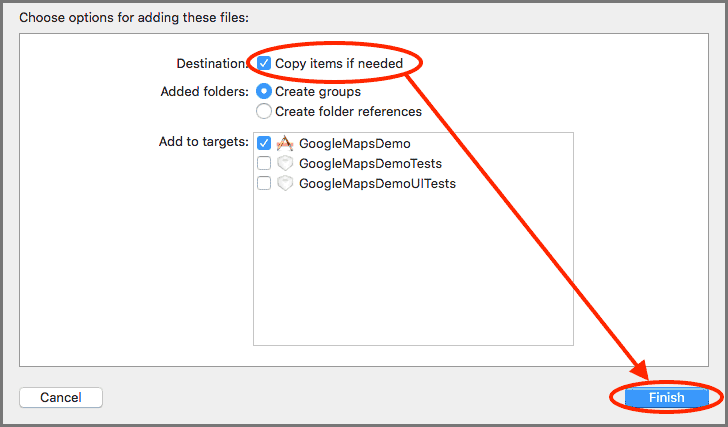
- A new window appears to choose the options for adding files. Check Copy items if needed checkbox if not checked already and click on Finish button.
- Now you can find GoogleMaps.framework framework in your project.
- Right-click on it and select Show in finder.
- Double click on GoogleMaps.framework in finder and select Resources folder.
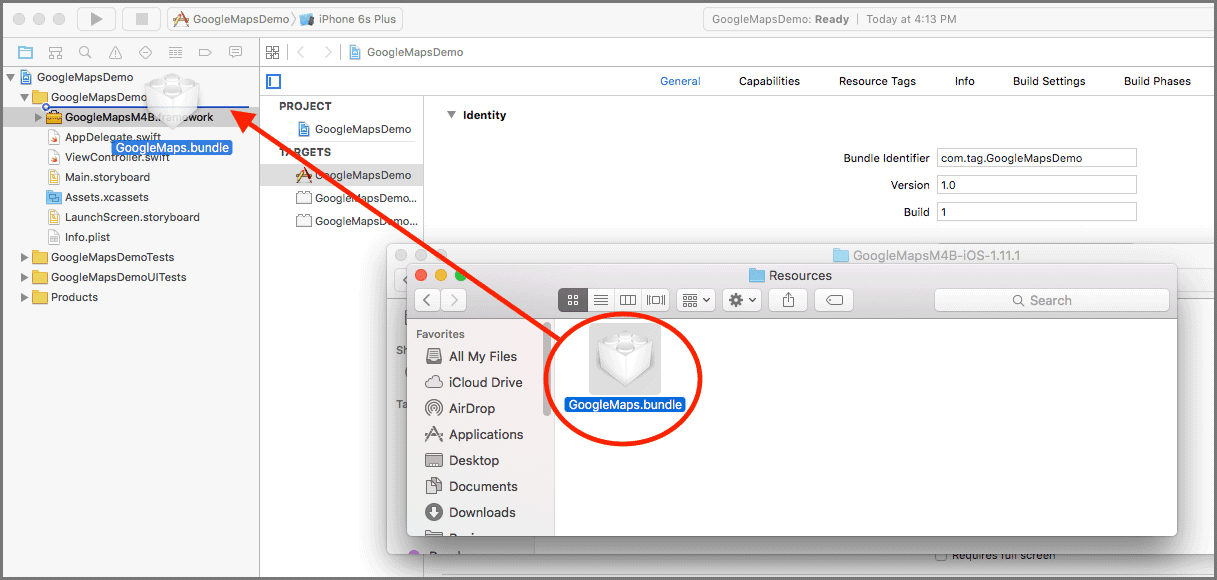
- You can find GoogleMaps.bundle.
- Drag GoogleMaps.bundle to the Xcode project.
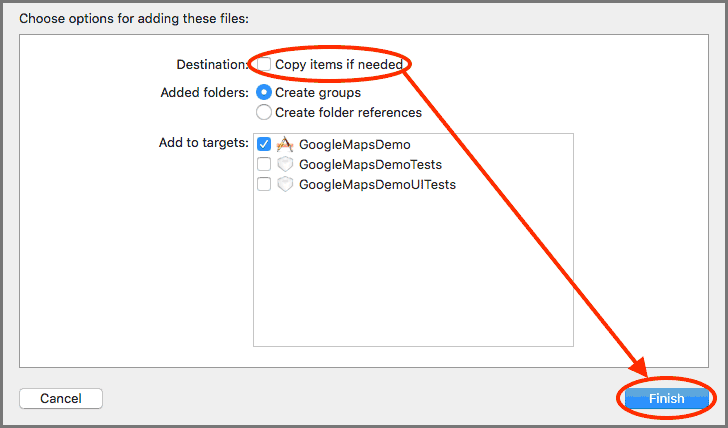
- A new window appears to choose the options for adding files. Now make sure Copy items if needed checkbox is unchecked and click on Finish.

Step 4 Add Other Frameworks
Google Maps SDK needs several other frameworks. Such as
- Accelerate.framework
- AVFoundation.framework
- CoreBluetooth.framework
- CoreData.framework
- CoreGraphics.framework
- CoreLocation.framework
- CoreText.framework
- GLKit.framework
- ImageIO.framework
- libc++.dylib
- libicucore.dylib
- libz.dylib
- OpenGLES.framework
- QuartzCore.framework
- Security.framework
- SystemConfiguration.framework
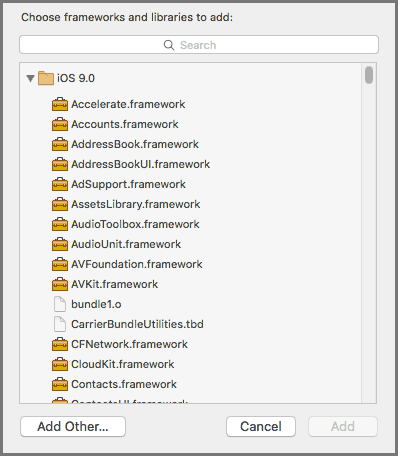
To add these frameworks, select your project in Project Navigator and click on Build Phases. Expand Link Binary With Libraries and click on + button.

Choose and add the above-listed frameworks.
Step 5 Add Bridging Header
As GoogleMaps.framework is available in Objective C, we need to add bridging header to our Swift project. By using bridging header, we can use Objective C code in our Swift application.
You can find more detail about Bridging Header by this link.
To add bridging header to the project
- Create new file by File >> New >> File from the menu to add temporary file.
- Select Objective-C File.
- Click Next.
- Add File Name.
- Click on Next.
- Click on Create.
- It will ask to configure Objective-C bridging header.
- Click on Create Bridging Header button.
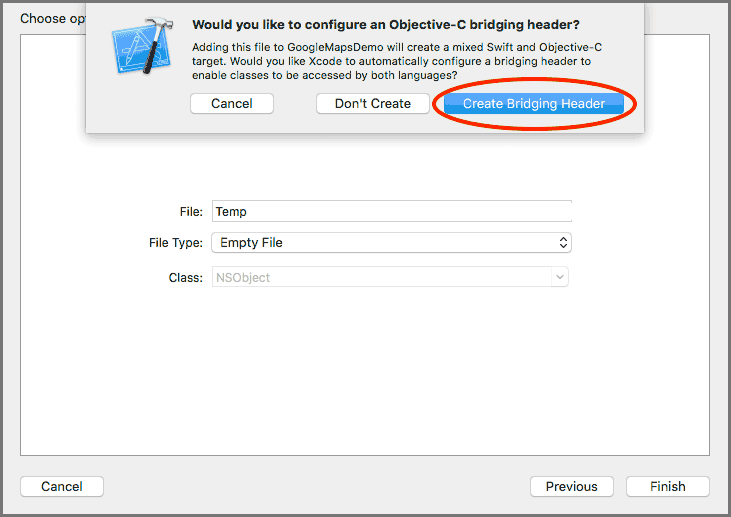
- It will create Objective-C bridging header file.
- Add following line of code to Bridging Header file.
#import <GoogleMaps/GoogleMaps.h> - Now delete the temporary created Objective-C file as we do not need that file any more.
Step 6 Display Map in our iOS Application
- Open the AppDelegate.swift file and use following lines of code in the application(_didFinishLaunchingWithOptions:) method.
func application(application: UIApplication, didFinishLaunchingWithOptions launchOptions: [NSObject: AnyObject]?) -> Bool {
    // Override point for customization after application launch.
    GMSServices.provideAPIKey("<YOUR_API_KEY_HERE>")
    return true
}
In this method, i would be using my API key to integrate Google Maps SDK in my iOS application.You have to set your iOS application API Key in
<YOUR_API_KEY_HERE>. - Now in ViewController.swift, add the following lines of code in viewDidLoad() method.
override func viewDidLoad()
{
    let camera: GMSCameraPosition = GMSCameraPosition.cameraWithLatitude(22.300000, longitude: 70.783300, zoom: 10.0)
    vwGMap = GMSMapView.mapWithFrame(self.view.frame, camera: camera)
    vwGMap.camera = camera
}
This method initializes the GMSCameraPosition. By default initial location will be displayed once map is loaded. For that you should get the latitude and longitude of the place.
Step 7 Get User’s Current Location
- Add your class to subclass of CLLocationManagerDelegate.
- Create variables of class CLLocationManager and GMSMapView.
var locationManager = CLLocationManager() var vwGMap = GMSMapView() - Add following lines of code in viewDidLoad() method of your ViewController.
override func viewDidLoad()
{
    super.viewDidLoad()
    locationManager.delegate = self
    locationManager.desiredAccuracy = kCLLocationAccuracyKilometer

    // A minimum distance a device must move before update event generated
    locationManager.distanceFilter = 500

    // Request permission to use location service
    locationManager.requestWhenInUseAuthorization()

    // Request permission to use location service when the app is run
    locationManager.requestAlwaysAuthorization()

    // Start the update of user's location
    locationManager.startUpdatingLocation()

    // Add GMSMapView to current view
    self.view = vwGMap
}
Step 8 CLLocationManagerDelegate methods
- When we request the permission by locationManager.requestWhenInUseAuthorization(), it will call locationManager(_didChangeAuthorizationStatus:). In which I have enabled myLocationEnabled to true. Now I am able to get the user’s current location.
func locationManager(manager: CLLocationManager, didChangeAuthorizationStatus status: CLAuthorizationStatus) { if (status == CLAuthorizationStatus.AuthorizedWhenInUse) { vwGMap.myLocationEnabled = true } } - Now locationManager(_didUpdateLocations) method is called at specific interval.
In this method, we can get the updated locations. I have set the camera with the target location.func locationManager(manager: CLLocationManager, didUpdateLocations locations: [CLLocation]) { let newLocation = locations.last vwGMap.camera = GMSCameraPosition.cameraWithTarget(newLocation!.coordinate, zoom: 15.0) vwGMap.settings.myLocationButton = true self.view = self.vwGMap }
Step 9 Create marker and set the location
We can also set marker at the user’s current location. For that you need a variable of GMSMarker variable.
let marker = GMSMarker()
I would be using following lines of code to set the marker at the specified location.
// Create marker and set location
marker.position = CLLocationCoordinate2DMake(newLocation!.coordinate.latitude, newLocation!.coordinate.longitude)
marker.map = self.vwGMap
Add this code to locationManager(_didUpdateLocations) method. Now user will get the marker at his/her current location.
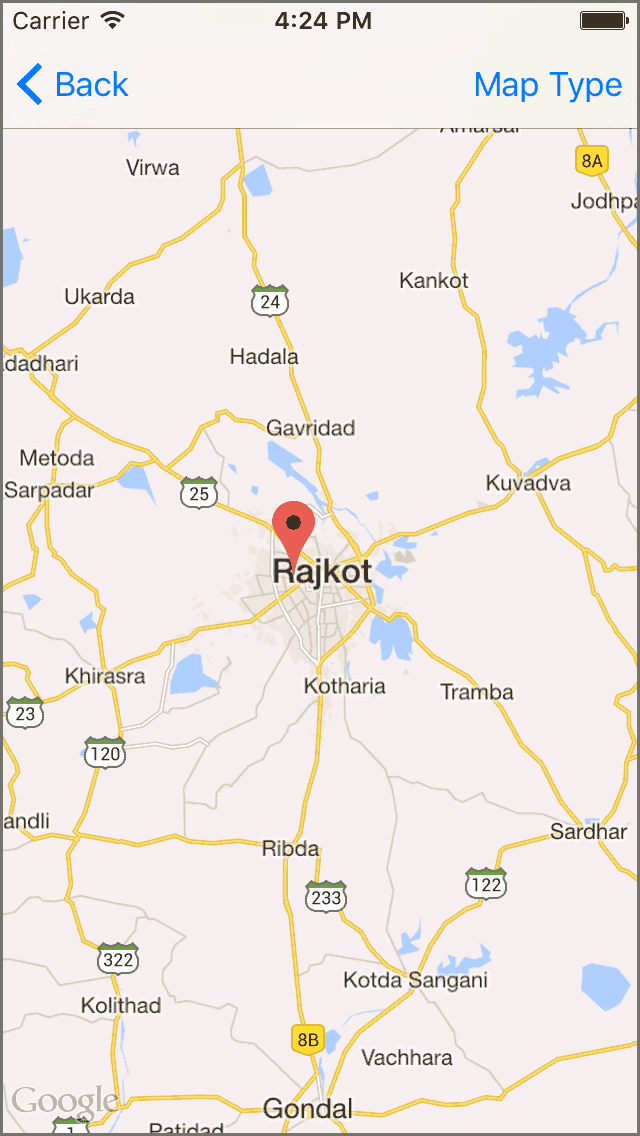
I hope you will find this blog post helpful while working with Google Maps Mobile SDK in iOS Swift. Let me know in comment if you have any questions regarding Google Maps Mobile SDK in iOS Swift. Please put a comment here and we will get back to you ASAP.
Got an Idea of iPhone App Development? What are you still waiting for? Contact us now and see the Idea live soon. Our company has been named as one of the best iPhone App Development Company in India.

I am 2D Game developer and iOS Developer with an aspiration of learning new technology and creating a bright future in Information Technology.
