- Features That I Have Used
- Create New Document of 800x800 Pixels
- Select Foreground and Background Color
- Apply Clouds and Noise Filter
- Create a New Alpha Channel and Apply Different Clouds Filter
- Randomize the Displacement Map Using Noise Filter
- Select The Layers Palette and Duplicate the Original layer
- Apply Displacement using Lighting Effects
- Final Result
Objective
The main objective of this post is to show you how to make a surface look real using Alpha Channel in Photoshop.
This blog shows you an awfully simple technique for creating exhausting rocky gravel texture that is improbably photorealistic. No special inventive skills are needed here. We'll simply be exploring Photoshop's own filters and tools for this purpose.
Features I gonna use are,
Step 1 Feautres That I Have Used
Render Clouds, Lighting Effects, Noise, Alpha Channels, Difference Clouds etc.
Now follow the steps given below:
Step 2 Create New Document of 800 x 800 Pixels
Start with an empty canvas. Here I chose 800x800 pixels, but this technique works with any size.
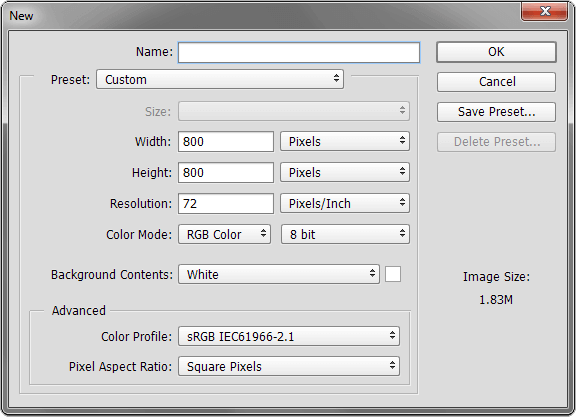
Step 3 Select Forground and Background Color
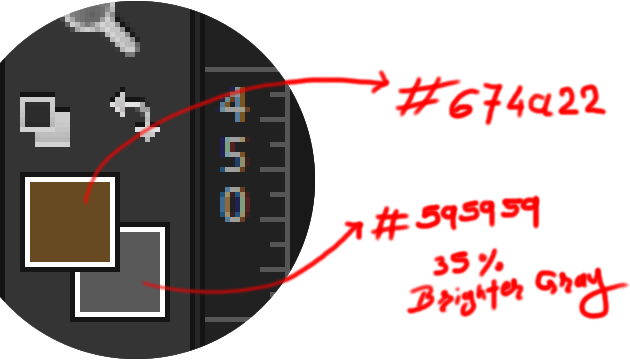
Now you need to select two colors, one is your Foreground and second is your Background color. Foreground is 35% grey (#595959) and Background color is dark brown (#674a22). We chose these colors because these colors give natural gravel shades.
Step 4 Apply Clouds and Noise Filter
Go to Filter / Render / Clouds to give simulated Foreground to Background color clouds and after this your screen will look like as giving below:

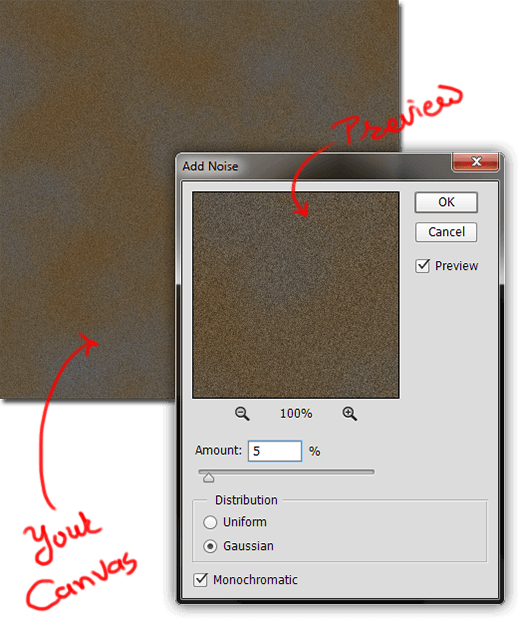
To add more randomness to your composition Go to Filter / Noise / Add Noise. After applying these settings in your composition will look like as given below:
Step 5 Create a New Alpha Channel and Apply Different Clouds Filter
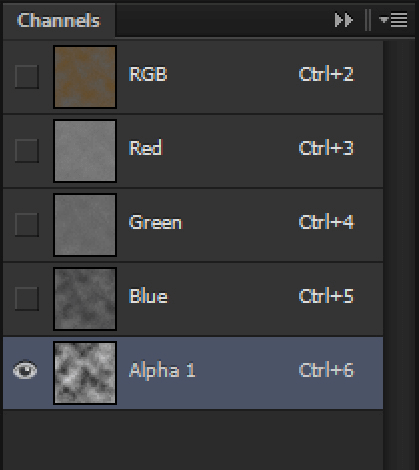
To create alpha channels, click on Channels tab and create a new alpha channel by clicking the new channel icon. An icon as shown ![]() here
here
Now you’ve already got black filled layer named ‘Alpha 1’. Channels palette is located next to the layer palette. Now choose Filter / Render / Difference Clouds. It's used for giving stone creases and more uneven texture quality.
Alpha Channel only works with black or white colors and its in-between. In the transparency black stands for 100% transparent and White stands for 100% Opaque.
But here we are using Alpha as lighting and bump spectacular so; here Black stands for Craters and White stands for Bumps.
Step 6 Randomize the Displacement map using Noise filter
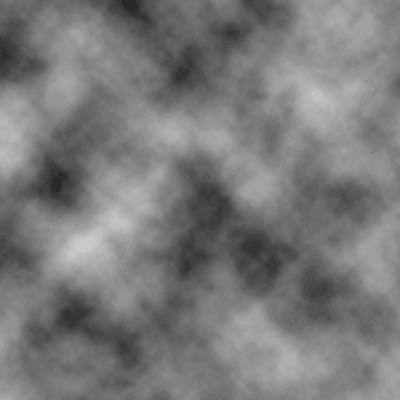
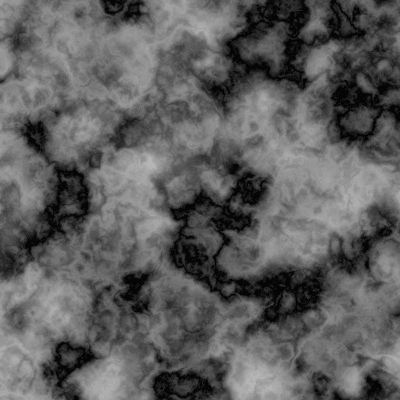
After this, we have to randomize the displacement map a bit more using applying Filter / Noise / Add Noise. Repeat same settings as described in Step 2. Now go to Edit / Fade Add Noise and set the opacity to 50%, to tone it down a little bit. Now go to Filter / Render / Difference Clouds once again. Hit Ctrl + f (cmd + F on MAC) to simulate the filter two or three times more until you get more rough pattern where the light and dark areas seem balanced. If you would like the surface to be sander or rougher, you'll be able to apply Level changes or Curve changes at this time. If you increase the difference between the shiny and dark areas, the surface will be rougher. Reducing the difference makes it more flatten. Final Alpha simulations appear as given below in the figure.
Step 7 Select the layers pallete and dublicate the original layer
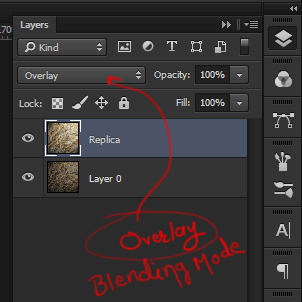
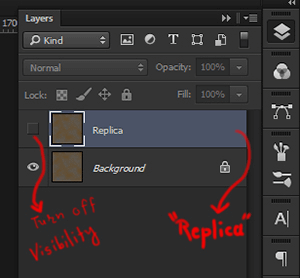
Select again the layers palette by clicking on the Layers tab. Duplicate the original layer by right-clicking on it and select Duplicate Layer option or just hit the shortcut Ctrl + j. Now select duplicate Layer. This will eventually trigger highlights layer, thus double click on the layer name for this new layer and rename it as ‘Replica’. For a little while, turn off the visibility of this layer by clicking on the ‘eye’ icon (1st left to layer). Your layers palette should look like as given below:
Step 8 Apply Displacement using Lighting Effects
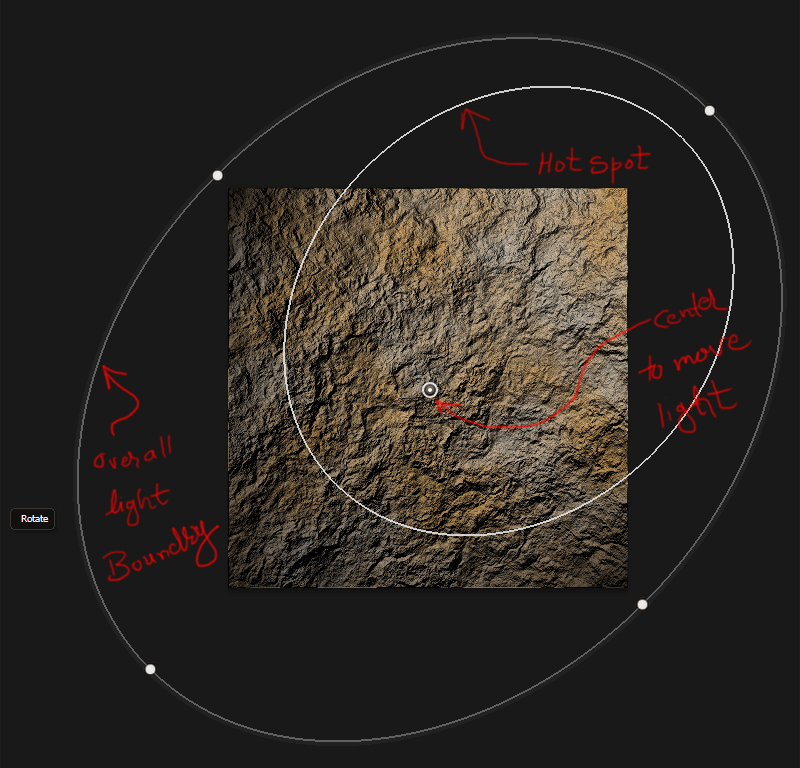
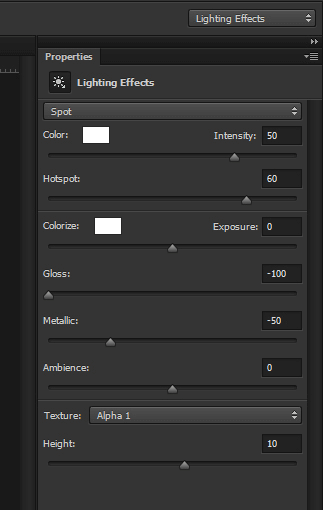
We're going to work on locked Background Layer now, so just double click on that layer to make it active. We will apply displacement to the image by using a lighting effect. Select Filter / Render / Lighting Effects. Below are the options which I used. Try these to get started and get the hang of how it works, play with different values like Height, Intensity etc...
Repeat this entire process with ‘Replica’ Layer with more light Intensity and change Blending Mode of ‘Replica’ layer to Overlay.
Step 9 Final Result
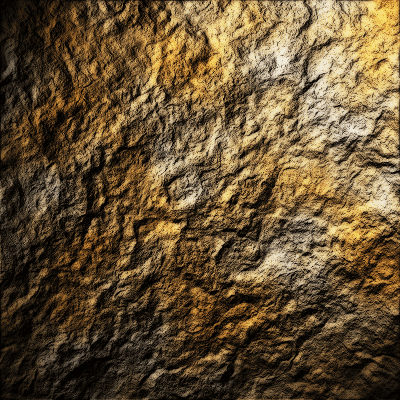
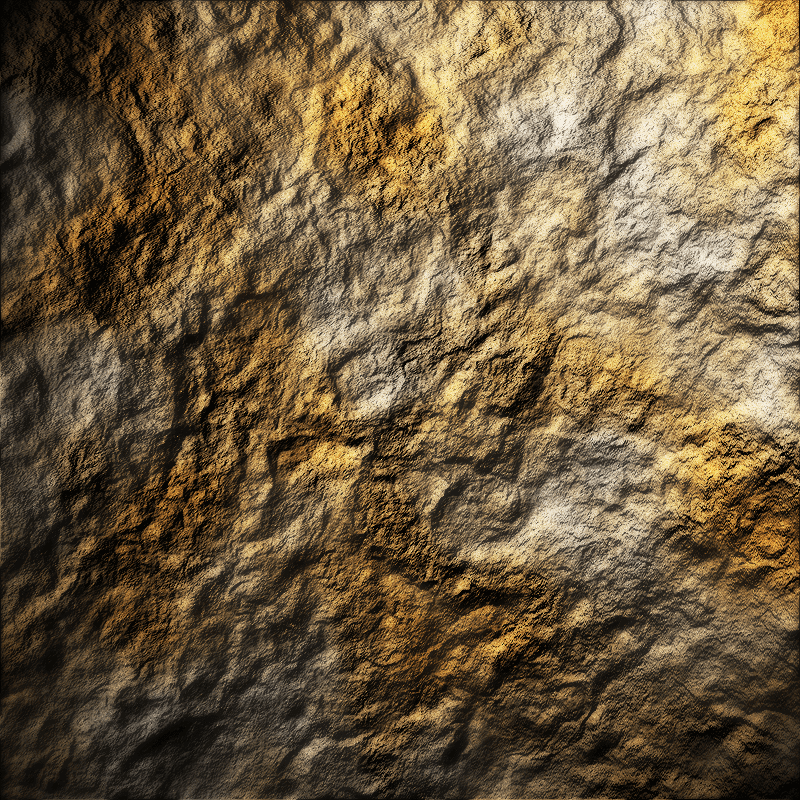
Add another Duplicate layer and give it a Gaussian Blur around 4px and set its Blending Mode to Lighten to give Bloom Effect to your picture and Final output will look like this...
Conclusion :
This technique is less time consuming and doesn’t require any extra Artistic Skills. Moreover, it gives an uneven texture and comes with the best Simulation. Widely used for game environments and film making (especially in VFX).
The main advantage of this technique is to create seamless textures not only similar to the above image, but can also be used to create Brick, Concrete, Static Water and many more textures.
Hence this is a BLOG on how to create your own texture using Alpha Channel and Lighting Effects. Previous versions of Photoshop have all these features, but the revolution in current builds of Photoshop includes the GPU rendering in your lighting effects which provides more realistic graphics.
Got an Idea of Game Development? What are you still waiting for? Contact us now and see the Idea live soon. Our company has been named as one of the best Game Development Company in India.
I am 3D game graphics designer at TheAppGuruz, I designed graphics for many 3D games. Here I am writing blog about one of my favorite concept of 3D graphics; love to share this with you.
Ads Implementation in Unity Using ChartBoost
Direction of Normals in Maya
