Be patient..... we are fetching your source code.
Objective
Main objective of this blog post is to describe how to work with MessageUI and Social framework and how to integrate it with your application in swift to use various social networking, mail and messaging services.
Introduction:
Social framework allows you to integrate various social networking services to your application. This framework is mainly responsible for generating HTTP requests and provides interface for posting all those requests on behalf of the user. For that you have to first create session and get activity feed, now prepare your post, set all its properties and attachments and at last post this newly created post on the created activity feed.
MessageUI framework provides special type of view controllers, which provides interfaces for email, and SMS and we have to use it for delivering messages and mail which doesn’t require leaving actual application. This interface modally present view controller from your application.
This allows you to customizing your contents of mail or message before sending or cancelling it. It also provides delegate and its methods for various actions related to that composition view controller.
For Example, dismiss ion of view controller as per the user’s action. If your device is not supported to send message then it will not display composition sheet and instead appropriate message will be displayed.
Following demo describes how to actually integrate Social and MessageUI framework with your application in swift.
Step 1 Create Xcode Project
Now First step is to create xCode project and named it as SocialFrameworkDemo and save this project wherever you want to save it. This project contains single view controller and contains single image and message which we use to share through social networking, text messaging and mail.
Step 2 Design UI
First of all you have to design user interface as per following and set all controls to it appropriate constraints.
Step 3 Attach Frameworks
Now you have to add two frameworks to your application in order to use social, messaging and mailing services. For that you have to add two frameworks from link binary with library. For that go to the project then select Build Phase tab, then select tab named Link Binary With Libraries. Then click on + button on lower left corner and add the following required framework.
- MessageUI.framework
- Social.framework
Step 4 Import Frameworks
Now if we want to use various services regarding social networking, mailing and messaging we have to import following to our ViewController.swift file. import Social import MessageUI
Step 5 MFMailComposeViewControllerDelegate method
In order to handle user’s action we have to set appropriate delegate to our ViewController.swift file.
Basically three delegates you have to set named as:
- UINavigationControllerDelegate
- MFMessageComposeViewControllerDelegate
- MFMailComposeViewControllerDelegate
You can get idea about how to set above delegates in ViewController from the following. class ViewController: UIViewController, UINavigationControllerDelegate, MFMessageComposeViewControllerDelegate, MFMailComposeViewControllerDelegate
Step 6 Code For Social Connections
Here we have to share image as well as text as per the click event of the appropriate button. Following are the action methods for various buttons when the button is clicked.
@IBAction func btnTwitterClicked(sender: AnyObject)
    {
        if objRechability!.isReachable()
        {
            shareTwitter()
        }
        else
        {
            Util .invokeAlertMethod("Warning", strBody: "Internet connection not available.", delegate: self)
        }
    }

    @IBAction func btnFacebookClicked(sender: AnyObject)
    {
        if objRechability!.isReachable()
        {
            shareFacebook()
        }
        else
        {
            Util .invokeAlertMethod("Warning", strBody: "Internet connection not available.", delegate: self)
        }
    }

    @IBAction func btniMessageClicked(sender: AnyObject)
    {
        shareiMessage()
    }

    @IBAction func btnMailClicked(sender: AnyObject)
    {
        if objRechability!.isReachable()
        {
            shareMail()
        }
        else
        {
            Util .invokeAlertMethod("Warning", strBody: "Internet connection not available.", delegate: self)
        }
    }
6.1 Facebook
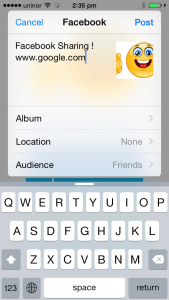
Following method allows you to share image and text with Facebook.
func shareFacebook()
    {
        let fvc: SLComposeViewController=SLComposeViewController(forServiceType: SLServiceTypeFacebook)
        fvc.completionHandler =
        {
            result -> Void in
            let getResult = result as SLComposeViewControllerResult;
            switch(getResult.rawValue)
            {
                case SLComposeViewControllerResult.Cancelled.rawValue:
                    Util .invokeAlertMethod("Warning", strBody: "Post Cancalled", delegate: self)
                case SLComposeViewControllerResult.Done.rawValue:
                    Util .invokeAlertMethod("Warning", strBody: "Post Successfull.", delegate: self)
                default:
                    Util .invokeAlertMethod("Warning", strBody: "Error Occured.", delegate: self)
            }
            self.dismissViewControllerAnimated(true, completion: nil)
        }
        self.presentViewController(fvc, animated: true, completion: nil)
        fvc.setInitialText("Facebook Sharing !")
        fvc.addImage(ivImage.image)
        fvc.addURL(NSURL(string: "www.google.com"))
    }
6.2 Twitter
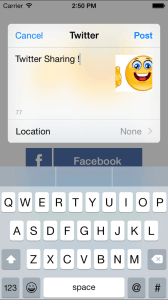
Following method allows you to share image and text with Twitter.
func shareTwitter()
    {
        let tvc: SLComposeViewController=SLComposeViewController(forServiceType: SLServiceTypeTwitter)
        tvc.completionHandler =
            {
                result -> Void in
                let getResult = result as SLComposeViewControllerResult;
                switch(getResult.rawValue)
                {
                    case SLComposeViewControllerResult.Cancelled.rawValue:
                        Util .invokeAlertMethod("Warning", strBody: "Post Cancalled", delegate: self)
                    case SLComposeViewControllerResult.Done.rawValue:
                        Util .invokeAlertMethod("Warning", strBody: "Post Successfull.", delegate: self)
                    default:
                        Util .invokeAlertMethod("Warning", strBody: "Error Occured.", delegate: self)
                }
                self.dismissViewControllerAnimated(true, completion: nil)
        }
        self.presentViewController(tvc, animated: true, completion: nil)
        tvc.setInitialText("Twitter Sharing !")
        tvc.addImage(ivImage.image)
        tvc.addURL(NSURL(string: "www.google.com"))
    }
6.3 iMessage
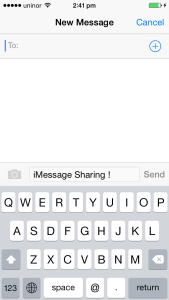
Following method allows you to share image and text with iMessage.
func shareiMessage()
    {
        let controller: MFMessageComposeViewController=MFMessageComposeViewController()
        if(MFMessageComposeViewController .canSendText())
        {
            controller.body="iMessage Sharing !"
            controller.addAttachmentData(UIImageJPEGRepresentation(UIImage(named: "images.jpg")!, 1)!, typeIdentifier: "image/jpg", filename: "images.jpg")
            controller.delegate=self
            controller.messageComposeDelegate=self
            self.presentViewController(controller, animated: true, completion: nil)
        }
        else
        {
            let alert = UIAlertController(title: "Error", message: "Text messaging is not available", preferredStyle: UIAlertControllerStyle.Alert)
            alert.addAction(UIAlertAction(title: "OK", style: UIAlertActionStyle.Cancel, handler: nil))
            self.presentViewController(alert, animated: true, completion: nil)
        }
    }

    func messageComposeViewController(controller: MFMessageComposeViewController, didFinishWithResult result: MessageComposeResult)
    {
        switch result.rawValue
        {
            case MessageComposeResultCancelled.rawValue:
                Util .invokeAlertMethod("Warning", strBody: "Message cancelled", delegate: self)
            case MessageComposeResultFailed.rawValue:
                Util .invokeAlertMethod("Warning", strBody: "Message failed", delegate: self)
            case MessageComposeResultSent.rawValue:
                Util .invokeAlertMethod("Success", strBody: "Message sent", delegate: self)
            default:
                Util .invokeAlertMethod("Warning", strBody: "error", delegate: self)
        }
        self.dismissViewControllerAnimated(false, completion: nil)
    }
6.4 Email
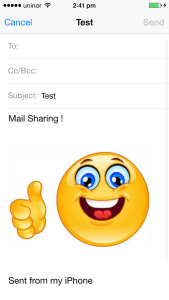
Following method allows you to share image and text with Email.
    func shareMail()
    {
        let mailClass:AnyClass?=NSClassFromString("MFMailComposeViewController")
        if(mailClass != nil)
            {
                if((mailClass?.canSendMail()) != nil)
                {
                    displayComposerSheet()
                }
                else
                {
                    launchMailAppOnDevice()
                }
            }
            else
            {
                launchMailAppOnDevice()
            }
    }
    func launchMailAppOnDevice()
    {
        let recipients:NSString="";
        let body:NSString="Mail Sharing"
        var email:NSString="\(recipients) \(body)"
        email=email.stringByAddingPercentEscapesUsingEncoding(NSUTF8StringEncoding)!
        UIApplication.sharedApplication().openURL(NSURL(string: email as String)!)
    }
    func displayComposerSheet()
    {
        let picker: MFMailComposeViewController=MFMailComposeViewController()
        picker.mailComposeDelegate=self;
        picker .setSubject("Test")
        picker.setMessageBody("Mail Sharing !", isHTML: true)
        let data: NSData = UIImagePNGRepresentation(UIImage(named: "images.jpg")!)!

        picker.addAttachmentData(data, mimeType: "image/png", fileName: "images.png")

        self.presentViewController(picker, animated: true, completion: nil)
    }
    func mailComposeController(controller:MFMailComposeViewController, didFinishWithResult result:MFMailComposeResult, error:NSError?)
    {
        switch result.rawValue
        {
            case MFMailComposeResultCancelled.rawValue:
                Util .invokeAlertMethod("Warning", strBody: "Mail cancelled", delegate: self)
            case MFMailComposeResultSaved.rawValue:
                Util .invokeAlertMethod("Warning", strBody: "Mail saved", delegate: self)
            case MFMailComposeResultSent.rawValue:
                Util .invokeAlertMethod("Success", strBody: "Mail sent", delegate: self)
            case MFMailComposeResultFailed.rawValue:
                Util .invokeAlertMethod("Warning", strBody: "Mail sent failure", delegate: self)
            default:
                Util .invokeAlertMethod("Warning", strBody: "error", delegate: self)
        }
        self.dismissViewControllerAnimated(false, completion: nil)
    }
Step 7 Build & Run the app
Following are the screen shots when user tries to share through this application.
I hope you find this tutorial helpful. If you are facing any issues or have any questions regarding Social and MessageUI Framework, please feel free to post a reply over here, I would be glad to help you.
Got an Idea of iPhone App Development? What are you still waiting for? Contact us now and see the Idea live soon. Our company has been named as one of the best iPhone App Development Company in India.

I am iOS developer, as a developer my basic goal is continue to learn and improve my development skills , to make application more user friendly.
Create Pixel Art in Photoshop
iOS - AirDrop File Sharing
