Objective
The main objective of this blog post is to show you how to work with the Patch Tool in Photoshop.
Patch tool is mostly used to remove the unwanted areas from the image. It will replace the selected area with the chosen area. You can also use this tool for duplication. Let's take a look at the patch tool. Here, I've used Photoshop CC.
Step 1 Getting Started with Patch Tool
Patch Tool
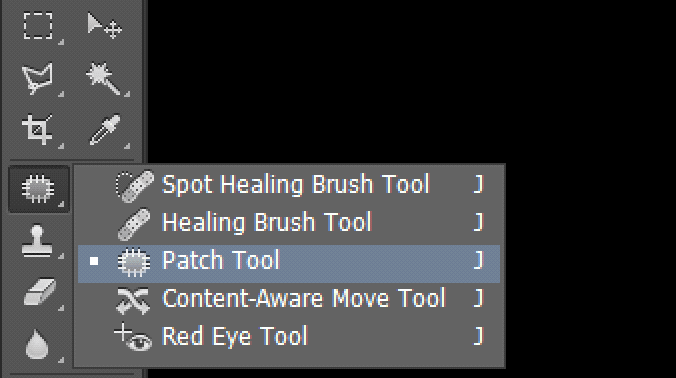
Select Patch Tool from the toolbox which is located under the Spot Healing Brush Tool panel on the left hand side of the screen.

You will see various options available at the top of the screen.
1.1 Options For Normal Patching

Here, either you can patch with Normal or you can go with Content - Aware. If you select normal, it will adjust the color and the tone of the selected area but doesn’t move the pixels around the patch.
Some other options are also available for normal patching as shown below:
- Patch Source from Destination : You can choose this option if you want to replace the selection with the destination area.
- Patch Destination from Source : You can choose this option if you want to duplicate the selected area.
- Transparency for blending : If you select this option, it will preserve the luminosity of the selected area.
- Use Pattern : If you want to apply any pattern to the selected portion, you can choose any pattern from here and just click on "Use Pattern".If you choose content aware, it will blend the selected portion with the destination in a seamless way. Here you can set values for Structure and Color Adaptation.
1.2 Options For Content Aware Patching

Structure
It will indicate how the patch reflects the existing image. You can give the value between 1 to 5.
Color
It will apply color blending to the patch. If you give 0, it means the color blending is disabled. You can give the values between 0 to 10.
Here, I want to remove the tree from the image. For this, first choose Content Aware patch from dropdown, set 5 in structure and 0 in color.
1.3 Apply Patching On Image

Select the tree with patch tool as you work with lasso tool.

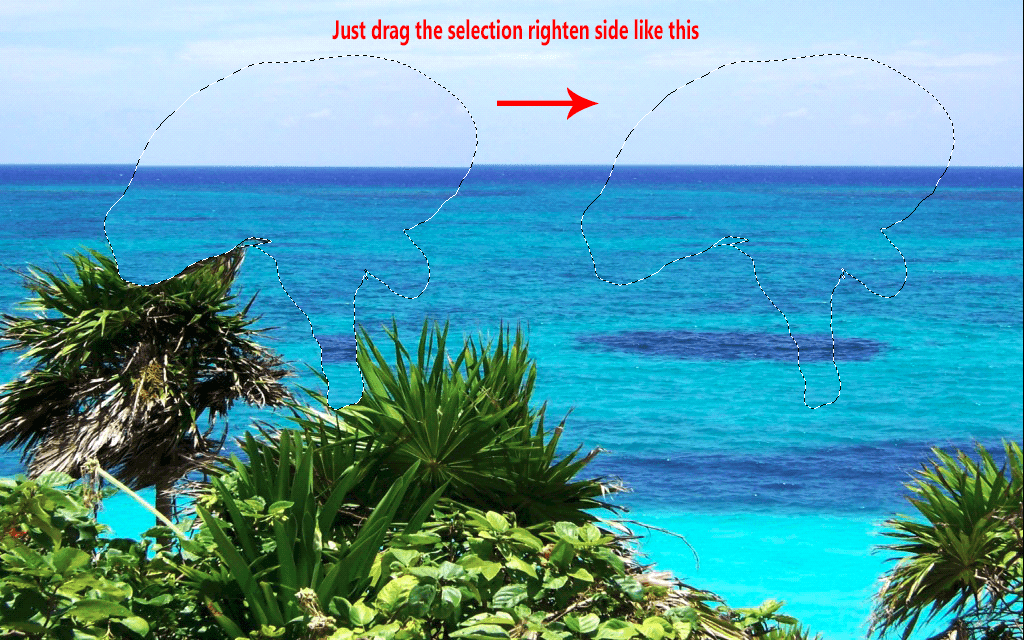
Now, simply drag the selection right hand side as shown in the image.

Finally you will get an image like this.

Step 2 Getting Start With Content Aware Move Tool
Content Aware Move Tool
Using this tool, you can select any particular portion of an image and move that part where you want to without any disturbance. After moving the part, the whole image is recomposed and automatically fills the moved area using matching elements from the image.

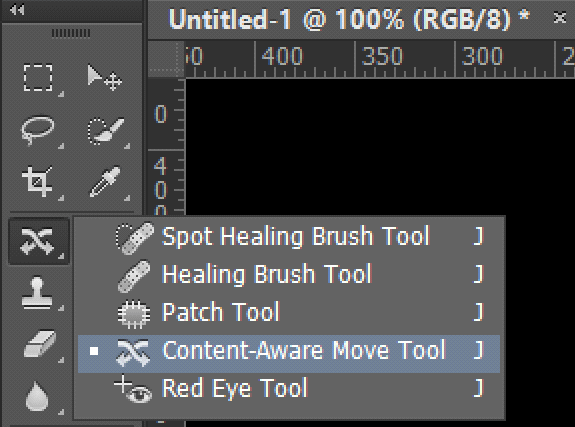
Select Content Aware Move Tool which is located under the Spot Healing Brush Tool panel from the toolbox.
You can use this tool in two modes.
2.1 Modes For Content Aware Move Tool

Move Mode:
Move mode is used for moving the object seamlessly.
Extend Mode:
Extend mode is used for the duplication of an object.
Take an image which you want to work with. Here I want to move the tree in this image.
2.2 Apply On Image

Select Move Mode and set Structure and Color to 5.

Select the tree with Content Aware Move Tool.

Now, simply drag the selected area as shown in the image below.

You can see that the tree has been moved from right side to left side seamlessly.You can see that the tree has been moved from right side to left side seamlessly.

I hope you find this blog post very helpful while working with Patch Tool (J) in Photoshop. Let me know in comment if you have any question regarding Photoshop. I will reply you ASAP.
Got an Idea of Game Development? What are you still waiting for? Contact us now and see the Idea live soon. Our company has been named as one of the best Game Development Company in India.

I am game graphics designer at TheAppGuruz. I am designing graphics for 2d Games. Here I am sharing information about 2d graphics designing tips and tricks.
Circular Timer Using NGUI in Unity
