Be patient..... we are fetching your source code.
Objective
This blog post teaches how to parse XML data in iOS. Here, you can parse XML file or XML file link with NSXMLParser Delegate methods.
The following steps provides easy way to pass XML data in iOS.
Follow the Step 1 (given below) to get started and go through all the steps for creating application and run it successfully.
Step 1 Setup Environment
In this blog we use higher version of Xcode but, you can also used lower version which supported Objective-C because demo example gives idea about how to do XML parsing in iOS objective C. You can also get idea about how to perform XML parsing in Swift by referring our blog named XML Parsing using NSXMLParse in Swift. So, open Xcode.
It following screen will appear:
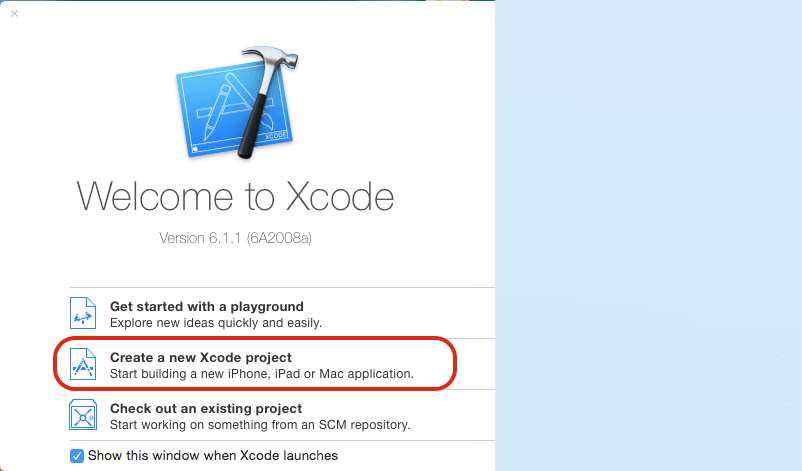
To create a new Xcode project select option Create a new Xcode project. It appears a Choose a template for your project dialog box as shown in given figure.
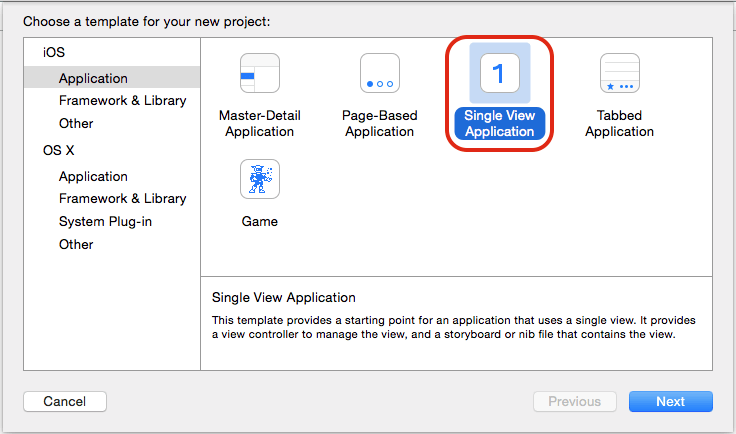
From the dialog box select Single View Application option and press next button.
It appears following screen:
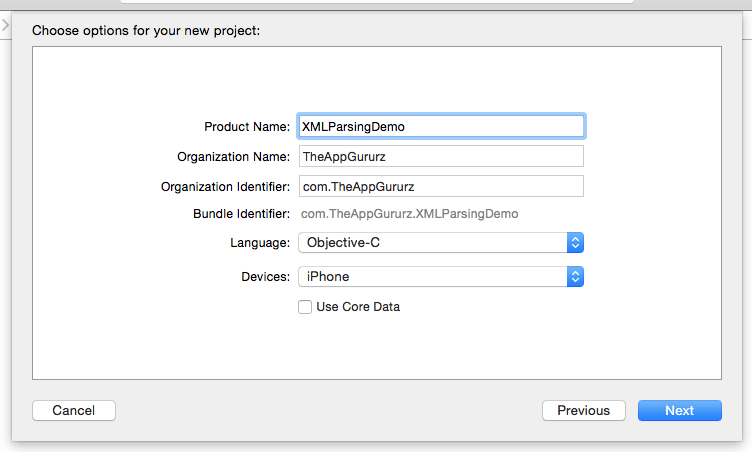
The above screen contains number of fields:
- Product Name
- Organization Name
- Company Identifier
- Bundle Identifier
- Class Prefix
User has to provide basic information into specific field, which is very helpful to create a new project. Here, make sure that your Language must be Objective-C for this application project. Also it includes list of devices for which you want to develop application (iPhone/iPad). If you want to develop an application for both then simply select option Universal. After giving appropriate application name press next button.
Here, we gave XMLParsingDemo as Product Name. Now directory dialog box will appear. Select the directory for your new project from directory dialog box where exactly you want to save your application and select Create Button.
Step 2 List of main files of your project
List of main files of your project The main files are given below screen that is generated when you have created your application. By implementing code in following files you can perform various operations to the application.
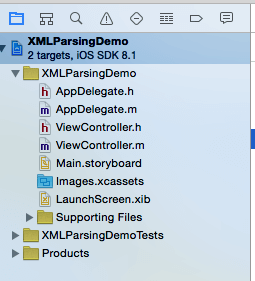
Here, first we have to delete default ViewController from Main.storyboard and ViewController.h & ViewController.m file from the project navigation bar. (Right side bar).
Step 3 Create new Objective-C (.h & .m file) file in your project
Now, Right Click on Project XMLParsingDemo >> New File >> Cocoa Touch Class >> Next
Following screen will appear:
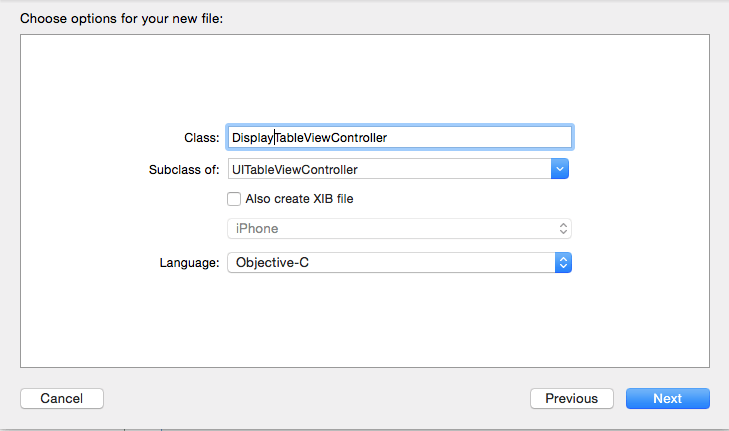
Here, give class name DisplayTableViewController and must Select subclass for TableView in iOS is UITableViewController and Click Next. Now, store your file where you want to save and finally click on Create button.
Now, your project Navigation looks like below:
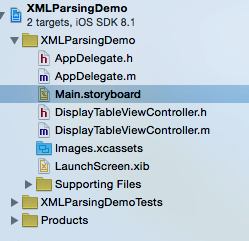
Here, two new file DisplayTableViewController.h & DisplayTableViewController.m file are created which shown in above screen.
Step 4 Create Objective-C (.h & .m file) file in your project
Now, click on Main.storyboard and Connect your DisplayTableViewController file to the TableViewController for that clcik TableViewController, open Utility window & choose Identity Inspector (3rd section from left) which shown in below:
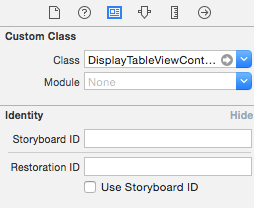
Now, Select TableViewController cell and open Utility window for cell and choose Attributes Inspector(4th section from left). And make below changes:
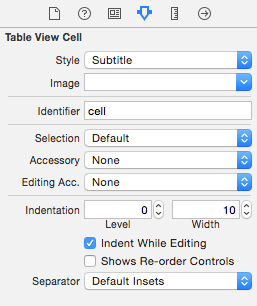
Here, major change is Give Style Subtitle, Identifier cell which is later used on our code.
Step 5 Code for .h file of TableView
Now, Write a Code below the comment section in DisplayTableViewController.h header file
For NSXMLParser method, first of all we will initialized NSXMLParserDelegate in .h file between ‘<’ & ‘>’ symbol like:
@interface DisplayTableViewController : UITableViewController <NSXMLParserDelegate>
Now, make some property which we want to used during the parsing process in .h file using @property:
@property (nonatomic, strong) NSMutableDictionary *dictData;
@property (nonatomic,strong) NSMutableArray *marrXMLData;
@property (nonatomic,strong) NSMutableString *mstrXMLString;
@property (nonatomic,strong) NSMutableDictionary *mdictXMLPart;
Step 6 Code for .m file of TableView
Now, Write a Code below the comment section in DisplayTableViewController.m implementation file,
1) Synthesize property which we are created in .h file below the @implementation
DisplayTableViewController line which looks like:
- @synthesize marrXMLData;
- @synthesize mstrXMLString;
- @synthesize mdictXMLPart;
2) Now, create a new funciton for XMLParsing with name startParsing using below code:
- (void)startParsing
{
}
Now, initialize NSXMLParser in this function , set parser delegate and start parsing with below code:
- (void)startParsing
{
NSXMLParser *xmlparser = [[NSXMLParser alloc] initWithContentsOfURL:[NSURL URLWithString:@"http://images.apple.com/main/rss/hotnews/hotnews.rss#sthash.TyhRD7Zy.dpuf"]];
[xmlparser setDelegate:self];
[xmlparser parse];
if (marrXMLData.count != 0) {
[self.tableView reloadData];
}
}
Here, link http://images.apple.com/main/rss/hotnews/hotnews.rss#sthash.TyhRD7Zy.dpuf which provide XML data. So, we called NSXMLParser with above link.
When [xmlparser parse]; line will get executed, NSXMLParserDelegate methods will work step by step, read whole XML data and store it into marrXMLData array. After reading full XML file, control again moves to [xmlparser parse]; line and execute code following that line which is used for reloading TableView data with marrXMLData array.
3) Now, implement NSXMLParserDelegate Method in .m file.
We write 3 methods of NSXMLParserDelegate which is given below:
- (void)parser:(NSXMLParser *)parser didStartElement:(NSString     *)elementName namespaceURI:(NSString *)namespaceURI qualifiedName:(NSString *)qName attributes:(NSDictionary *)attributeDict;
{
}

- (void)parser:(NSXMLParser *)parser foundCharacters:(NSString *)string;
{
}

- (void)parser:(NSXMLParser *)parser didEndElement:(NSString *)elementName namespaceURI:(NSString *)namespaceURI qualifiedName:(NSString *)qName;
{
}
Now, write code in all 3 methods step by step:
6.1 Code for didStartElement Method
- (void)parser:(NSXMLParser *)parser didStartElement:(NSString *)elementName namespaceURI:(NSString *)namespaceURI qualifiedName:(NSString *)qName attributes:(NSDictionary *)attributeDict;
{
if ([elementName isEqualToString:@"rss"]) {
marrXMLData = [[NSMutableArray alloc] init];
}
if ([elementName isEqualToString:@"item"]) {
mdictXMLPart = [[NSMutableDictionary alloc] init];
}
}
6.2 Code for foundCharacters Method
- (void)parser:(NSXMLParser *)parser foundCharacters:(NSString *)string;
{
if (!mstrXMLString) {
mstrXMLString = [[NSMutableString alloc] initWithString:string];
}
else {
[mstrXMLString appendString:string];
}
}
6.3 Code for didEndElement Method
- (void)parser:(NSXMLParser *)parser didEndElement:(NSString *)elementName namespaceURI:(NSString *)namespaceURI qualifiedName:(NSString *)qName;
{
if ([elementName isEqualToString:@"title"]
|| [elementName isEqualToString:@"pubDate"]) {
[mdictXMLPart setObject:mstrXMLString forKey:elementName];
}
if ([elementName isEqualToString:@"item"]) {
[marrXMLData addObject:mdictXMLPart];
}
mstrXMLString = nil;
}
Step 7 Display data in TableView
Now, we will get all XML data into our NSMutableArray. So, fill UITableView with that data , UITableViewDelegate & UITableViewDatasource method implemented accordingly and code for display that data given below:
- (NSInteger)numberOfSectionsInTableView:(UITableView *)tableView
{
     return 1;
}

- (NSInteger)tableView:(UITableView *)tableView numberOfRowsInSection:(NSInteger)section
{
     return [marrXMLData count];
}

- (UITableViewCell *)tableView:(UITableView *)tableView cellForRowAtIndexPath:(NSIndexPath *)indexPath
{
     UITableViewCell *cell = [tableView dequeueReusableCellWithIdentifier:@"cell" forIndexPath:indexPath];

     cell.textLabel.text = [[[marrXMLData objectAtIndex:indexPath.row] valueForKey:@"title"] string     ByTrimmingCharactersInSet:[NSCharacterSet whitespaceAndNewlineCharacterSet]];
     cell.detailTextLabel.text = [[[marrXMLData objectAtIndex:indexPath.row] valueForKey:@"pubDate"     ] stringByTrimmingCharactersInSet:[NSCharacterSet whitespaceAndNewlineCharacterSet]];

     return cell;
}
If you are not able to understand above TableView DataSource & Delegate then first read our blog named Create UITableView Control in iOS
Step 8 Call NSXMLDelgate Method
Now, we must call startParsing function from viewDidLoad method to start parsing process.
So, viewDidLoad function looks like:
- (void)viewDidLoad
{
[super viewDidLoad];
[self startParsing];
}
Step 9 Build & Run Project
Now, build & run the project. For shortcut press cmd+b for build & cmd+r for run the project.

Wow, its build Successfully. And your final output looks like:
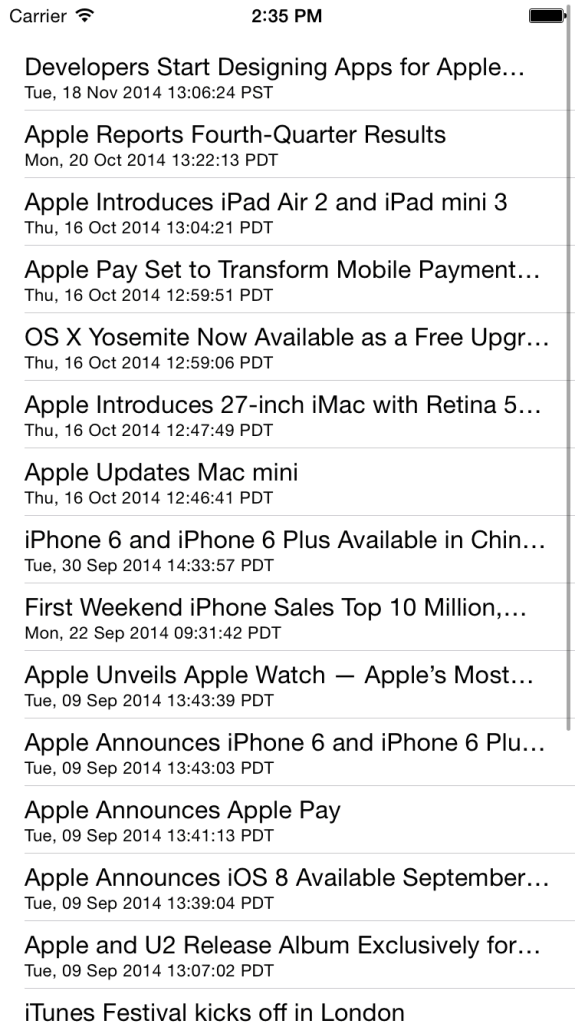
I hope you find this tutorial helpful. If you are facing any issues or have any questions regarding XMLParsing with NSXMLParser, please feel free to post a reply over here, I would be glad to help you.
Got an Idea of iPhone App Development? What are you still waiting for? Contact us now and see the Idea live soon. Our company has been named as one of the best iPhone App Development Company in India.

I am iOS Application Developer & I personally believed that When a programming language is created that allows programmers to program in simple English, it will be discovered that programmers cannot speak English.
iOS - AirDrop File Sharing
How to setup Laravel 4 on MAC
