Be patient..... we are fetching your source code.
Objective
Main objective of this blog post is to show you how to make an app in Swift Language and how to recognize gestures with Swift.
Follow the steps and make your own Gesture recognition successful.
What is Gesture?
Gesture is simply the user interaction with the screen.
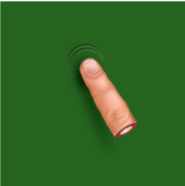
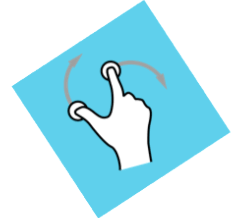
Types of Gestures with images shown as below:
- Tap Gesture
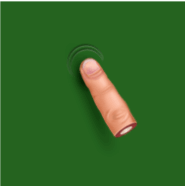
- LongPressed Gesture
- Rotation Gesture
- Pinch Gesture
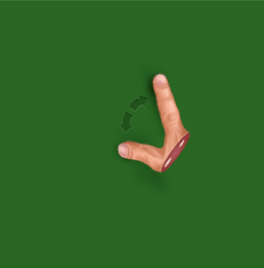
- Pan Gesture
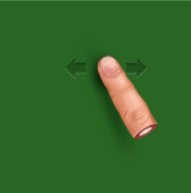
So, let’s start to recognize these gestures.
Step 1 Setup for Swift Project
Xcode’s latest version is an IDE which is used to create all the apps using Swift Language but it requires platform OS X latest version to be installed. Now, open Xcode Project.
The below screen will appear:
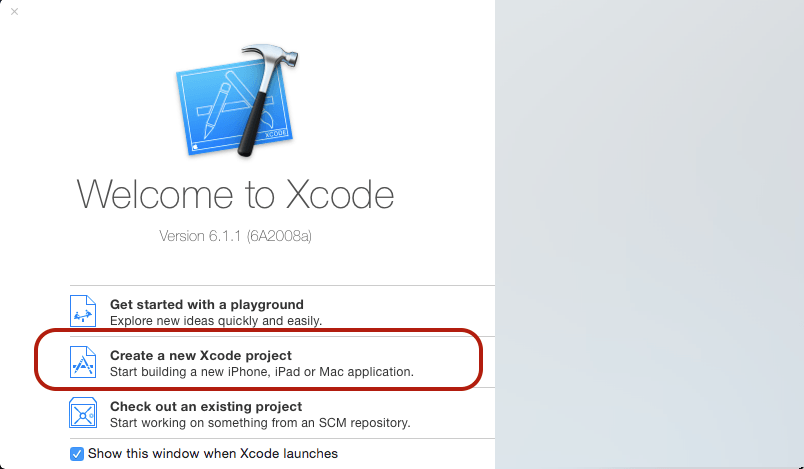
Select Create a new Xcode project option as shown below:
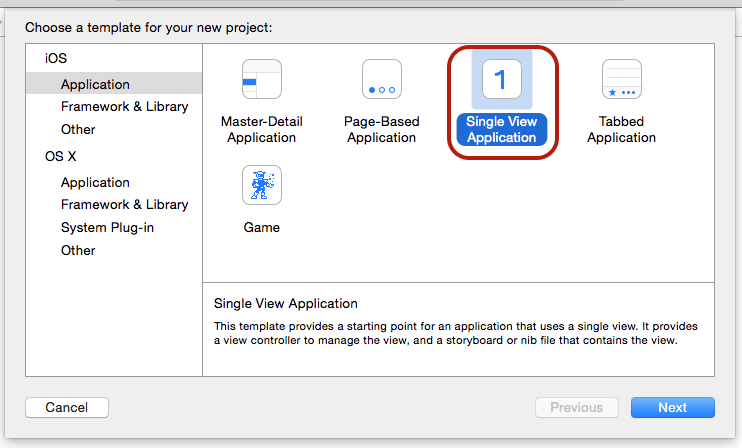
Now, select the Single View Application option and press on the next button.
It will give you a Project Detail screen as shown:
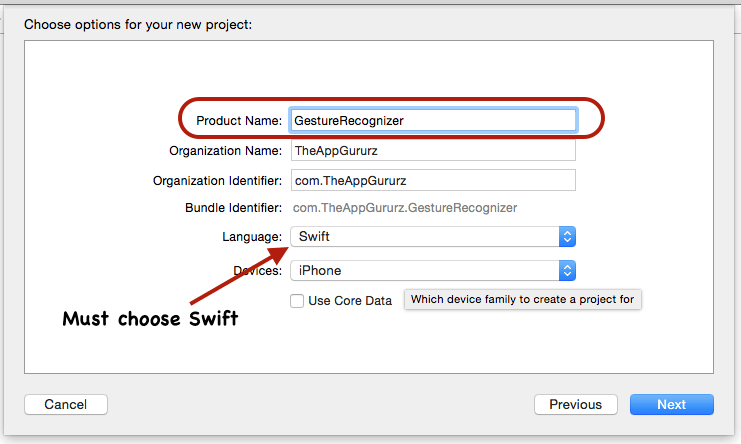
The above screen contains some fields. User must provide information in all the fields, Set app name GestureRecognizer or whatever you need to give and click on next.
Here, Language of the project to be selected must be Swift for Swift language and so on. Choose your project path and Press on Create to create project. Here, select your project.
Step 2 Main files of project
The main files that you’ll be able to see in your application are as shown below. Using these files you can implement any functionality.
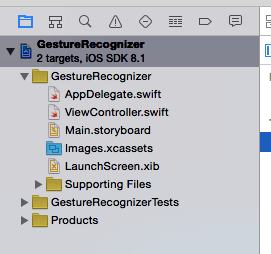
Step 3 Make UI for GestureRecognizer
Now, create a layout for Gesture Recognizer which is shown below. Put a simple view at the center of the screen and make connection with ViewController.swift file.
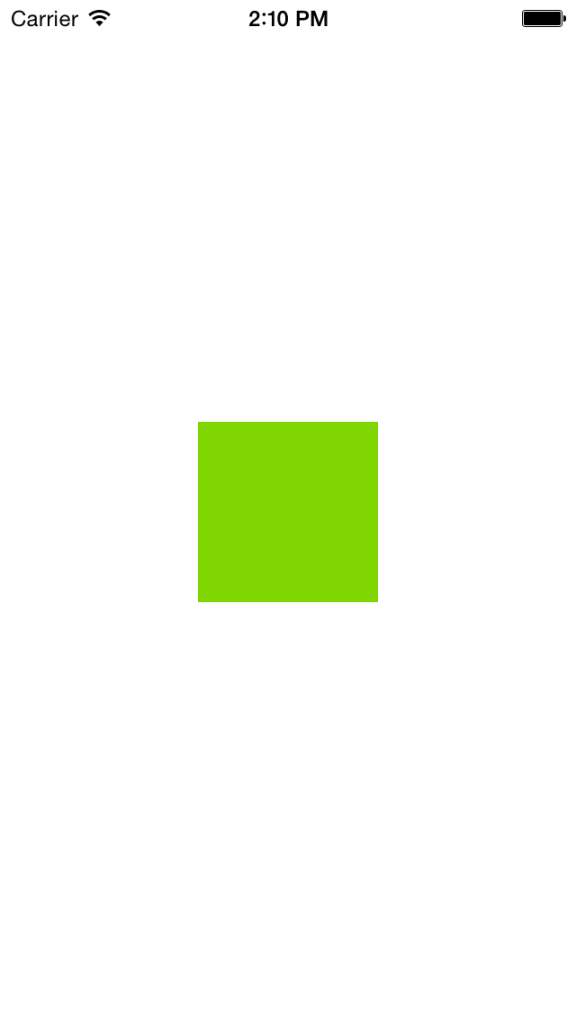
Attach this view with ViewController.swift project. Then, make IBOutlet for which your 1 line code looks like this:
@IBOutlet weak var vwBox: UIView!
Step 4 Make Local Variable
Now, for gesture recognition, use X & Y position of UIView whose name is vwBox.
Make first X & first Y variable using below code:
var firstX:Double = 0;
var firstY:Double = 0;
Step 5 Initialize Tap Gesture & Code
First gesture recognizer is Tap Gesture for which a method named initializeGestureRecognizer() is used and for Tap Gesture write the below given code:
funcinitializeGestureRecognizer()
{
//For TapGesture Recognization
var tapGesture: UITapGestureRecognizer = UITapGestureRecognizer(target: self, action: Selector("recognizeTapGesture:"))
vwBox.addGestureRecognizer(tapGesture)
}
Here, tapGesture variable is made with type UITapGestureRecognizer and give its target to self. Action selector method name recognizeTapGesture is used to handle tap and perform some actions on view or any functionality made in app.
In recognizeTapGesture() method write the code as given below:
func recognizeTapGesture(sender: UIGestureRecognizer)
{
var colorRed: CGFloat = CGFloat(rand()) / CGFloat(RAND_MAX)
var colorGreen: CGFloat = CGFloat(rand()) / CGFloat(RAND_MAX)
var colorBlue: CGFloat = CGFloat(rand()) / CGFloat(RAND_MAX)
vwBox.backgroundColor = UIColor(red: colorRed, green: colorGreen, blue: colorBlue, alpha: 1)
}
Here, in function recognizeTapGesture code is used to change the view background color which you have set on the tap gesture recognition. You can apply your own logic for this method. You can check this gesture by simply clicking on that view.
Step 6 Initialize LongPressedGesture & Code
Second gesture recoginzer is LongPressedGesture for which the same method is used initializeGestureRecognizer().
After TapGesture code write the below code for LongPressedGesture:
func initializeGestureRecognizer()
{
//For LongPressGesture Recoginzation
var longPressedGesture: UILongPressGestureRecognizer = UILongPressGestureRecognizer(target: self, action: Selector("recognizeLongPressedGesture:"))
vwBox.addGestureRecognizer(longPressedGesture)
}
Here, longPressedGesture variable is made with type UILongPressGestureRecognizer and give its target to self. Action Selector method name recognizeLongPressedGesture is used to handle long press and perform some actions on view or any functionality made in the app.
In recognizeLongPressedGesture() method write the code given below:
func recognizeLongPressedGesture (sender: UILongPressGestureRecognizer)
{
var colorRed: CGFloat = CGFloat(rand()) / CGFloat(RAND_MAX)
var colorGreen: CGFloat = CGFloat(rand()) / CGFloat(RAND_MAX)
var colorBlue: CGFloat = CGFloat(rand()) / CGFloat(RAND_MAX)
vwBox.backgroundColor = UIColor(red: colorRed, green: colorGreen, blue: colorBlue, alpha: 1)
}
Here, in function recognizelongPressedGesture code is used to change the view background color which you have set on long pressed gesture recognization. You can put any logic on your own for this method.
You can test this gesture by long clicking on the view.
Step 7 Initialize Rotation Gesture & Code
Third gesture recoginzer is Rotation gesture for which the same method is used initializeGestureRecognizer()
After LongPressedGesture code write the below given code for Rotation Gesture:
func initializeGestureRecognizer()
{
//For RotateGesture Recoginzation
var rotateGesture: UIRotationGestureRecognizer = UIRotationGestureRecognizer(target: self, action: Selector("recognizeRotateGesture:"))
vwBox.addGestureRecognizer(rotateGesture)
}
Here, rotateGesture variable is made with type UIRotationGestureRecognizer and give its target to self. Action Selector method name recognizeRotateGesture is used to handle rotation and perform some actions on view or any other functionality made in the app.
In recognizeRotateGesture() method write the code given below:
func recognizeRotateGesture(sender: UIRotationGestureRecognizer)
{
sender.view!.transform = CGAffineTransformRotate(sender.view!.transform, sender.rotation)
sender.rotation = 0
}
Here, in this function recognizeRotateGesture code is used to rotate the view which you have set on rotate gesture recognition. You can apply any logic of your own for this method.
You can test this gesture by pressing option key and rotate view using the mouse.
Step 8 Initialize Pinch Gesture & Code
Fourth gesture recoginzer is Pinch Gesture for which we use the same method initializeGestureRecognizer()
After Rotation Gesture code write the below code for Pinch Gesture:
func initializeGestureRecognizer()
{
//For PinchGesture Recoginzation
var pinchGesture: UIPinchGestureRecognizer = UIPinchGestureRecognizer(target: self, action: Selector("recognizePinchGesture:"))
vwBox.addGestureRecognizer(pinchGesture)
}
Here, pinchGesture variable is used with type UIPinchGestureRecognizer and give its target to self. Action Selector method named recognizePinchGesture is used to handle pinch and perform some actions on view or any other functionality made in the app.
In recognizePinchGesture() method write the code as given below:
func recognizePinchGesture(sender: UIPinchGestureRecognizer)
{
sender.view!.transform = CGAffineTransformScale(sender.view!.transform,
            sender.scale, sender.scale)
sender.scale = 1
}
Here, in function recognizePinchGesture code is used to put pinch in the view which you have set on pinch gesture recognition. You can apply logic of your choice for this method. You can test this gesture by pressing the option key and then pinching the view (Zoom in / Zoom out) using the mouse.
Step 9 Initialize Pan Gesture & Code
Our fifth gesture recognizer is Pan gesture for which the same method initializeGestureRecognizer() is used.
After Pinch Gesture code write the below given code for Pan Gesture:
func initializeGestureRecognizer()
{
//For PanGesture Recoginzation
var panGesture: UIPanGestureRecognizer = UIPanGestureRecognizer(target: self, action: Selector("recognizePanGesture:"))
panGesture.minimumNumberOfTouches = 1
panGesture.maximumNumberOfTouches = 1
vwBox.addGestureRecognizer(panGesture)
}
Here, panGesture variable is used with type UIPanGestureRecognizer and give its target to self. Action Selector method is created named recognizePanGesture to handle pan or moving activity and perform some actions on view or any other functionality made in the app.
Here, by default maximum & minimum number of touches is 1 for pan (moving object) gestures.
In recognizePanGesture() method write the code given below:
func recognizePanGesture(sender: UIPanGestureRecognizer)
{
var translate = sender.translationInView(self.view)
sender.view!.center = CGPoint(x:sender.view!.center.x + translate.x,
            y:sender.view!.center.y + translate.y)
sender.setTranslation(CGPointZero, inView: self.view)
}
Here, in function recognizePanGesture code is used for pan or moving the view which you have set on pan gesture recognition. You can apply your logic for this method.
You can test this gesture by clicking on the object and then moving it around.
Step 10 Final method call from viewDidLoad()
Now, call initializeGestureRecognizer() method from viewDidLaod() function which looks like this:
override func viewDidLoad()
{
super.viewDidLoad()
self.initializeGestureRecognizer()
}
Your final initializeGestureRecognizer() looks like this:
func initializeGestureRecognizer()
{
        //For TapGesture Recognization
        var tapGesture: UITapGestureRecognizer = UITapGestureRecognizer(target: self, action: Selector("recognizeTapGesture:"))
        vwBox.addGestureRecognizer(tapGesture)
        //For LongPressGesture Recoginzation
        var longPressedGesture: UILongPressGestureRecognizer = UILongPressGestureRecognizer(target: self, action: Selector("recognizeLongPressedGesture:"))
        vwBox.addGestureRecognizer(longPressedGesture)
        //For RotateGesture Recoginzation
        var rotateGesture: UIRotationGestureRecognizer = UIRotationGestureRecognizer(target: self, action: Selector("recognizeRotateGesture:"))
        vwBox.addGestureRecognizer(rotateGesture)
        //For PinchGesture Recoginzation
        var pinchGesture: UIPinchGestureRecognizer = UIPinchGestureRecognizer(target: self, action: Selector("recognizePinchGesture:"))
        vwBox.addGestureRecognizer(pinchGesture)
        //For PanGesture Recoginzation
        var panGesture: UIPanGestureRecognizer = UIPanGestureRecognizer(target: self, action: Selector("recognizePanGesture:"))
        panGesture.minimumNumberOfTouches = 1
        panGesture.maximumNumberOfTouches = 1
        vwBox.addGestureRecognizer(panGesture)
}
Now, build the App (cmd + b) & Run (cmd + r).
The app and you’ll get something like this:
Wow, its build Successful.
Finally, your all 5 gestures are now recognized on the view. You can test all the 5 gestures at a time on the screen.
I hope you find this blog very helpful while working with Gesture Recognizer using Swift. Let me know in comment if you have any question regarding swift. I will reply you ASAP.
Got an Idea of iPhone App Development? What are you still waiting for? Contact us now and see the Idea live soon. Our company has been named as one of the best iPhone App Development Company in India.

I am iOS Application Developer & I personally believed that When a programming language is created that allows programmers to program in simple English, it will be discovered that programmers cannot speak English.
Add Random Header Images to WordPress Blog
