Be patient..... we are fetching your source code.
Objective
Main objective of Twitter Integration tutorial is to explain how to integrate Twitter with Android Application.
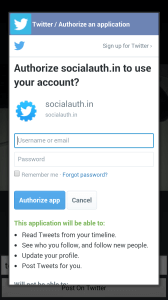
You will get Final Output:

In this blog, I’ll integrate Twitter in one demo app and post an image from that app to my twitter account.
Following are the steps to Integrate Twitter in your Android application:
Step 1 Create an App on Twitter.com
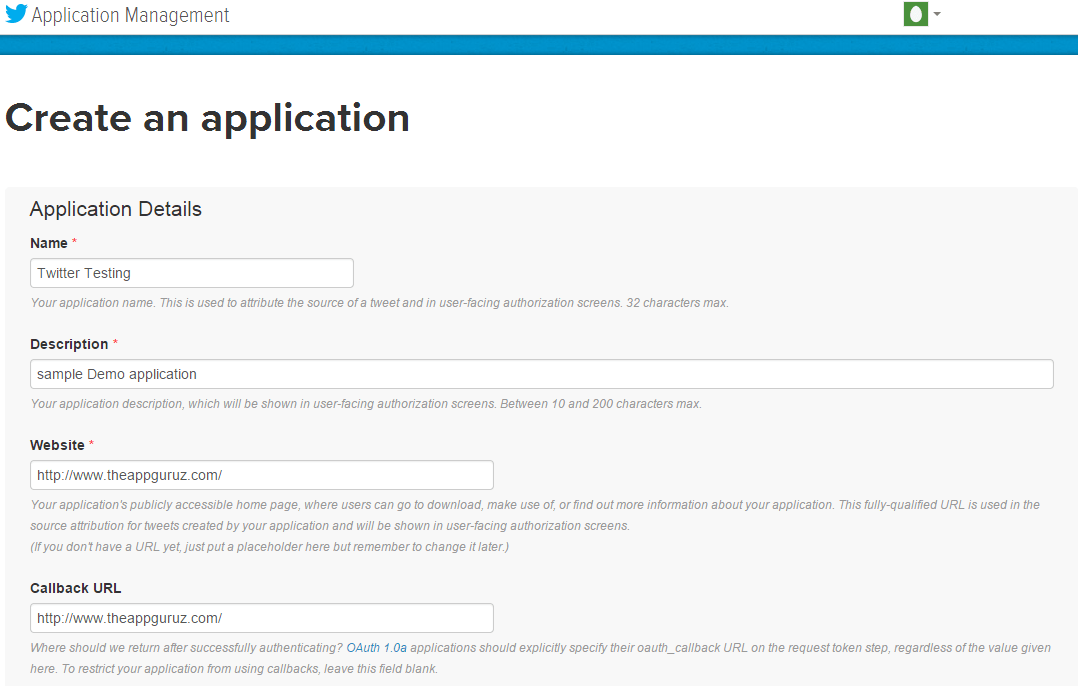
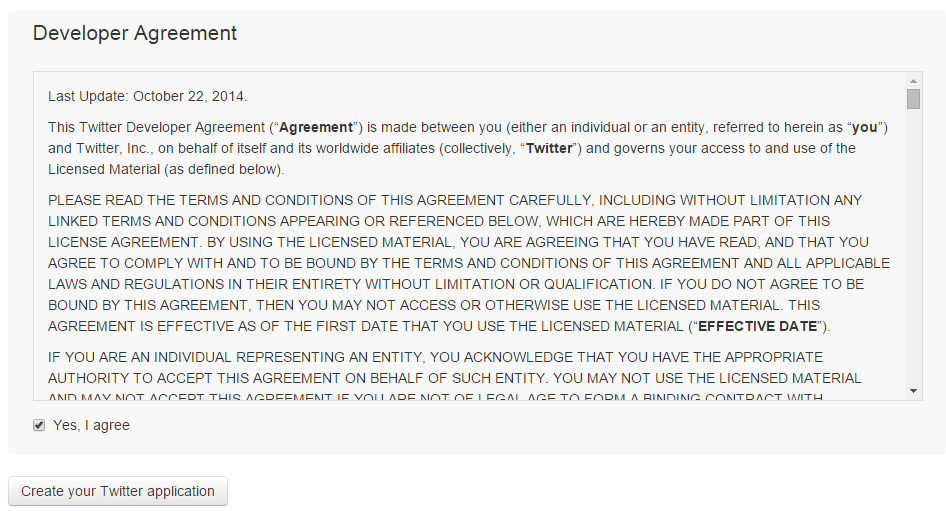
First of all you have to create the twitter application id & secrets. Links is given below. When you open this link page is look link below snapshot. Provide necessary information to create your ID.
Step 2 Setting Access Level
After creating your Twitter App. Now you have to set the access level for your app. There are three options for setting level.
| Read Only | Select this permission if you want to only read the data and don’t want to post anything. |
| Read & Write | Select this permission if you want to read as well as post the data. |
| Read, Write & Acess direct messages | This permission will allow an application to read or delete a user's direct messages. |

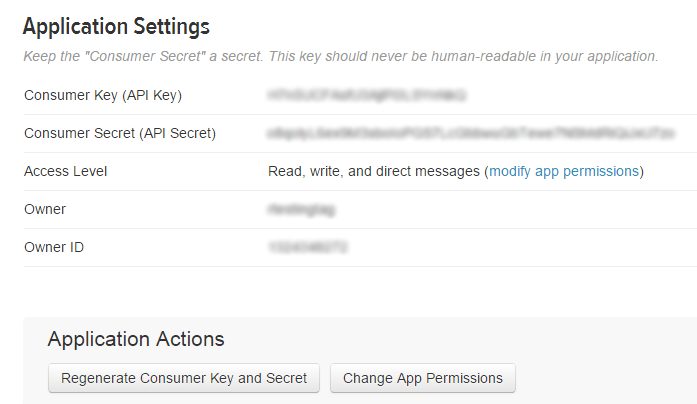
Note: Copy this consumer Key and secret to somewhere for future use.
Step 3 Create an Android Project
After completing above steps. Open your Eclipse and Create new Android Application Project in Eclipse. Here path is given File >> New >> Android Application Project

Step 4 Create XML Layout
Now create xml layout in res folder with name activity_main.xml and create your custom xml file
<?xml version="1.0" encoding="utf-8"?>
<LinearLayout xmlns:android="http://schemas.android.com/apk/res/android"
    android:layout_width="match_parent"
    android:layout_height="match_parent"
    android:orientation="vertical" >

    <LinearLayout
        android:layout_width="match_parent"
        android:layout_height="0dp"
        android:layout_weight="1"
        android:gravity="center"
        android:orientation="vertical" >

        <ImageView
            android:id="@+id/ivTwitterImageChoose"
            android:layout_width="wrap_content"
            android:layout_height="wrap_content"
            android:src="@drawable/ic_launcher" />
    </LinearLayout>

    <LinearLayout
        android:layout_width="match_parent"
        android:layout_height="wrap_content"
        android:orientation="vertical" >

        <EditText
            android:id="@+id/etTwitterAuthorize"
            android:layout_width="match_parent"
            android:layout_height="wrap_content"
            android:ems="10" >

            <requestFocus />
        </EditText>
    </LinearLayout>

    <Button
        android:id="@+id/btnTwitterAuthorize"
        android:layout_width="match_parent"
        android:layout_height="wrap_content"
        android:text="@string/btn_Post" />

</LinearLayout>
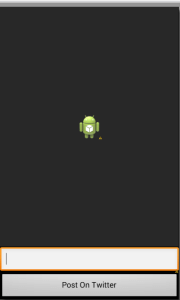
After write above code in file screen is look like:
Step 5 Integrate .jar files
You need to integrate two jar files in order to integrate Twitter in your project
- socialauth-4.4.jar
- socialauth-android-3.2.jar
You can download this .jar files from given link:
Step 6 Put .jar files
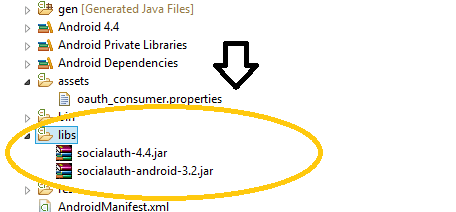
Put these .jar files in libs folder. Shows in the blow screenshot.
Step 7 Twitter Consumer Key
Referencing key and secret in the application After placing the social-auth.jar create oauth_consumer.properties file in asset folder and in this file set Twitter consumer key & secrets in it like below. From this file key is directly used by social auth library and we don’t need to give any static reference to it.
#twitter
twitter.com.consumer_key = "consumer_key"
twitter.com.consumer_secret = "consumer_secret"
Now open MainActivity.java file and put these two statements there
socialAuthAdapter = new SocialAuthAdapter(new ResponseListener(((BitmapDrawable)ivUploadImage.getDrawable()).getBitmap(),etMessage.getText().toString()));
socialAuthAdapter.addProvider(Provider.TWITTER, R.drawable.twitter);	socialAuthAdapter.authorize(MainActivity.this, Provider.TWITTER);
Step 8 ResponseListener class for Authorization
Create ResponseListener class. This class handles the authorization result which says whether the user is authorized or not.
There are 4 methods in the class, which does the following tasks:
- If authorized properly, then we get acknowledgement in onComplete() method.
- If Error occurred during authorization, then we get acknowledgement in onError() method.
- If User cancels the authorization dialog box, then we get acknowledgement in onCancel() method
- If user press back button of the device, then we get acknowledgement in onBack() method
private class ResponseListener implements DialogListener {
Bitmap bitmap;
String message;
public ResponseListener(Bitmap bitmap, String message) {
this.bitmap = bitmap;
this.message = message;
}

@Override
public void onComplete(final Bundle values) {
try {
socialAuthAdapter.uploadImageAsync(message, "The AppGuruz.png",
bitmap, 100, new UploadImageListener());
} catch (Exception e) {
e.printStackTrace();
}
}

@Override
public void onError(SocialAuthError error) {
if (pd != null && pd.isShowing())
Log.d("ShareTwitter", "Authentication Error: " + error.getMessage());
}

@Override
public void onCancel() {
Log.d("ShareTwitter", "Authentication Cancelled");
}

@Override
public void onBack() {
Log.d("ShareTwitter", "Dialog Closed by pressing Back Key");
}
}
Step 9 UploadImageListener Class
After getting the response of authorization from Twitter, call UploadImageListener to upload image and status message. UploadImageListener class uploads the image to user’s Twitter account.
private final class UploadImageListener implements
SocialAuthListener {

@Override
public void onError(SocialAuthError e) {
}

@Override
public void onExecute(String arg0, Integer arg1) {
Integer status = arg1;
try {
if (status.intValue() == 200 || status.intValue() == 201
|| status.intValue() == 204) {
Toast.makeText(MainActivity.this, "Image Uploaded",
Toast.LENGTH_SHORT).show();
} else {
Toast.makeText(MainActivity.this, "Image not Uploaded",
Toast.LENGTH_SHORT).show();
}

} catch (NullPointerException e) {
Toast.makeText(MainActivity.this, "Image not Uploaded",
Toast.LENGTH_SHORT).show();
}
}
}

Step 10 Check your Twitter Account
Finally you can check that your image and status message has been successfully posted on the Twitter Account.
Also check out following Android Integration:
I hope you found this blog helpful while integrating Twitter in your application. Let me know if you have any questions or concerns, please put a comment here and we will get back to you ASAP.
Got an Idea of Android App Development? What are you still waiting for? Contact us now and see the Idea live soon. Our company has been named as one of the best Android App Development Company in India.

I am professional Android application developer with experience of 1 years in Android Application Development. I worked with so many technology but android is the only one which interests me.
HTML5 Tutorial: SVG Shape Morphing
