Be patient..... we are fetching your source code.
Objective
Main Objective of this blog post is to give you an idea about how to create custom keyboard in iOS 8
Introduction:
iOS 8 comes with several exciting features in market. One of the most significant additions new features is custom keyboard. Apple has finally allowed third-party developers to make keyboard apps for iOS. In this tutorial we create a demo application in swift that adds a custom keyboard.
Following steps explains how to add custom keyboard in targeted application and how to add buttons in it as per our requirement.
Step 1 Create Single View Application
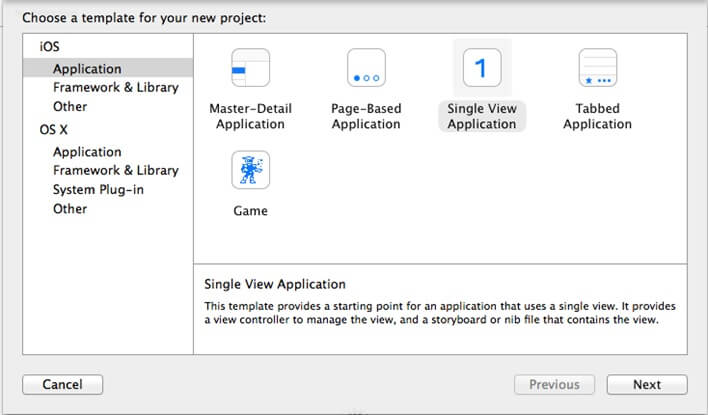
Open Xcode 6 and create one new project with single view application template as shown in below figure.
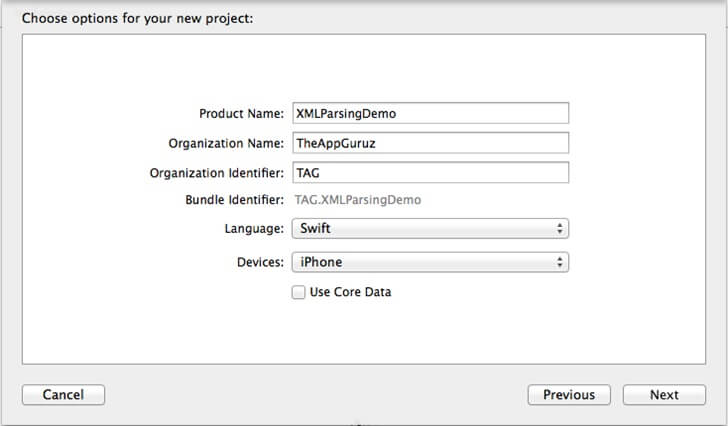
In the next step enter CustomKeyboardDemo as a product name and also select swift as a language as shown in below figure.
Step 2 Add Keyboard Target to your Application
Add keyboard target from File >> New >> Target Select Application Extension from iOS options then select CustomKeyboard and click on Next.
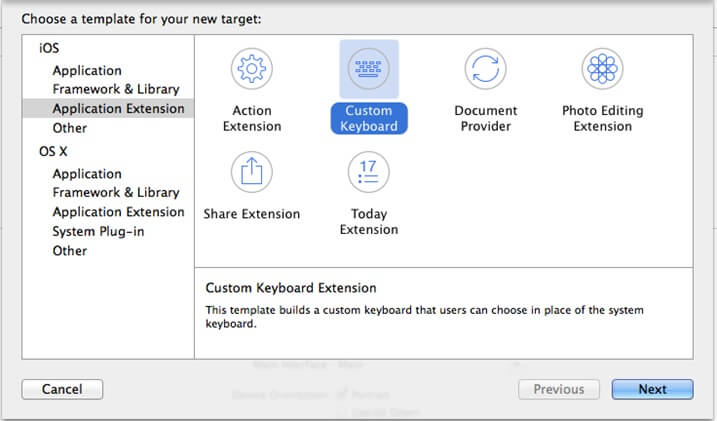
Give Product name as CustomKeyboard and then click Finish.
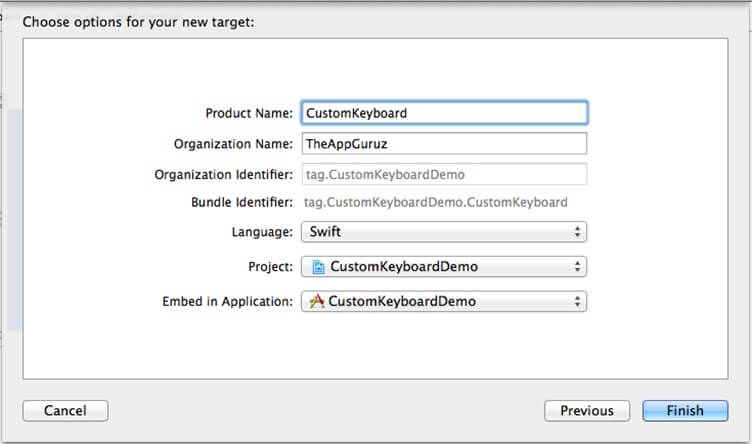
Now custom keyboard target is added in your application. You can find a folder named CustomKeyboard and inside that KeyboardViewController.swift file.
Step 3 Add Nib file and design your keyboard
Add nib file from File >> New >> File
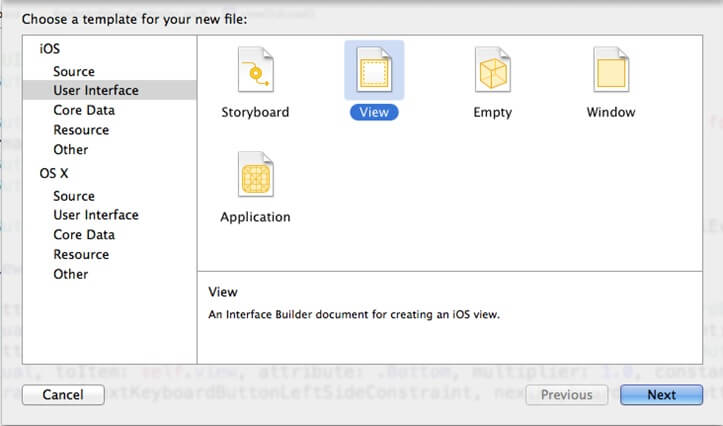
Select UserInterface from iOS options then select View and click on Next.
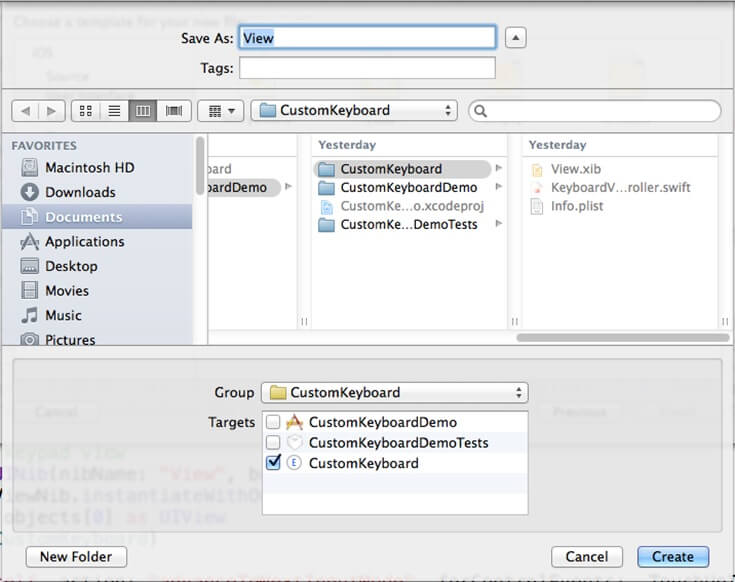
Give nib file name and click Create. Make sure that target should be CustomKeyboard.
Change your view size to 320 X 216. Design nib file as per your requirement. In this example I have added two buttons with title Hii and Good Morning!!
Also added a button named Next which must be there in any custom keyboard to switch to default keyboard or other keyboard.
Set class of view controller as KeyboardViewController in File’s owner. Declare an object of UIView as below and link it with your main view in nib file.
@IBOutlet var vwCustomKeyboard: UIView!
Also declare an object of UIButton as below and link it with next button in nib file.
@IBOutlet var btnNext: UIButton!
Now create an object of UINib and get its main view and add that view in self.view
var mainViewNib = UINib(nibName: "View", bundle: nil)
let objects = mainViewNib.instantiateWithOwner(self, options: nil)
vwCustomKeyboard = objects[0] as UIView
self.view.addSubview(vwCustomKeyboard)
Declare an action method of buttons of keyboard to handle action when keyboard key press. Link that method with all your keyboard keys except next keyboard button. Create UITextDocument proxy object and call its insertText method to insert text from keyboard to your UITextField or UITextArea.
 @IBAction func btnClicked(sender: AnyObject)
    {
        var proxy = textDocumentProxy as UITextDocumentProxy
        if sender.tag == 100 {
            proxy.insertText(" ")
        } else if sender.tag == 200 {
            proxy.insertText("\n")
        } else {
            proxy.insertText(sender.titleForState(UIControlState.Normal)!)
        }
    }
Add target to next keyboard button as default next keyboard button have
btnNext.addTarget(self, action: "advanceToNextInputMode", forControlEvents: .TouchUpInside)
Now you can use your custom keyboard but you have to run this project and then add keyboard from settings as below.
Go to settings >> General >> Keyboard >> Keyboards >> Add New Keyboard >> Select your keyboard from list.
Output:
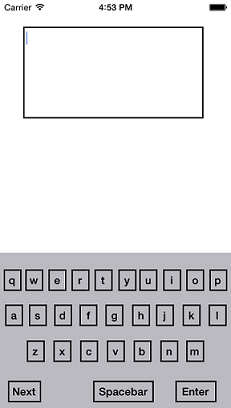
I hope you found this blog helpful while Creating Custom Keyboard for iOS8. Let me know if you have any questions or concerns regarding iOS, please put a comment here and we will get back to you ASAP.
Got an Idea of iPhone App Development? What are you still waiting for? Contact us now and see the Idea live soon. Our company has been named as one of the best iPhone App Development Company in India.

I am iOS developer with an aspiration of learning new technology and creating a bright future in Information Technology.
How to use SQLite Database in Swift
Integrate Objective C file in Swift
