Be patient..... we are fetching your source code.
Objective
The main objective of this blog post is to describe the basics of UICollectionView and use of its methods to build a simple grid like layout.
Introduction to UICollectionView:
The main idea behind UICollectionView is to develop grid like layouts. If you have no idea about the grid layouts then look at your built-in photos app. All photos are arranged in grid. You can also create this type of layout in your project using UICollectionView.
The UICollectionView is same as UITableView. UITableView manages a collection of data items and displays them on the screen in a single-column layout whereas UICollectionView class offers developers the flexibility to present items using customizable layouts.
UICollectionView has three components:
- Cell:
It is an instance of UICollectionViewCell. It represents a single item in data collection. If UICollectionViewFlowLayout is used, the cells are arranged in a grid-like format. We will mainly focus on this element in the tutorial. - Supplementary views It is optional and usually used to implement the header or footer views of the sections.
- Decoration views It is another type of supplementary view but for decoration purpose only. It is not related to data collection. We create decoration views to enhance the visual appearance of the collection view.
Let’s create one simple app, which shows use of UICollectionView:
Step 1 Create Xcode Project
Create a new xCode project and select single view application and name it as CollectionViewDemo.
Step 2 Design UI
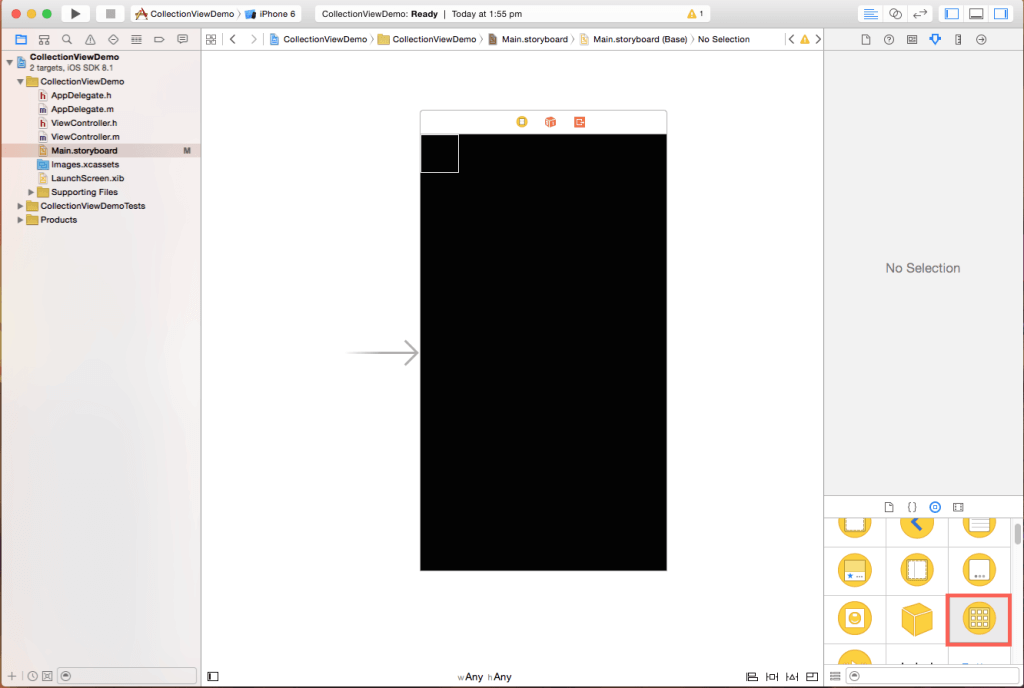
Go to Main.Storyboard and delete the default view controller and add one new Collection View controller from the object library.
It will look like this:
Step 3 Set reuseIdentifier for Cell
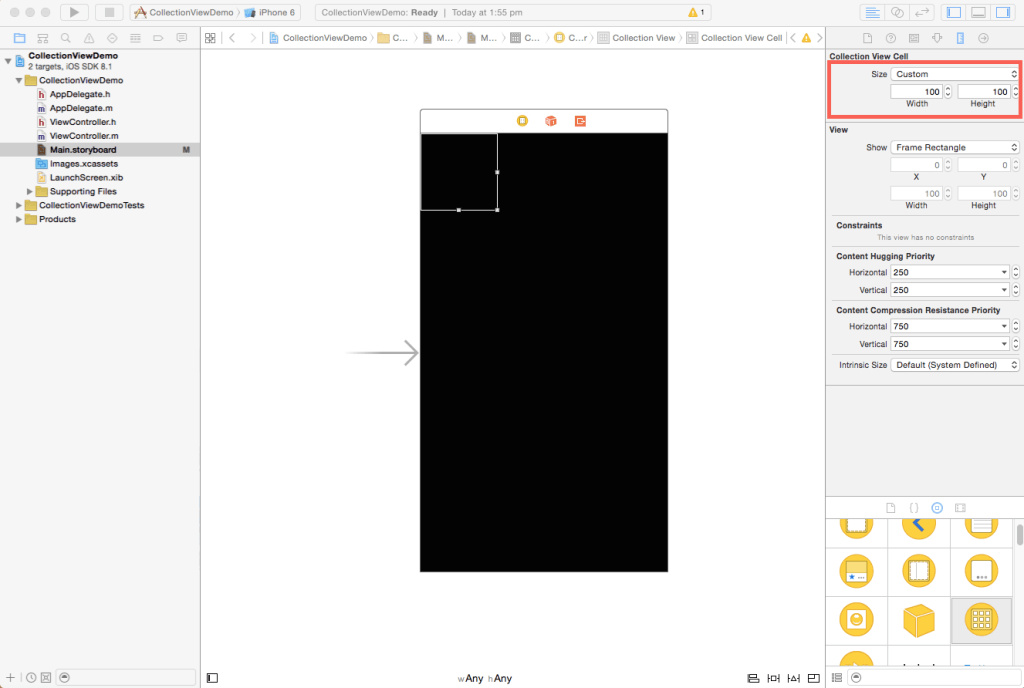
The square icon in the view controller represents the cell. Select the cell to change the size of the cell. First go to size inspector in right panel and select the custom attribute for size and then change the size from 50 to 100 for both height and width.
Step 4 Design Custom cell
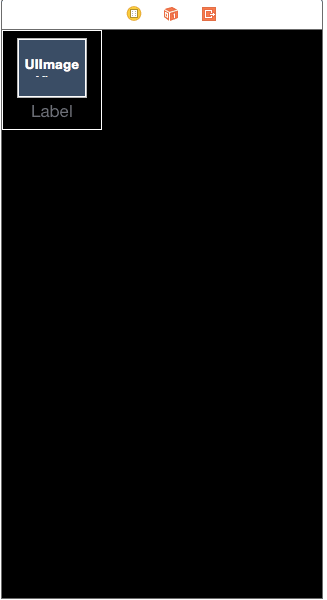
Now add one image view controller and label it into the cell and arrange them as shown:
Step 5 Attach cell with Custom class
Make a new class which is a subclass of UICollectionViewCell and name it as CustomCell. Like UITableViewCell here we use UICollectionViewCell to customize the cell of UICollectionView. Now, select the cell from the storyboard and change its class to CustomCell from default class and set the reuseidentifier as cell.

Step 6 Create CollectionViewController class
Again make a new class which is a subclass of UICollectionViewController and name it as CollectionViewController. Select view controller in the storyboard and change its class from default to this new one. Delete the existing viewcontoller.m and viewcontroller.h files.
Step 7 Give Datasource & Delegate to class
To use the methods of UICollectionView you have to implement the UICollectionViewDataSource in your CollectionViewController.h file. This protocol defines data source methods for providing the data to the collection view.
You have to implement the collectionView:numberOfItemsInSection and collectionView:cellForItemAtIndexPath methods.
Step 8 Create array for Image data
First create a mutable array to store objects for cell and one mutable dictionary to hold data for each object in your CollectionViewController.h file.
After that create the image objects as given in the sample source code:
@interface CollectionViewController : UICollectionViewController

@property (nonatomic,strong) NSMutableArray *marrImages;
@property (nonatomic,strong) NSMutableDictionary *mdictImageData;

@end
Step 9 Delegate & Datasource methods
Now, make the outlets for imageView and label them respectively.
@interface CustomCell : UICollectionViewCell

@property (weak, nonatomic) IBOutletUIImageView *ivCartoon;
@property (weak, nonatomic) IBOutletUILabel *lblIndex;

@end
It is used to set the imageView and label from the array of image objects. For that import CustomCell.h file into your CustomViewController.h
Write the code to set these two properties in below method:
- (UICollectionViewCell *)collectionView:(UICollectionView *)collectionView cellForItemAtIndexPath:(NSIndexPath *)indexPath
{
CustomCell *cell = [collectionView dequeueReusableCellWithReuseIdentifier:reuseIdentifierforIndexPath:indexPath];

    cell.lblIndex.text=[[marrImagesobjectAtIndex:[indexPath row]]valueForKey:@"Info"];

UIImage *image=[UIImageimageNamed:[[marrImagesobjectAtIndex:[indexPath row]]valueForKey:@"imageFile"]];

    [cell.ivCartoonsetImage:image];

return cell;
}
Step 10 Build & Run the app
Make sure you have imported all the image files used in the project. Now run your application.
It will look similar to what is given below:
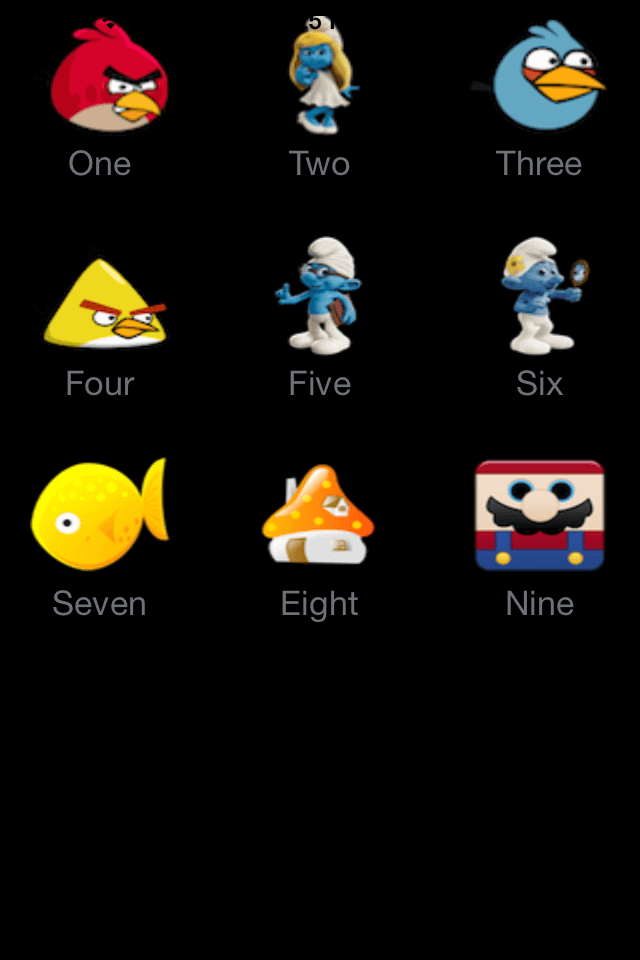
I hope you find this blog very helpful while working with Grid Layout Using UICollectionView. Let me know in comment if you have any question regarding UICollectionView. I will reply you ASAP.
Got an Idea of iPhone App Development? What are you still waiting for? Contact us now and see the Idea live soon. Our company has been named as one of the best iPhone App Development Company in India.

I am an iOS developer and I like to develop creative apps. I love to update my programming knowledge with new concepts and features which are continuously added in iOS.
PSD to HTML for Beginners
