
Be patient..... we are fetching your source code.
Objective
Main Objective of this blog post is to share information on how to create 2D animation sprites using Unity.
Step 1 Getting Started
First of all to get started with 2D animation, we need some graphics. We have a ready graphic available for you which you can download it from here.
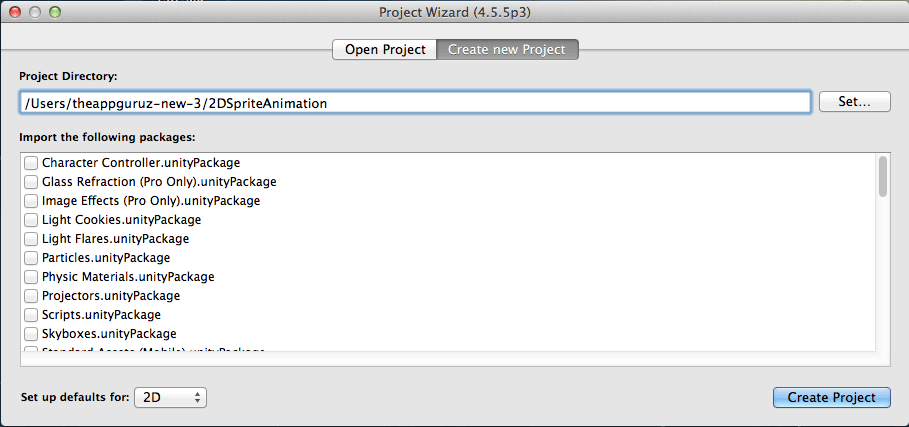
Let’s start a new Unity 2D project:
Open Unity and go to File >> New Project
Give the name 2DAnimation and make sure that you select 2D from the drop down.
Step 2 Import Zombie Graphics
Import Zombie Graphics into unity After creating the project, next step is to import zombie graphics into unity.
Downloading the zip file zombie.zip and unzip it on the desktop. You can import using different ways:
- Just drag the folder into unity Assets (its easy and my favorite).
- Copy the folder into 2DAnimation/Assets using finder (use explorer in windows).
- Use unity assets importer.
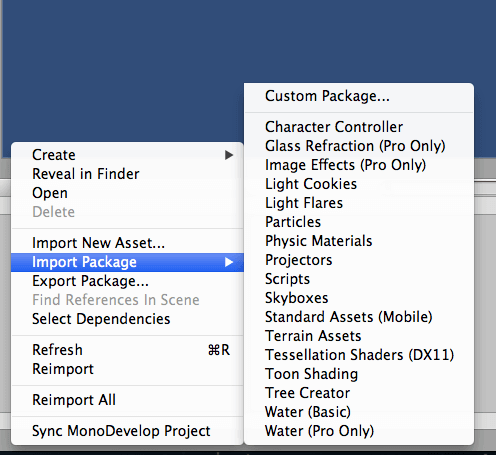
Now all the graphics are imported and it is ready to use.
You can change its property form inspector window:
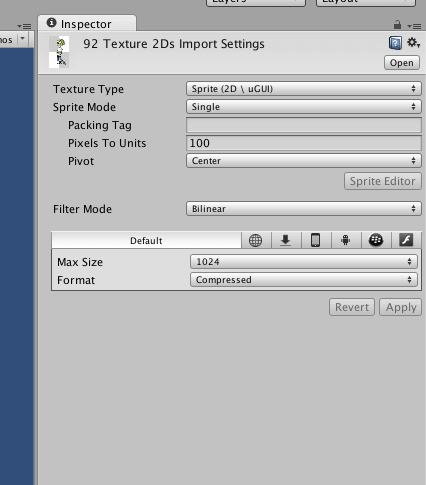
Step 3 Creating Animations
We have the following sprites for different animations.
| Walk frames | 1 - 42 |
| Attack frames | 43 - 60 |
| Idle frames | 61 - 76 |
| Die frames | 77 - 92 |
Select the first 42 sprites, which will make our zombie walk animation.
![]()
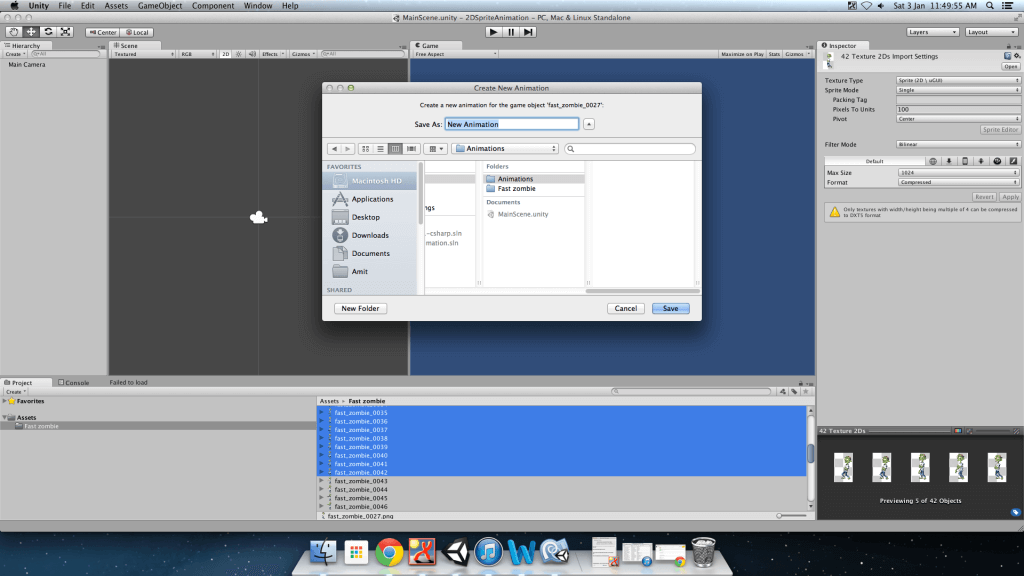
Once you have all of them selected, drag them onto the scene. Unity will prompt you to save the animation, so let’s give it a name Walk.
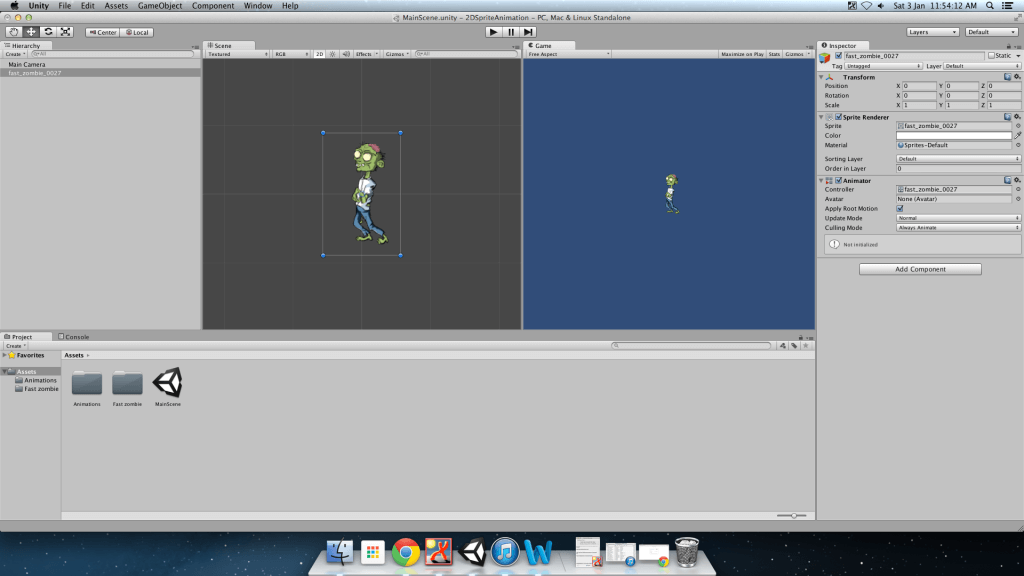
At the same time, Unity will create a Controller and a GameObject in the scene. We will come back to those in a second. For now, repeat this process for the next 3 sets of nine, and name them attack, idle and die respectively.
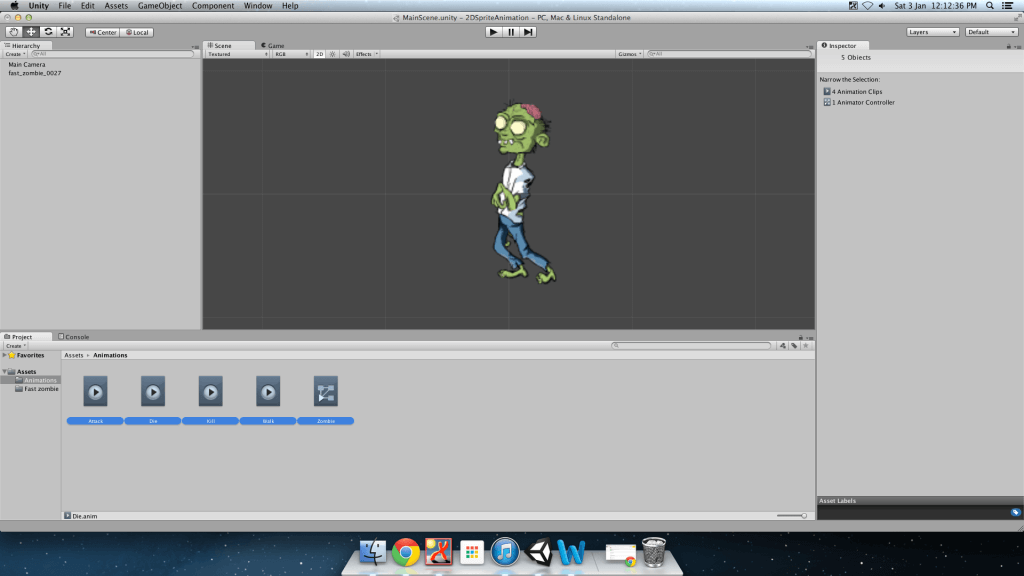
Once you have completed that, switch on to the assets window and check out all 4 animations and controllers.
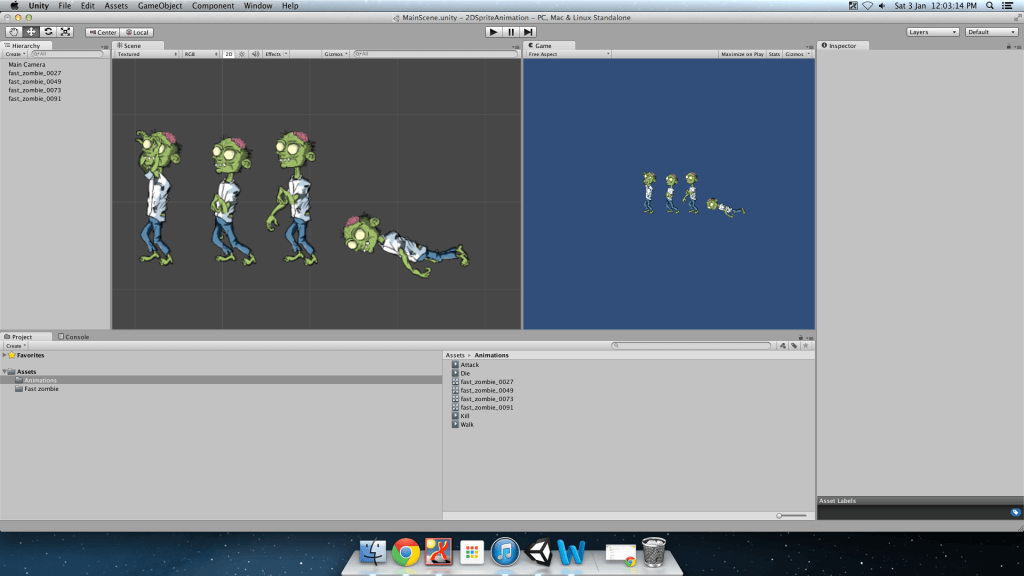
If you select one of the GameObject in the scene, the Inspector will show you the Components that are assigned to that GameObject. Observe that the last one is Animator property and in my case it is Controller property that is set to the fast_zombie_0027 object.
The Animator Component provides a connection from your GameObject to the AnimationController so that, the AnimationController can adapt changes in your game and provide it to the GameObject.
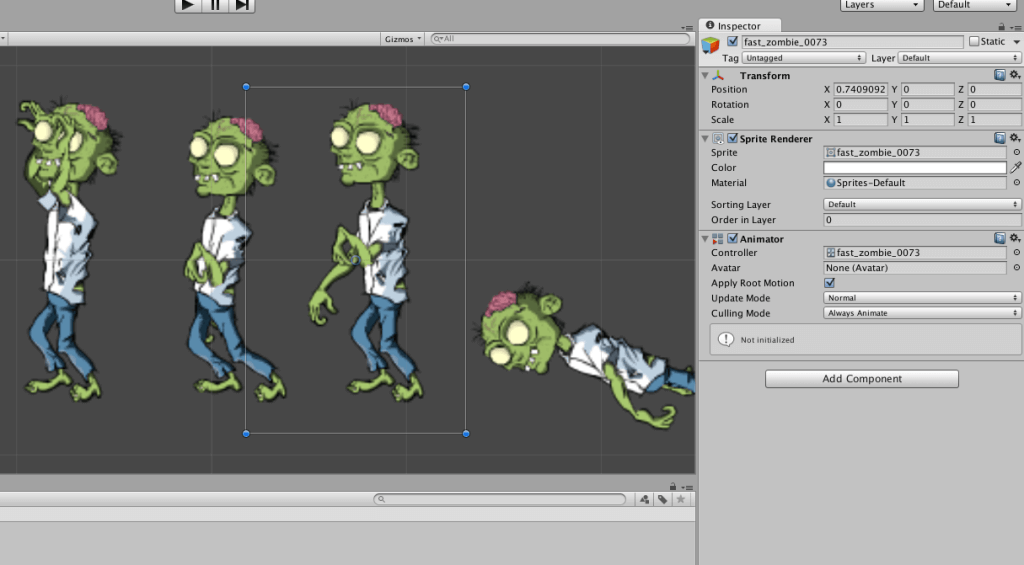
I’ll delete the other 3 GameObjects from the scene and rename the remaining one to just Zombie.
Deleting the GameObjects doesn’t delete the associated Animator Controller or Animation objects, which is good for us.
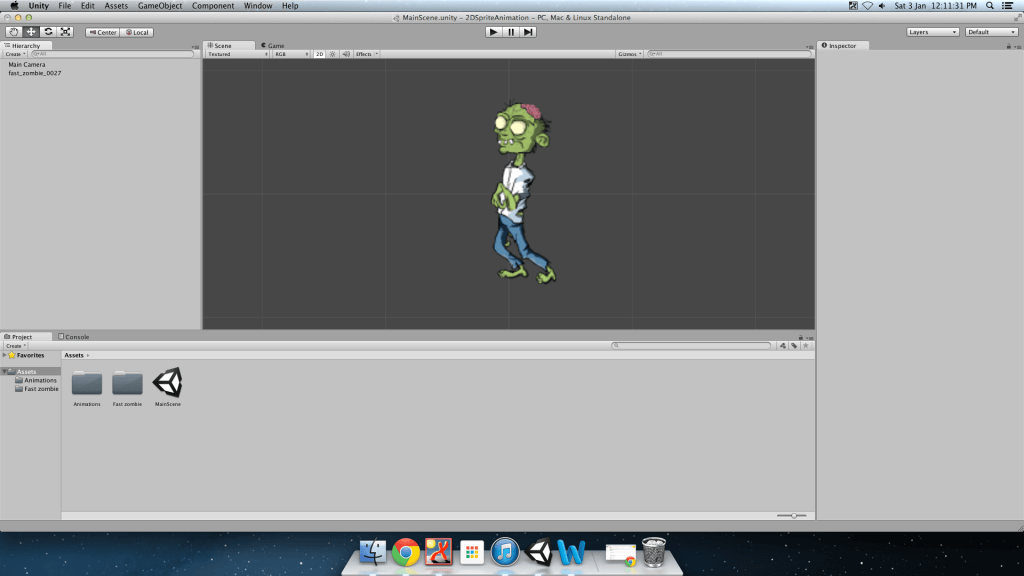
Let’s remove the extra Animation Controllers as well. Make sure you don’t delete the Controller that is currently connected to the GameObject. To see which controller is connected to the GameObject, click the Controller name in the Inspector panel.
Once you've removed the extra ones, rename the remaining one to Zombie or ZombieAnimatorController or whatever you like. Once you are done with that, you should have one GameObject, one Animation Controller and four animations.
Step 4 Zombie Animator Controller
Let’s open the ZombieAnimatorController to hook up the other three animations. Transitions are used to allow the controller to move from the current state to a new state or from current animation to new animation.
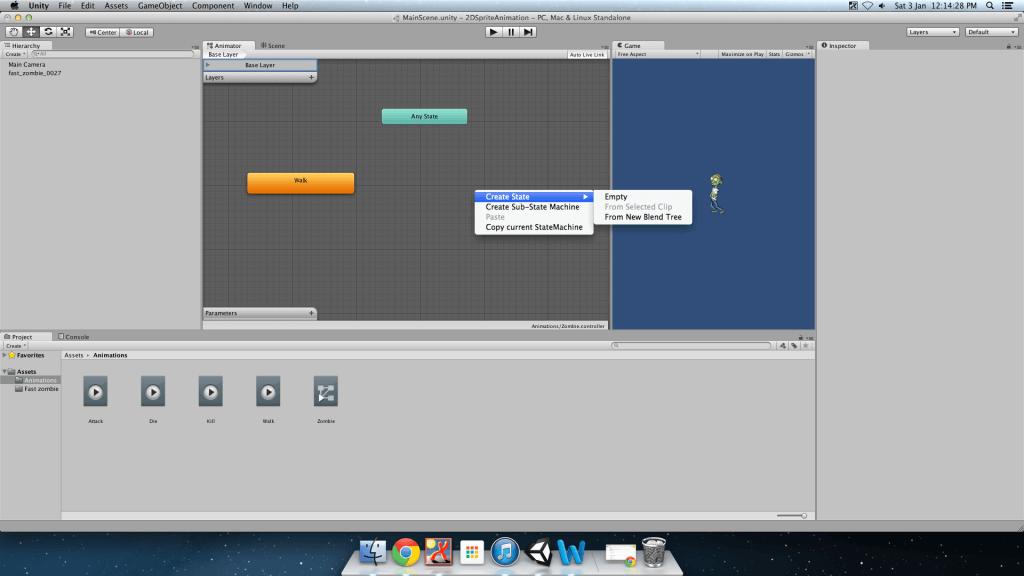
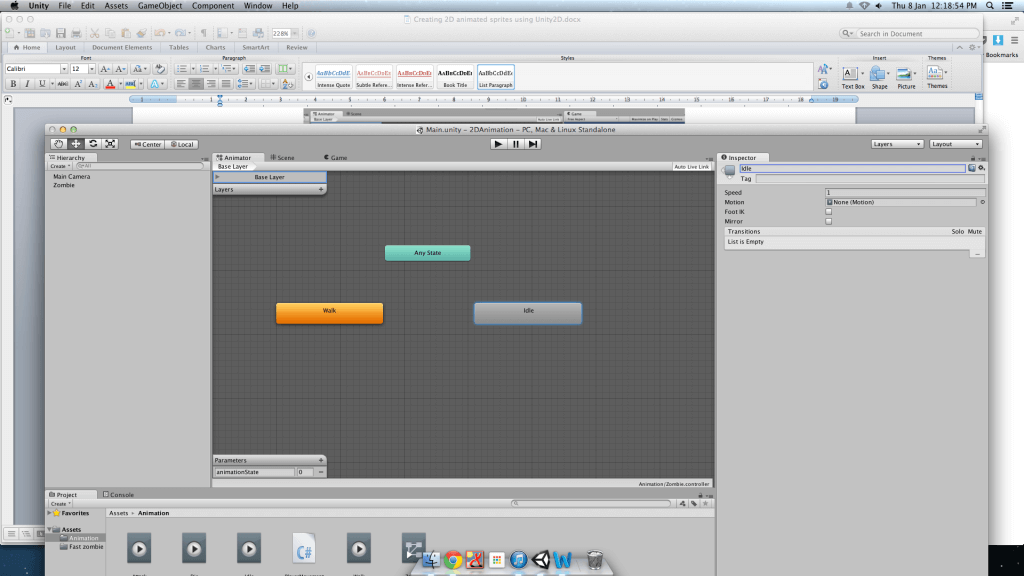
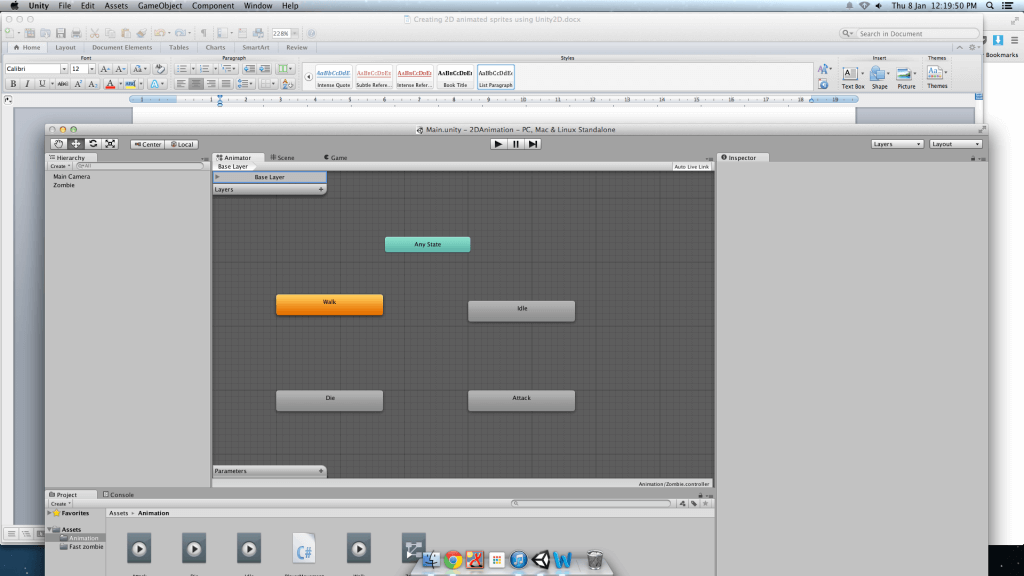
To add new states to our other three directions, Right-Click on the designer, Select Create State >> Empty and use the Inspector to rename the states.
Now, for creating the transitions from current state (the state from which, you want to start a transition) to new state (the state up to which, you want to make a transition), Right-Click on the current state, Select Make Transition, and then click on the new state.
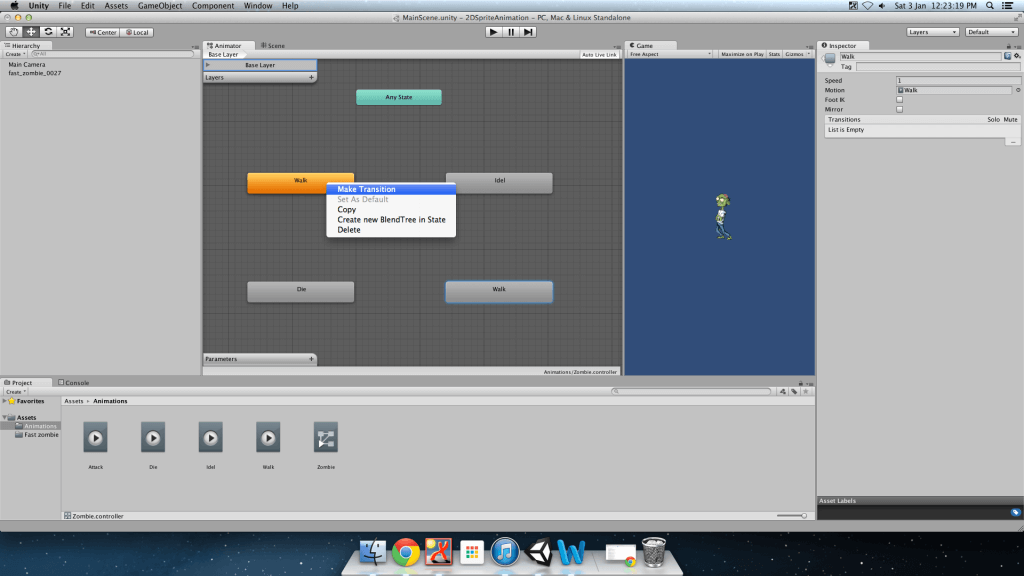
Do this from each state to the other 3 states.
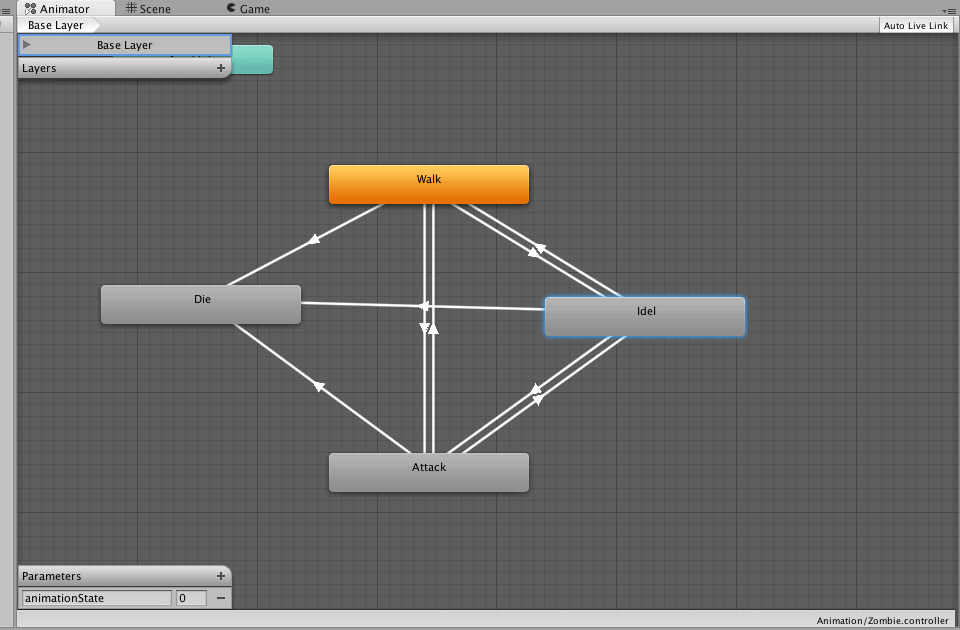
Step 5 Assign State
For associating each Animation to the according state, drag the Animation from the Assets panel to the Inspector panel and drop it on the Motion property. To make each transition fire on appropriate condition, we need to create a parameter that will change its value.
Each transition will have a condition, that will test the value of the parameter and if it’s true, the transition will occur and the state will change, causing the Animation to change as well.
Step 6 Create Parameter
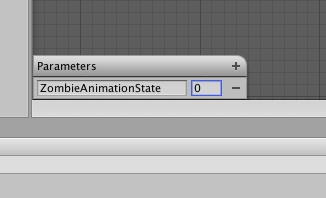
Let’s create the parameter for the Animation Controller. In the lower left hand corner of the designer, is a small pane titled Parameters. Click the '+' at the right hand side of that pane to create a new parameter.
Select Int from the list of available parameter types, and name the parameter ZombieAnimationState.
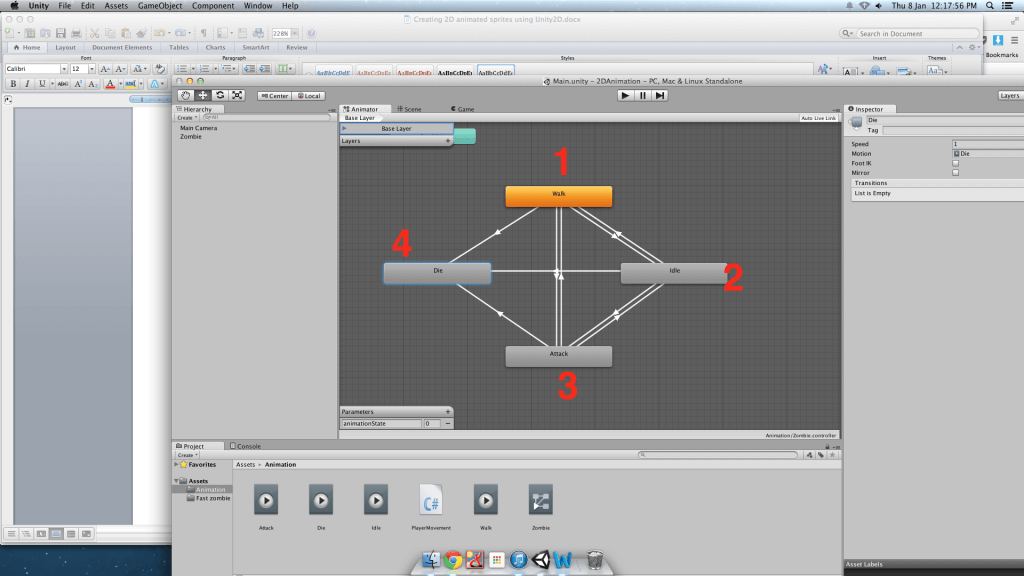
Now there is a way, to control when the transition will fire and change the state of your controller. The following table specifies the rules that we will use to dictate, what the values of the parameter mean.
| Value | State |
| 1 | Walk |
| 2 | Idle |
| 3 | Attack |
| 4 | Die |
To configure the transitions correctly, select the state and the transition, you want to configure. Once you select a transition more knobs and switches will be shown into inspector Panel, but what we are interested is, first dropdown under the heading Conditions. The Exit Time will be selected by default, but since we have a control parameter we’ll use that. Hit the drop down and select ZombieAnimationState from the list.
Here we don’t want that Zombie walks after it dies so we don’t set transition from die to walk, attack and idle.
Step 7 Finalize Animation
Before we wrap up all these in a nice red bow for you, run the game again. Your ZombieAnimator should be walking towards you. Then switch to the ‘Animator’ tab and change the value of the ‘ZombieAnimationState’ parameter to 1, 2 or 3. Now switch back to the ‘Game’ tab and see the Zombie Animation Working.
Now it’s the time to set key for different animations:
Start by adding a new C# script to the Assets folder.
Right-Click on the Assets tool Pane and Select Create >> C#Script
Name the new asset ZombieMovement.
Step 8 ZombieMovment Script
Double-Click the ZombieMovement script to open the file in either MonoDevelop, or Visual Studio, depending on your preferences.
Copy and paste the following code into the script file, Save it, and switch back to Unity.
using UnityEngine;
using System.Collections;

public class ZombieMovement: MonoBehaviour {

    Animator animator;

    const int WALK =1;
    const int IDLE =2;
    const int ATTACK =3;
    const int DIE =4;
    const string animationState = " ZombieAnimationState ";

    // Use this for initialization
    void Start () {
        animator = GetComponent();
    }

    // Update is called once per frame
    void Update () {
        if(Input.GetKey(KeyCode.W)){
            animator.SetInteger(animationState,WALK); //for Walk
        }else if(Input.GetKey(KeyCode.A)){
            animator.SetInteger(animationState,ATTACK); // for Attack
        }else if(Input.GetKey(KeyCode.Space)){
            animator.SetInteger(animationState,DIE); // for Die
        }else{
            animator.SetInteger(animationState,IDLE); //For Idle
        }

    }
}
Now, drag the PlayerMovement script from the Assets Panel to your Zombie GameObject in the hierarchy Panel to attach the controller to the GameObject.
Finally, test your game one last time.
You should be able to change the animation of the ZombieAnimator using 'W', 'A' and 'SPACE' keys on the keyboard.
I hope this blog is very helpful to you while creating 2D Animated Sprites Using Untiy2D. Let me know if you have any questions regarding Unity2D please comment here. I will replay you ASAP.
Got an Idea of Game Development? What are you still waiting for? Contact us now and see the Idea live soon. Our company has been named as one of the best Game Development Company in India.

Amit is proficient with C#, Unity. He has experience with different programming languages and technologies. He is very passionate about game development and the gaming industry, and his objective is to help build profitable, interactive entertainment.
Basics of Prefab in Unity3D
SVG Light Source Filter Tutorial